When we moved fulltime aboard quak, our Fellowship 28, in October ’25, the colder season was already really starting. During the previous winter, we only spent weekends on the boat and heating was done with an electric oil radiator. It got the cabin pretty warm, but it was quite expensive. It did the job for just the weekends, but the downside was that it took up loads of space inside the cabin.
So, we got a new, very small electric unit. Unfortunately, it hardly produced enough heat for the whole boat. Plus, it was extremely wet inside; we didn’t get enough fresh outside air, so condensation formed on the walls. With days getting shorter and temps getting lower, we really started to get cold, so we finally put the diesel heater into productive use.

We had already installed the unit itself back on land, so we only had to finalize laying the hot air pipes, insulate them, and get it onto 12V. The problem: we didn’t have the electrics finished yet. So in the end, we hooked it up to the 230V system via a converter (transformer), which worked great. But first, the install.
Diesel Heater selection
We originally had a 2kW Eberspächer installed and never really thought about changing it. However, we found out that you are supposed to change the heat exchanger housing every 10 years. When we saw that the housing alone would cost five times the price of a complete Chinese unit and would offer fewer functions, like Bluetooth it was clear that we would replace it with a new unit.
The reason the heat exchanger housing should be changed after 10 years is that it can crack over time. If that happens, Carbon Monoxide (CO) can mix with the warm air outlet and get blown into the cabin, ultimately resulting in death. With any heater install I would always also get a carbon monoxide detector.
2kW vs. 5kW: The Wattage Debate
For a boat our size, I think 2kW is usually plenty. Since you should run these heaters hot to avoid internal soot buildup, it is generally better to use a smaller unit on high than a large unit on low.
We debated this, but the final word in this decision belonged to Mariam. Since she gets cold very easily, we agreed on the 5kW unit. We figured we could always open the hatches and companionway to get fresh cold air in. This actually helps with condensation and humidity, especially since our hull is not insulated.
Why We Chose Vevor
We chose the Vevor 5kW because it had the best price-to-performance ratio, the most orders, and many reviews. The availability of Amazon customer service was also a big factor.
There are other Chinese brands available, and I think overall they are of similar quality. The absolute cheapest option is a direct product from a Chinese website without a brand, but that wasn’t worth the risk for us. Plus, we really wanted the Bluetooth connection to our phone.
Parts List for Our Installation
To get the system exactly how we wanted it, we didn’t just use the box contents. Here is the additional gear we decided to install:
- Vevor Unit: The Bluetooth version.
- New Exhaust Silencer: To keep things quiet outside.
- Double-Walled Exhaust Pipe: Reused from our old heater for extra safety.
- Fiberglass Exhaust Wrap: To prevent burns if anything accidentally touches the pipe.
- Additional Warm Air Ducting: To reach further into the cabin.
- 90-Degree Connector: For the tight turn right behind the heater.
- Beaded Connecting Pieces: Only buy the ones with small raised ridges for the clamps. The smooth ones are a pain because the ducting slides off as the material expands and contracts with the heat.
- Warm Air Pipe Insulation: To keep the heat inside the pipe until it reaches the outlet.
- 90-Degree Entry Pipe: Epoxied onto the intake.
- Fuel Pickup Pipe: To draw diesel directly from the main tank.
- Upgraded Fuel Line: Replaced the soft green line that often comes in the box, it came with the fuel pickup pipe.
- Carbon Monoxide Detector
Installing the Diesel Heater
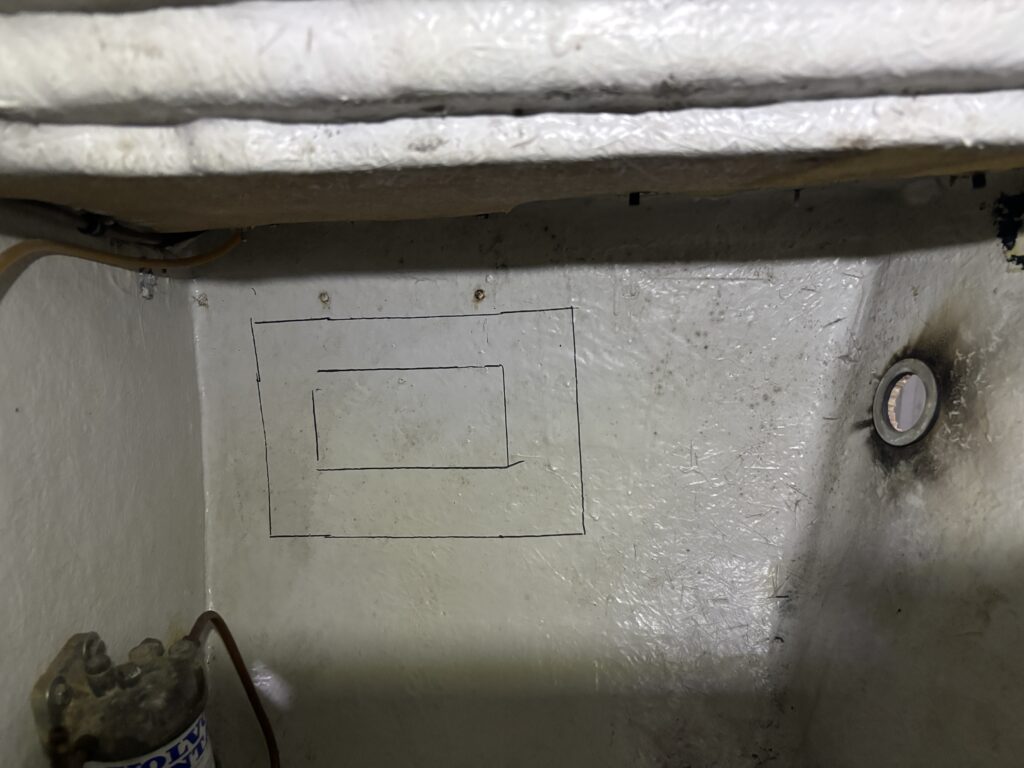
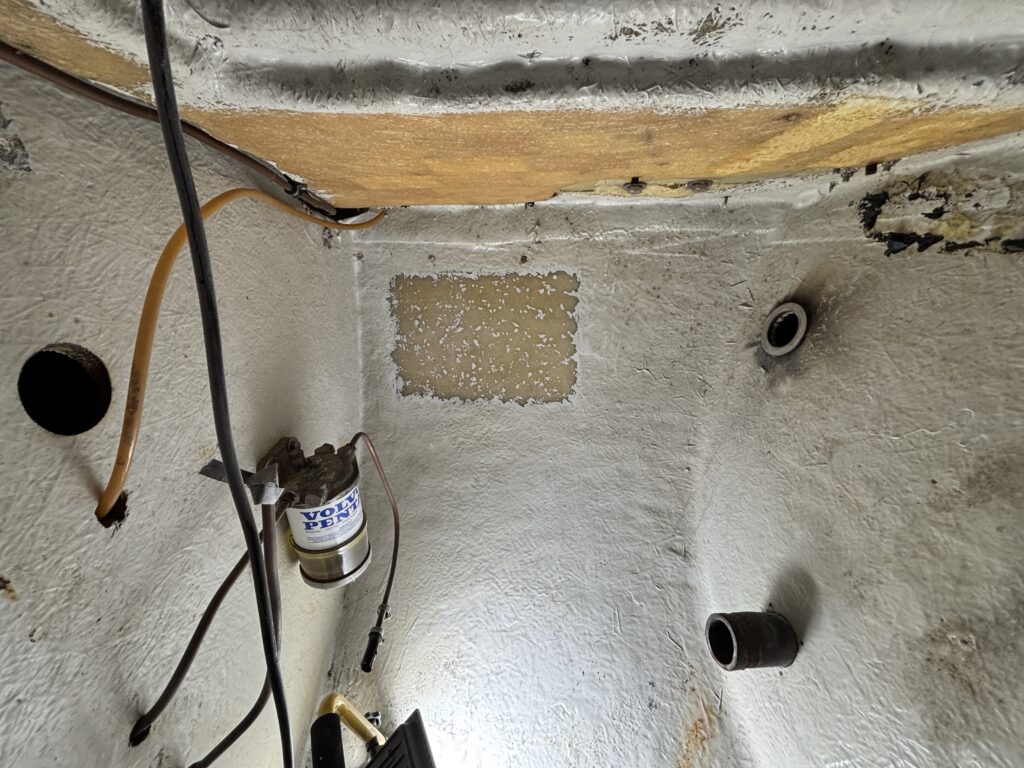
We decided to mount the unit as far aft as possible to keep the exhaust run short and to minimize the storage space it would take up.
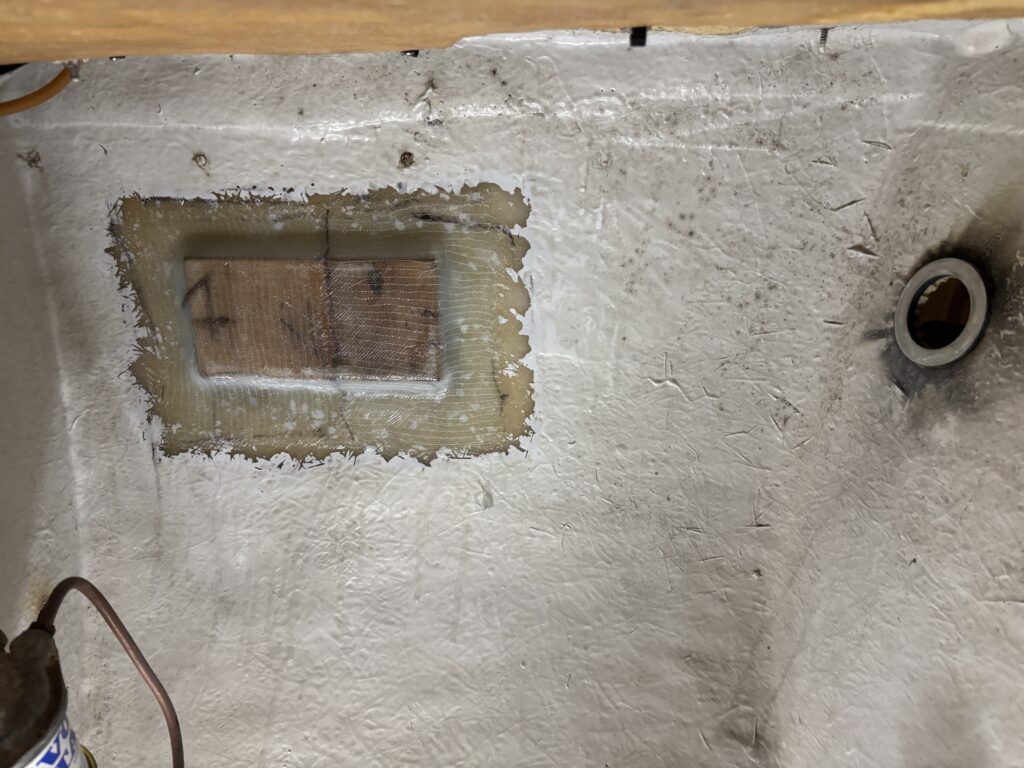
I epoxied and fiberglassed a piece of thick plywood onto the hull and mounted the heater on a stainless steel angle bracket. For the muffler, the wood was only epoxied without glass; it probably would have held without support, but I wanted to be on the safe side. I used two stainless steel pipes as spacers to create a heat gap. During testing, even on Level 10, those spacers stayed cool enough to touch by hand.

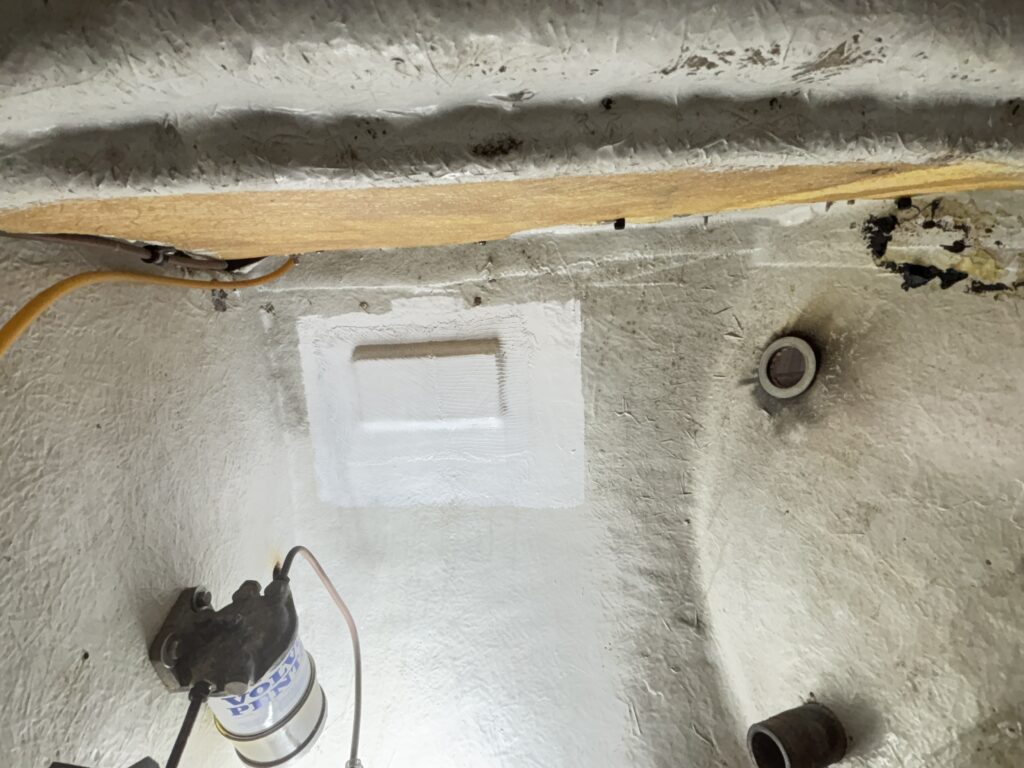

The warm air run starts with a 90-degree elbow and basically does a 180-degree turn. This is far from optimal, but it works. However, if it’s warm outside, the heater can run too hot and overheat because the fan isn’t powerful enough to push the heat through all those bends and insulation. As soon as it gets properly cold outside, this isn’t a problem at all.
For the air intake, I used a 90-degree piece to draw air from the outside. The reason for this is to pull in unsaturated fresh air, heat it up, and blow it into the cabin. This results in very dry air being blown into the boat. Since only our V-berth is insulated, this is a key part of our strategy to fight the constant condensation on the hull. The downside is that it takes more fuel to heat freezing outside air than it would to recirculate inside air, but the trade-off for a dry boat is worth it in our opinion.
Running the Vevor on Shore Power (230V or 110V)
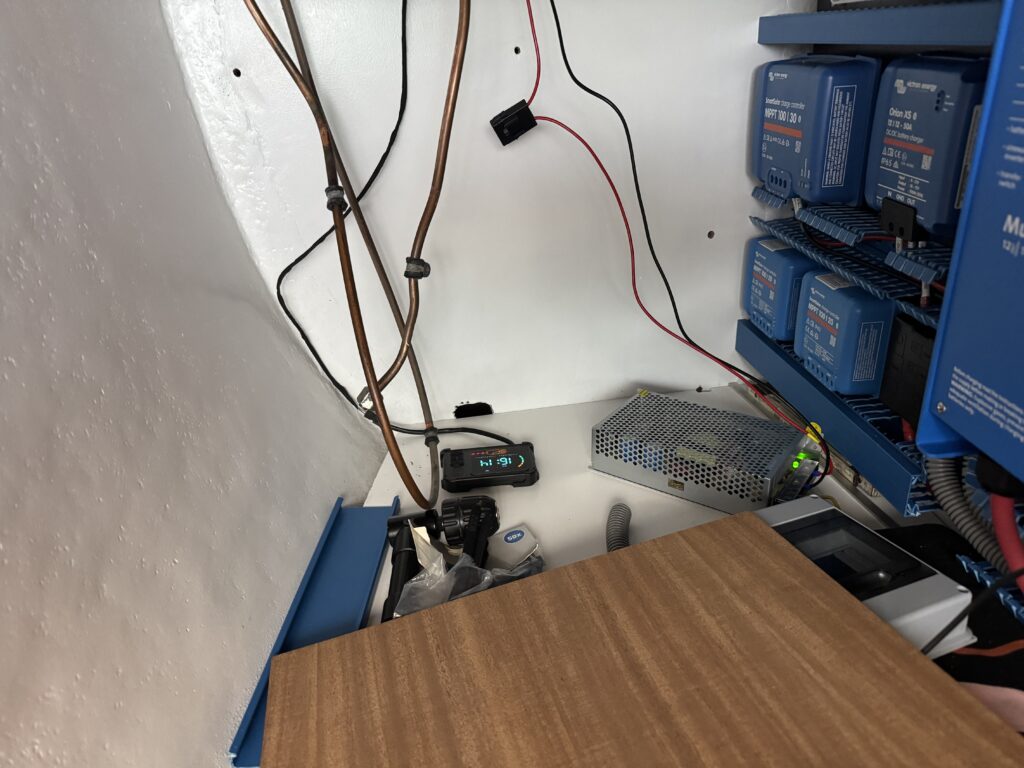
Since our electrical system wasn’t finished when we installed the heater, we had to run it off shore power temporarily. It is actually quite simple to set up. A major advantage is that you can set the voltage slightly higher than normal. These heaters really prefer higher voltage and won’t run if the voltage drop is too significant, especially during ignition when they draw a lot of amps.
To set up a shore power connection, you just need a switching power supply that converts 230V (or 110V for the US) to 12V, and a cable with a standard plug. Connect the heater to the 12V output side, and that’s it. Most of these power supplies have a small adjustment screw that allows you to increase the voltage slightly. Just be sure to use a multimeter to measure the output voltage at the connectors before powering it up.
Our experience after running it for 5 months straight
Fuel & Power
We didn’t measure the electrical power draw precisely since we ran it on shore power most of the time. However, we found the fuel consumption to be pretty much in line with what others have reported. You can easily calculate it by looking at the frequency (Hz) the fuel pump is running at. The 5kW unit uses a 0.022ml pump.
| Setting (Level) | Hz Range (approx.) | Consumption |
| Level 1 – 3 | 1.6 – 2.5 Hz | 0.12 – 0.20 L |
| Level 4 – 7 | 2.6 – 4.2 Hz | 0.21 – 0.33 L |
| Level 8-10 | 4.3 – 5.5 Hz | 0.34 – 0.44 L |
Noise Levels: Can You Sleep With It?
We sleep in the V-berth, and the pump is mounted as far aft as possible. It is screwed into a bulkhead attached to the hull using the standard rubber mount. At night, if it’s quiet outside, the ticking is still very noticeable; the pump seems to transfer the sound directly into the hull.
Interestingly, it is more noticeable on lower settings because, on higher settings, the sound of the air stream drowns it out. As soon as it gets cold, windy, and choppy outside, the sounds of weather disturb our sleep more than the heater. We quickly got used to it and didn’t bother changing anything.
If the noise gets on your nerves, there are several options to dampen it. You can buy a “silent pump” replacement or mount the existing pump suspended in zip ties, which seems to completely eliminate the ticking sound.
The fan itself gets louder with every level. It is quite noticeable, but it quickly becomes white noise that you just get used to.
Reliability: Did It Ever Fail?
Our heater never failed during the entire five months, except for one specific scenario. When it was very warm outside and we tested it on the highest setting, we got an overheat error code, and it powered down. This is mostly related to our air duct run, which has many kinks and suboptimal airflow. These Chinese units do not seem to have very powerful fans to overcome that resistance.
However, as soon as it gets cold enough outside, we can easily run it on higher settings without issues. Honestly, the high settings are way too warm for our 28ft boat anyway, unless it is below freezing outside.
We spoke to other people in the marina who had problems with their units (mostly not Vevor, but similar brands). In almost all cases, the problems were tied to bad cabling and voltage drop. As mentioned earlier, these heaters like higher voltage. Once their cabling was upgraded, all of them ran perfectly again.
2kw or 5kw what do I need
I would say we probably could have managed with the 2kW unit, but I prefer having the more powerful 5kW version. It allows us to run the heater while opening the hatches for added airflow to fight the greatest problem on a mostly uninsulated boat in winter: condensation.
In our boat, only the topsides are balsa-cored and the V-berth is insulated with 10mm Armaflex. We still had quite a lot of moisture, but it would have been much worse without a forced-air diesel heater drying things out. The downside, of course, is that you will naturally use more fuel with the bigger pump, but since we overwintered in a marina, this is only a problem of carrying a few more diesel jugs. It was no problem to get the cabin to 24°C even when it was below freezing outside.
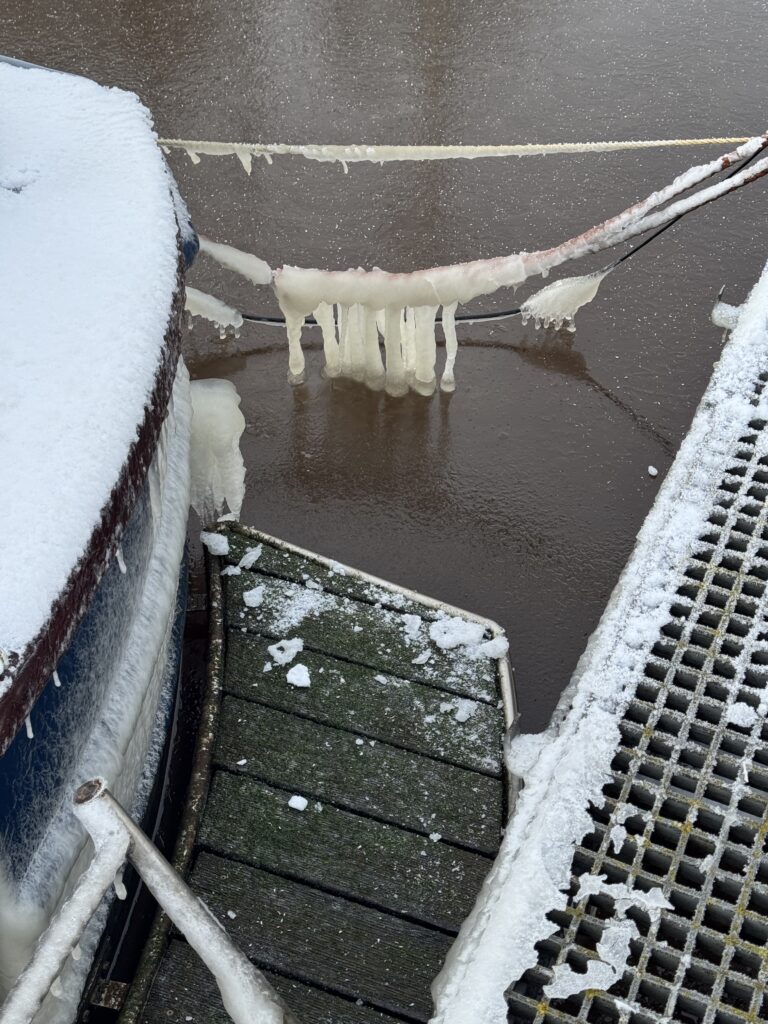
How Good Is It Against Condensation?
It is amazingly good. The outside humidity where we lived averages around 90%. In winter, with cooking and living in such a confined space, the condensation inside was incredible before we set up the heater.
Since the heater draws air from the outside, I measured the humidity at the point of entry into the salon at around 10%. It easily brought the inside humidity down to below 50% to the point where it actually felt a bit too dry inside.
I will say, however, that this mostly applied to the salon. Our problem was that we only had one outlet, so the head and V-berth did not receive as much of that dry air. Whenever possible, I would recommend installing an outlet in every room. We are currently planning on installing fans in our deck vents to pull the air through the boat, we’ll see how that goes.
Problems We Had
With the unit itself, we didn’t have any problems at all. The Bluetooth control is very convenient. The only downside is that you miss out on the hidden menu found on standard LCD controllers, where you can make advanced adjustments to Hz and RPM to fine-tune the heater for your specific circumstances. Also, the high-elevation mode is managed automatically by the controller and cannot be forced manually.
The only real issue we encountered was with one of the duct connectors, but that has nothing to do with Vevor directly. When buying connectors, always make sure they have a small plastic ridge or lip to prevent the duct from sliding off.
We found that no matter how tight we cranked the hose clamps, it didn’t matter on the smooth connectors. Due to the material expanding and contracting with the changing heat, they would always slide apart at the most inconvenient times and locations. After several sessions of boat yoga to fix it, we finally switched to connectors that have proper retention ridges.
Conclusion
All in all, for a price of around €100 (or even less on sale), it is incredible how much value you get out of these cheap Chinese units. It is hands down the best form of heating for a small, poorly insulated boat in winter. We are quite happy with ours.