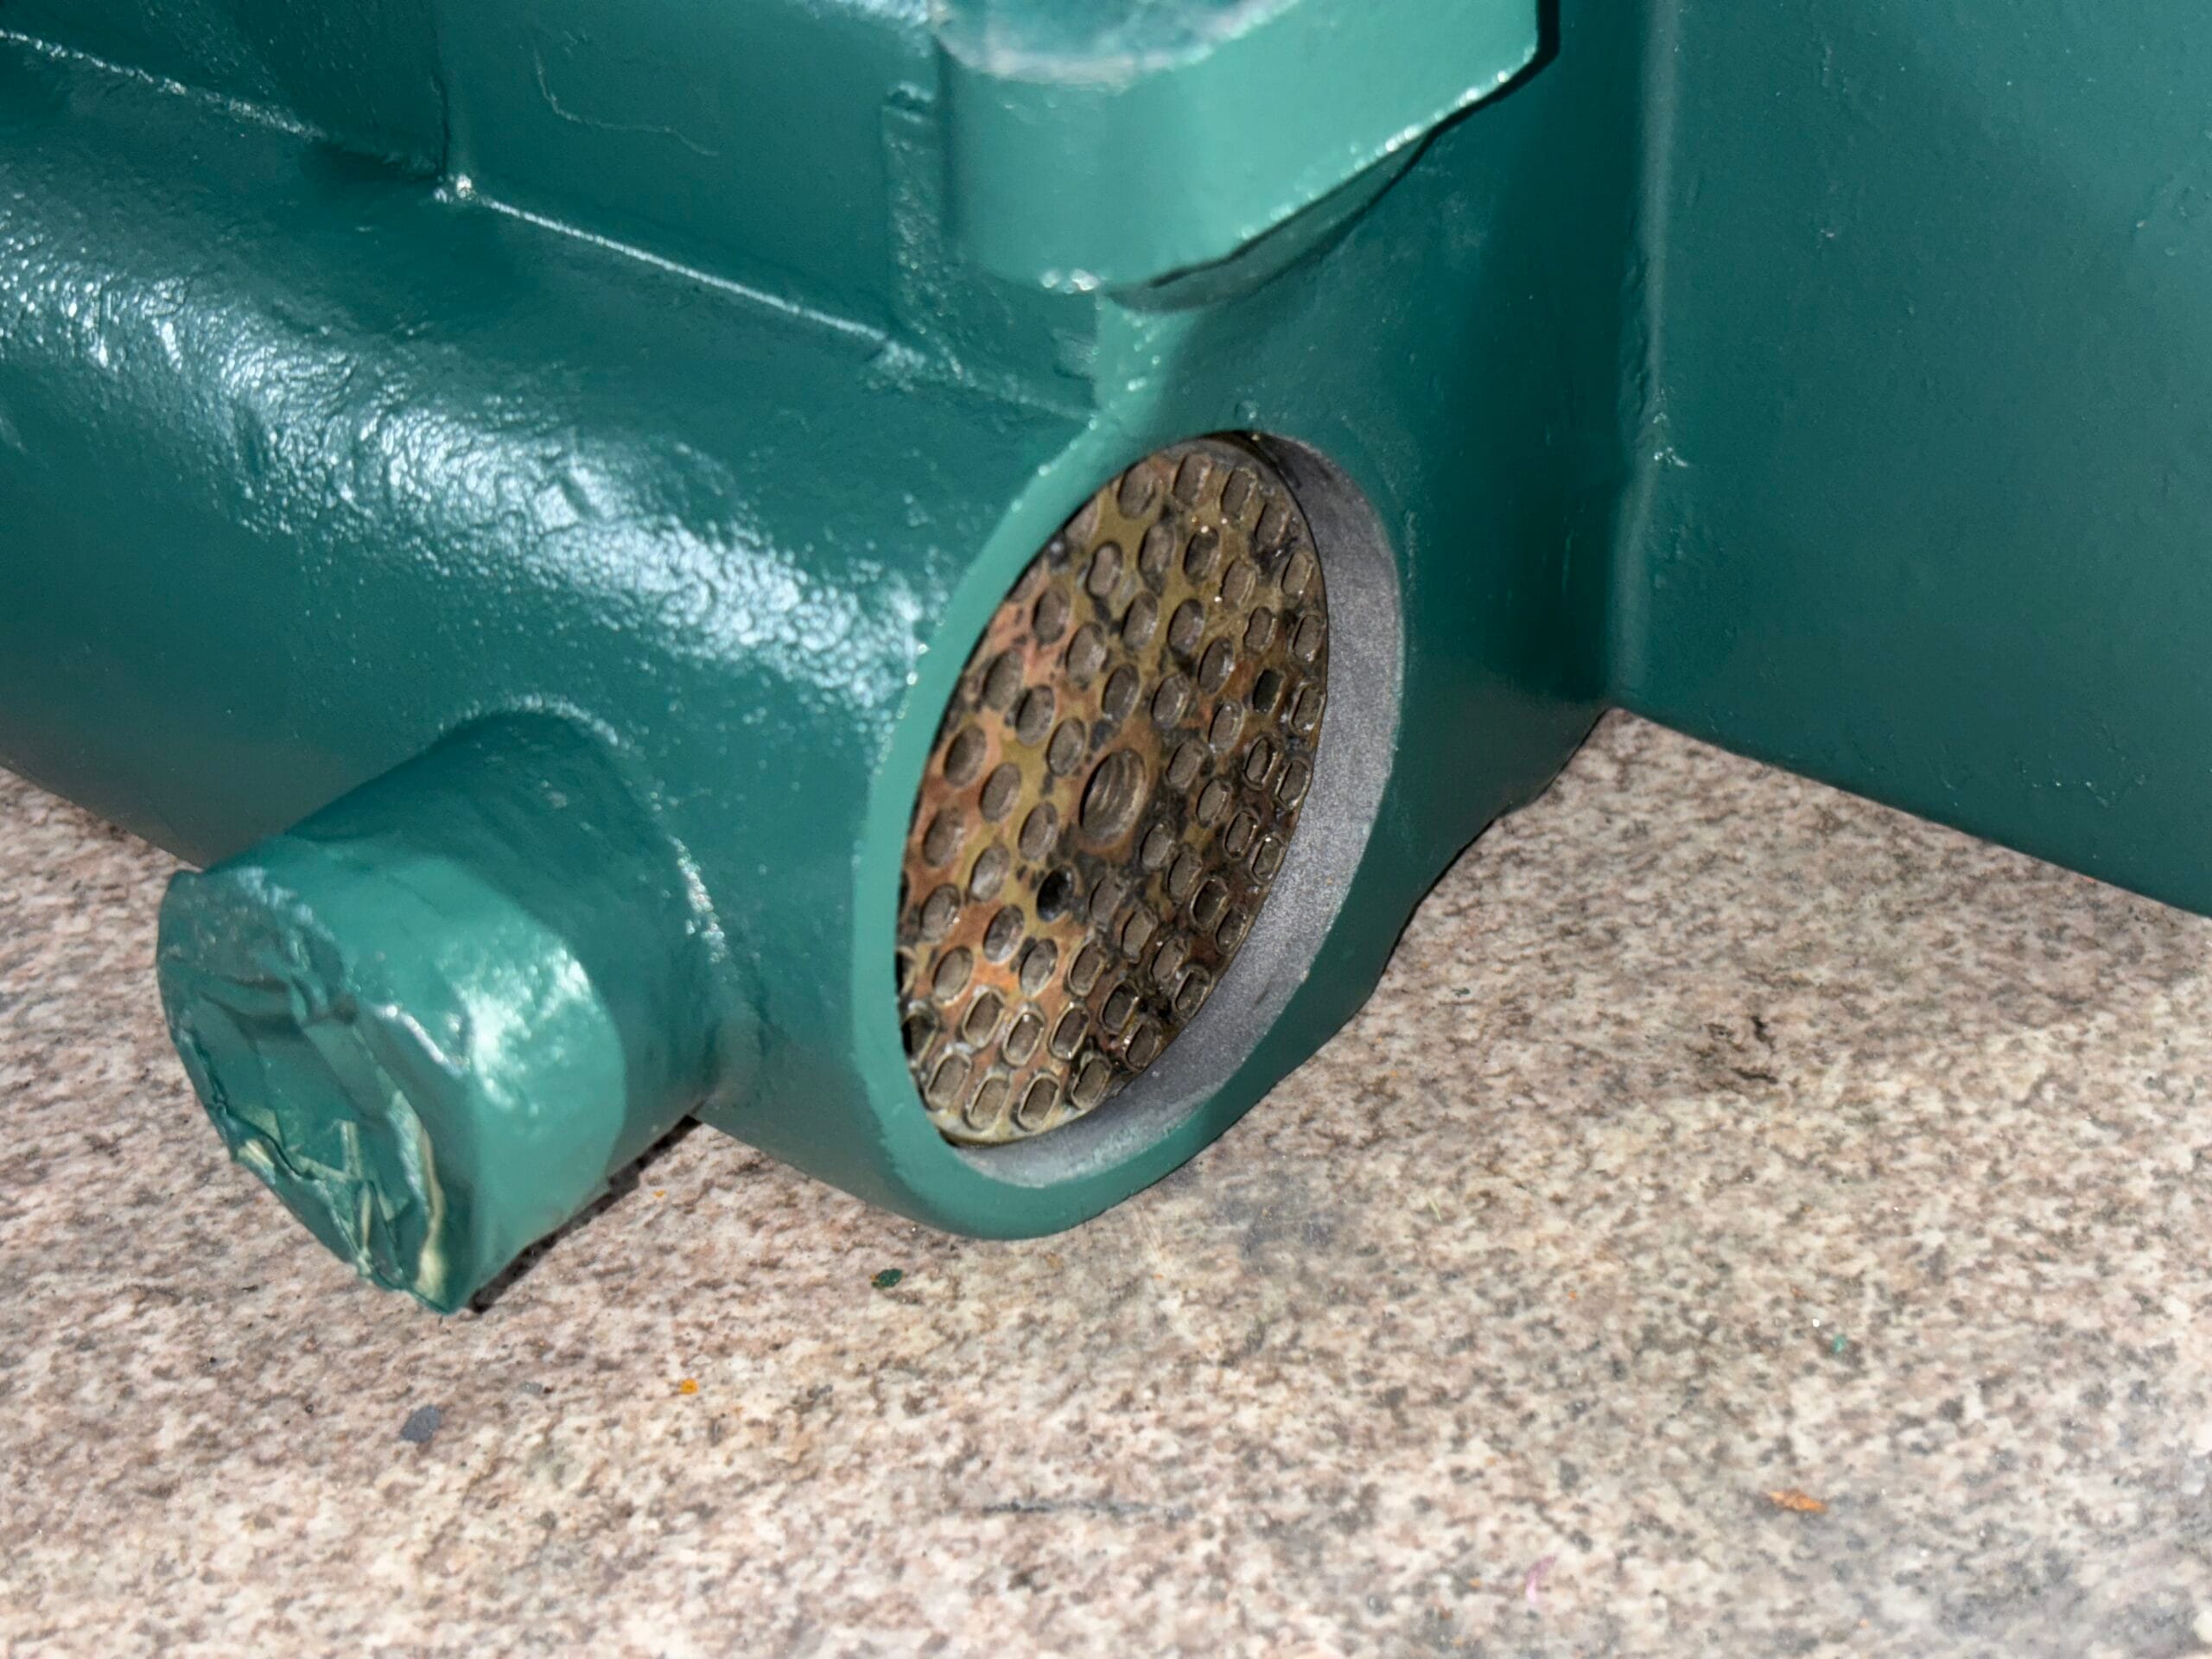
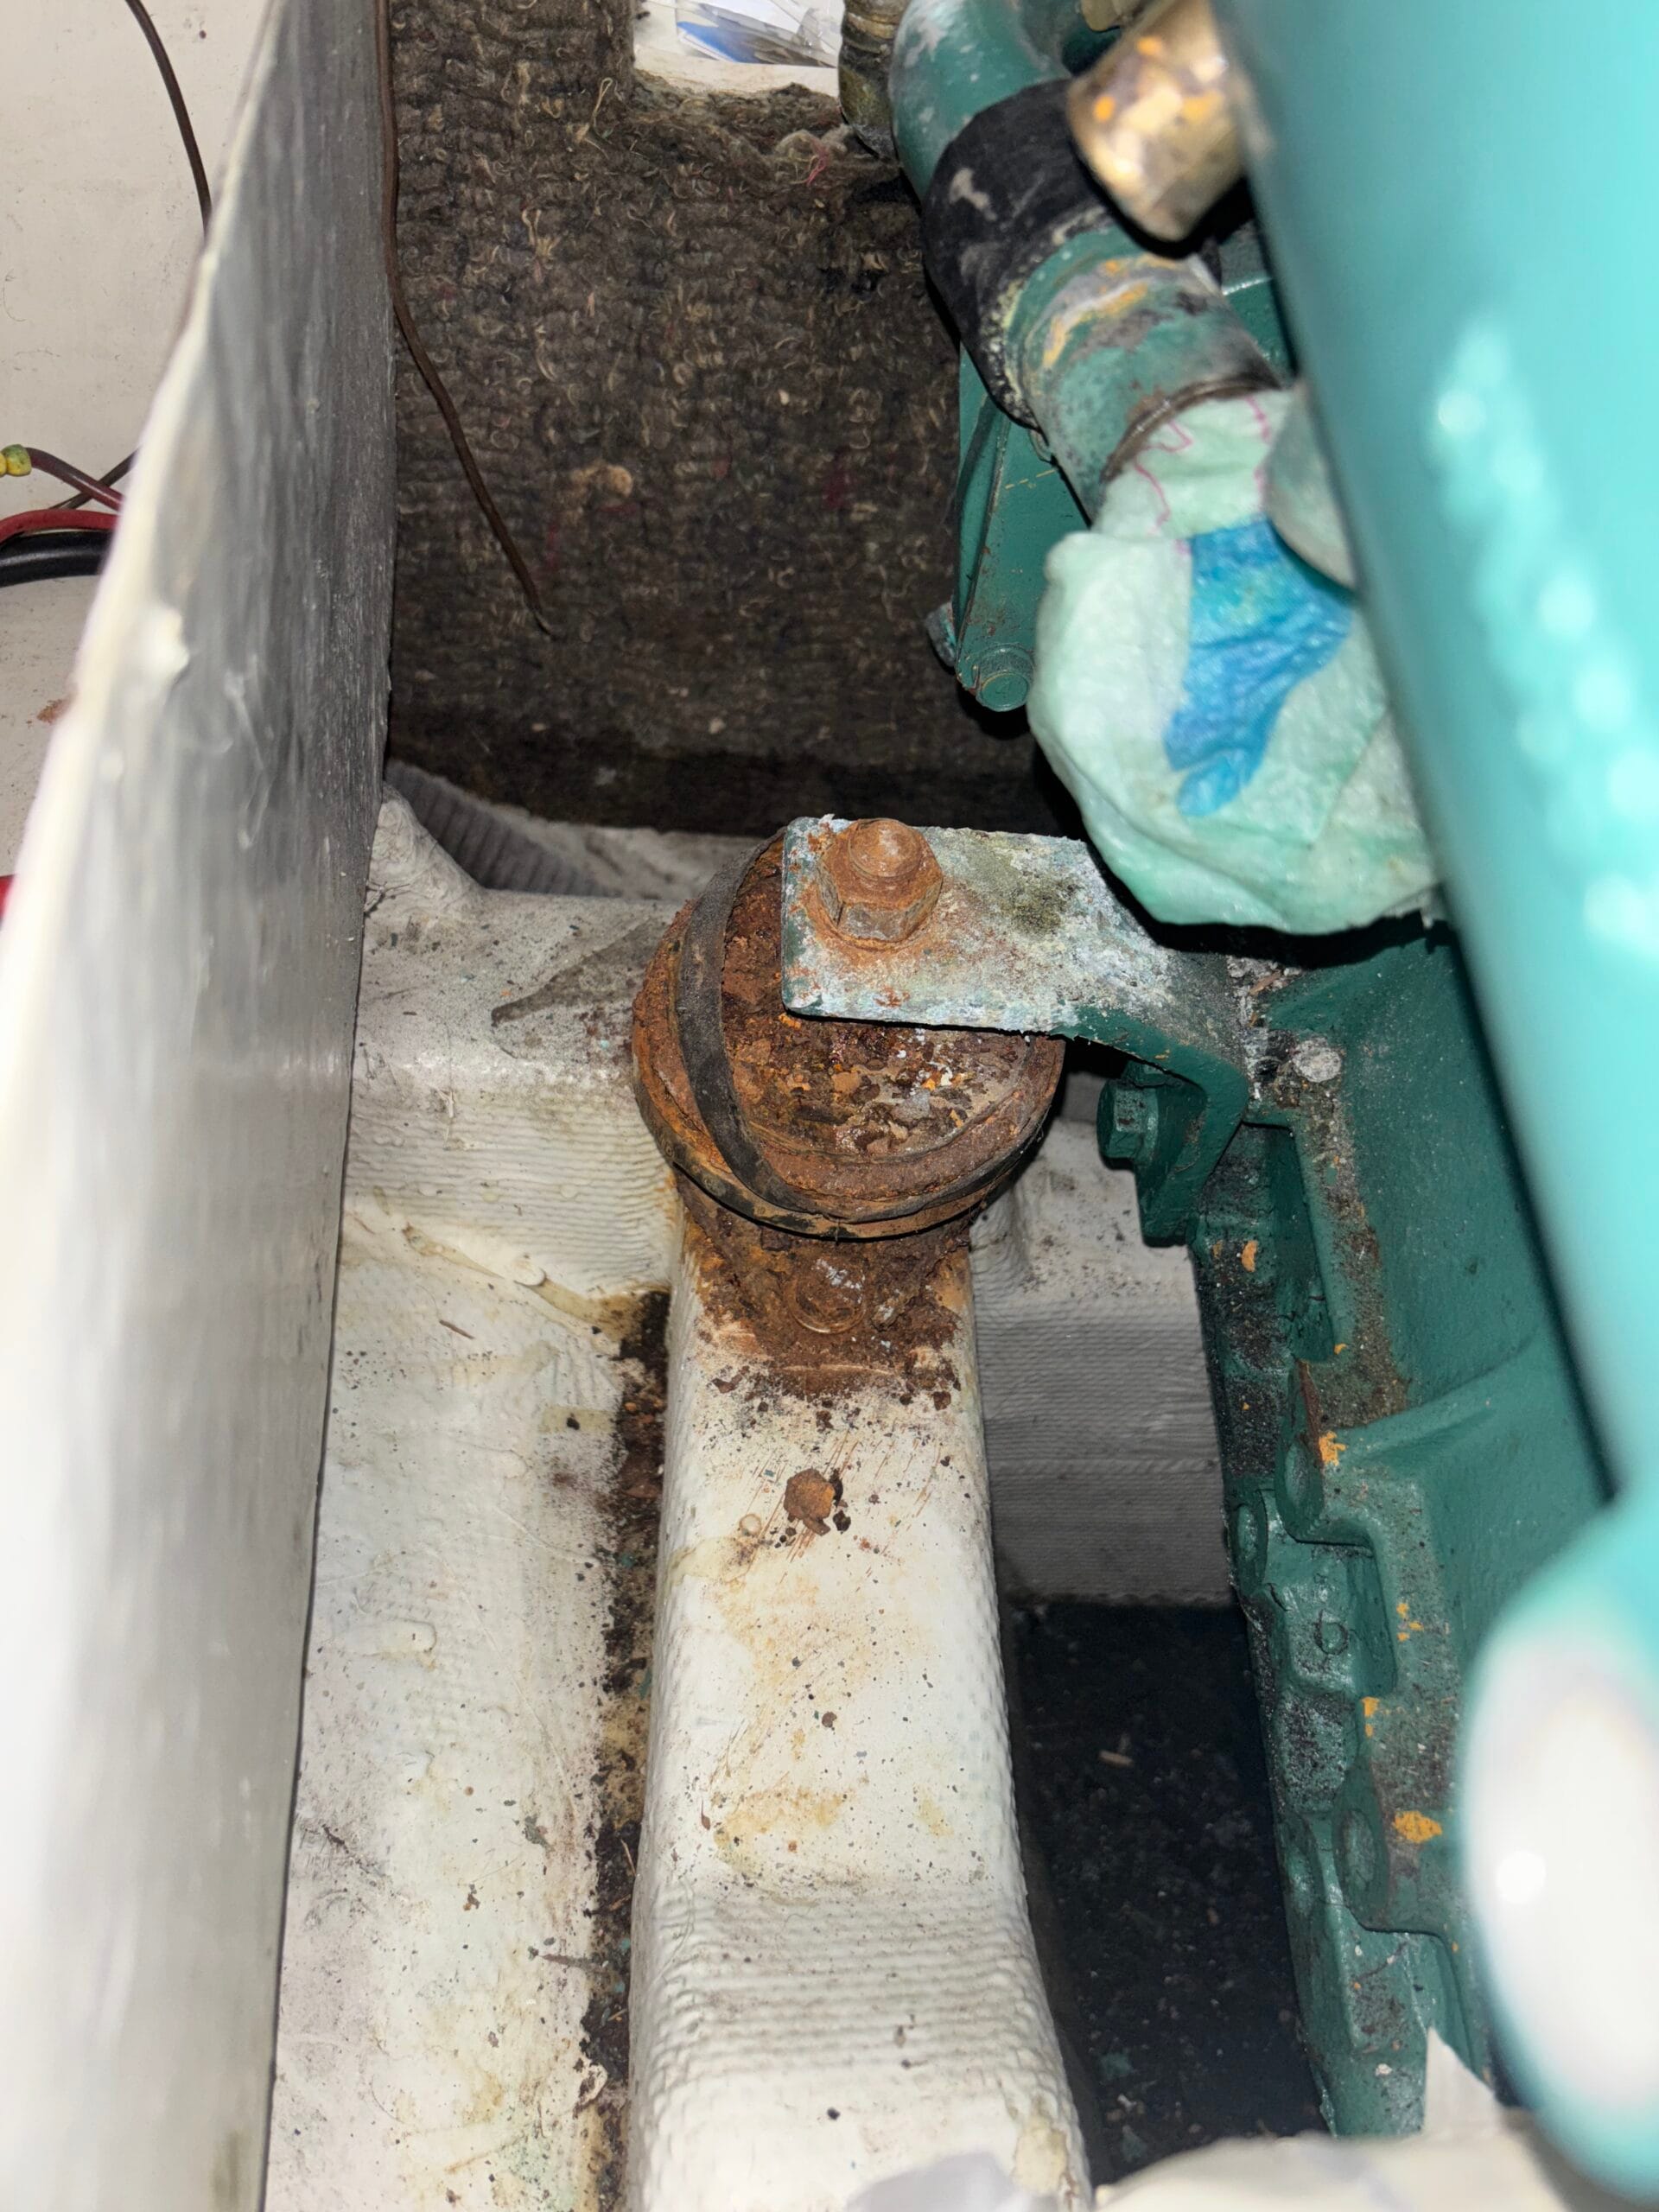
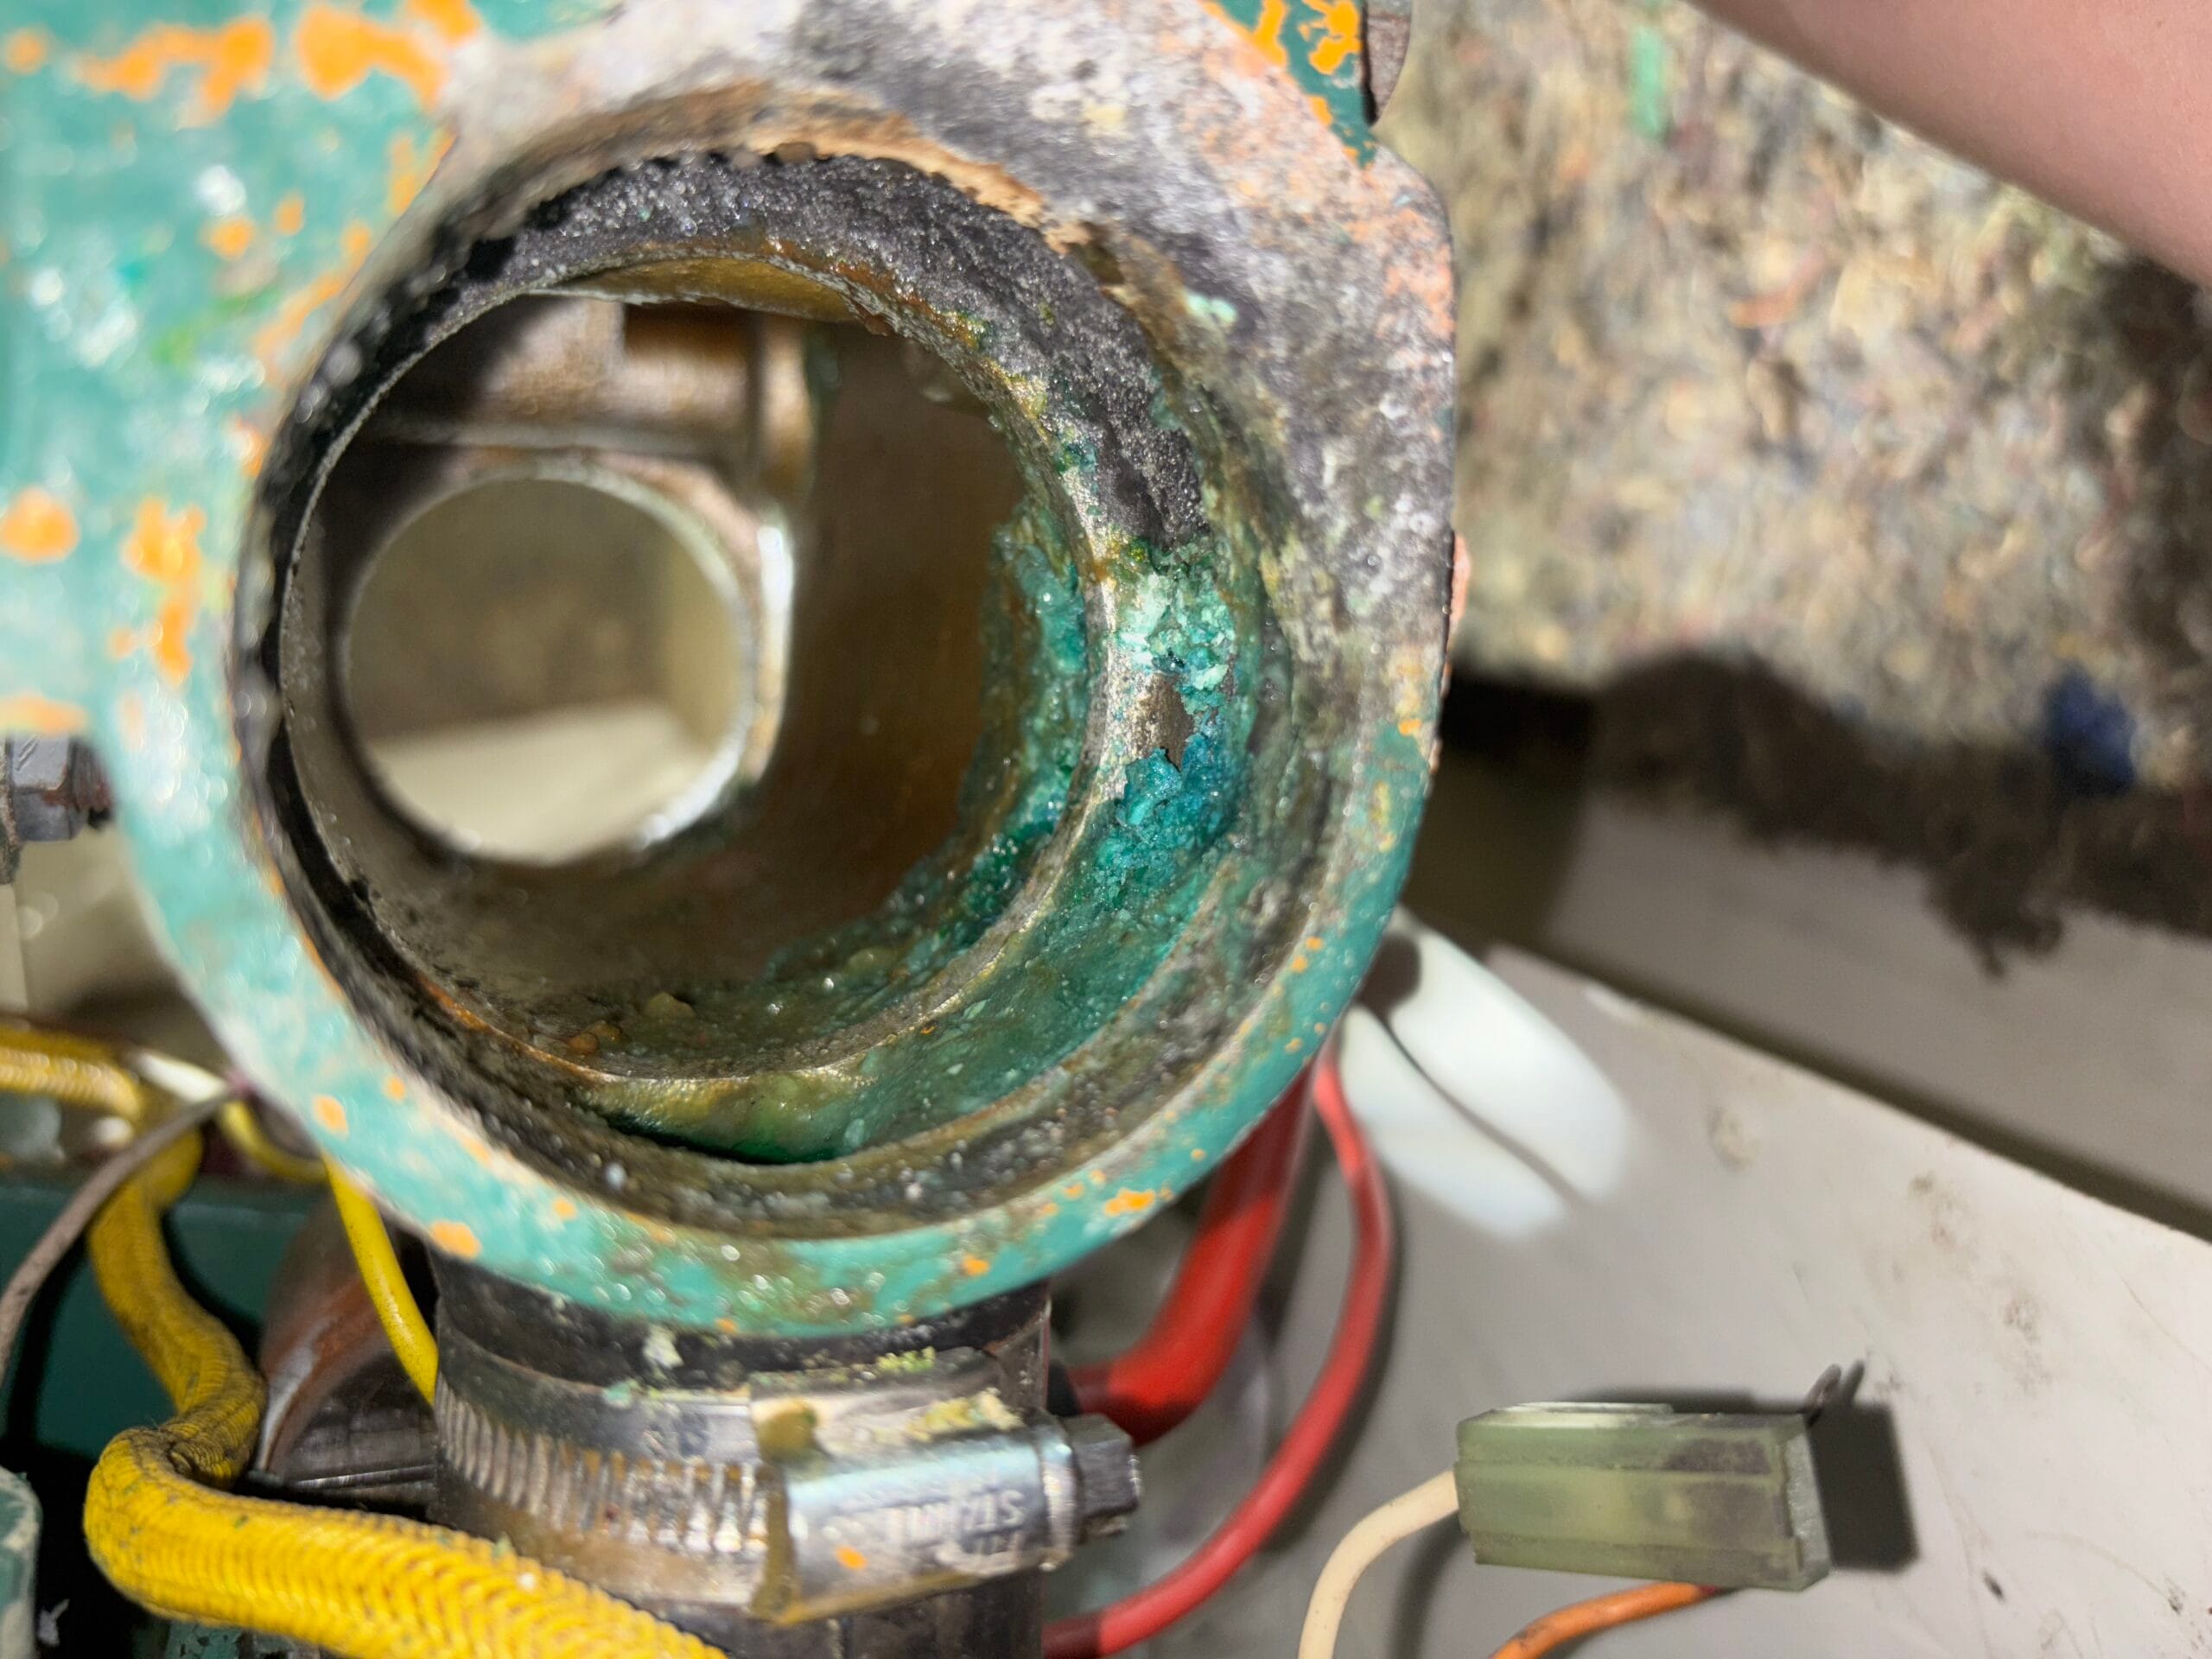
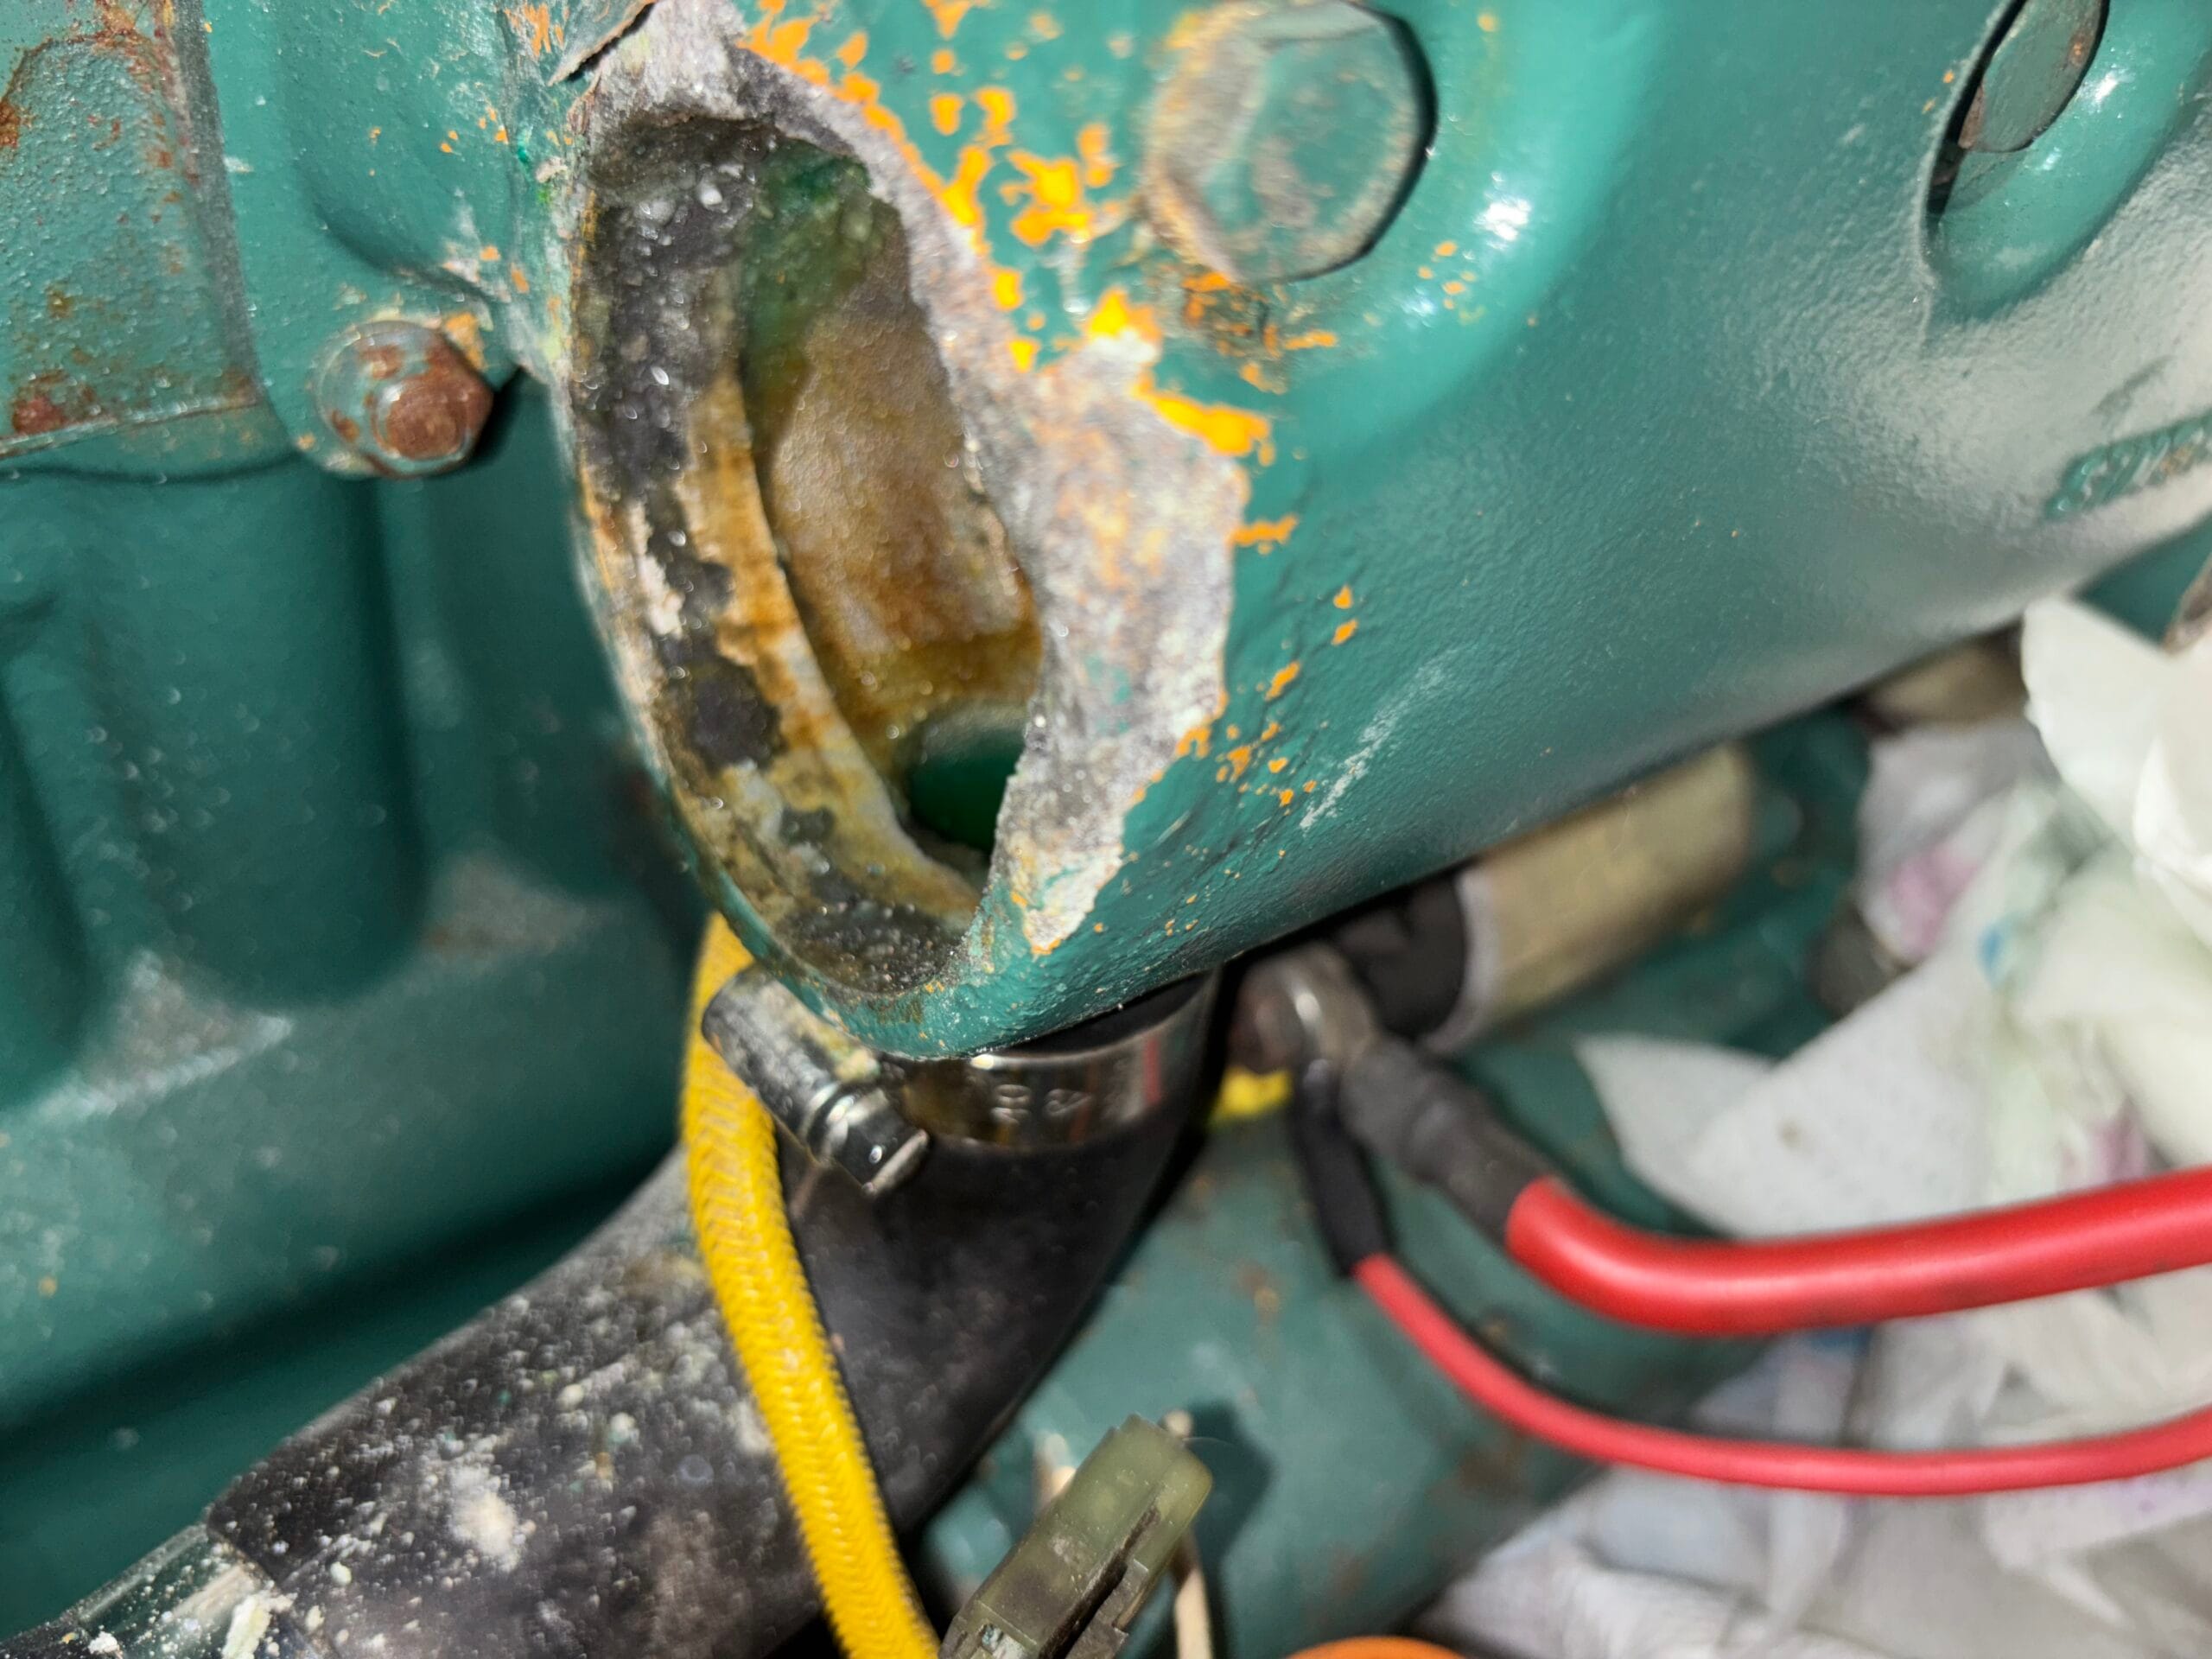
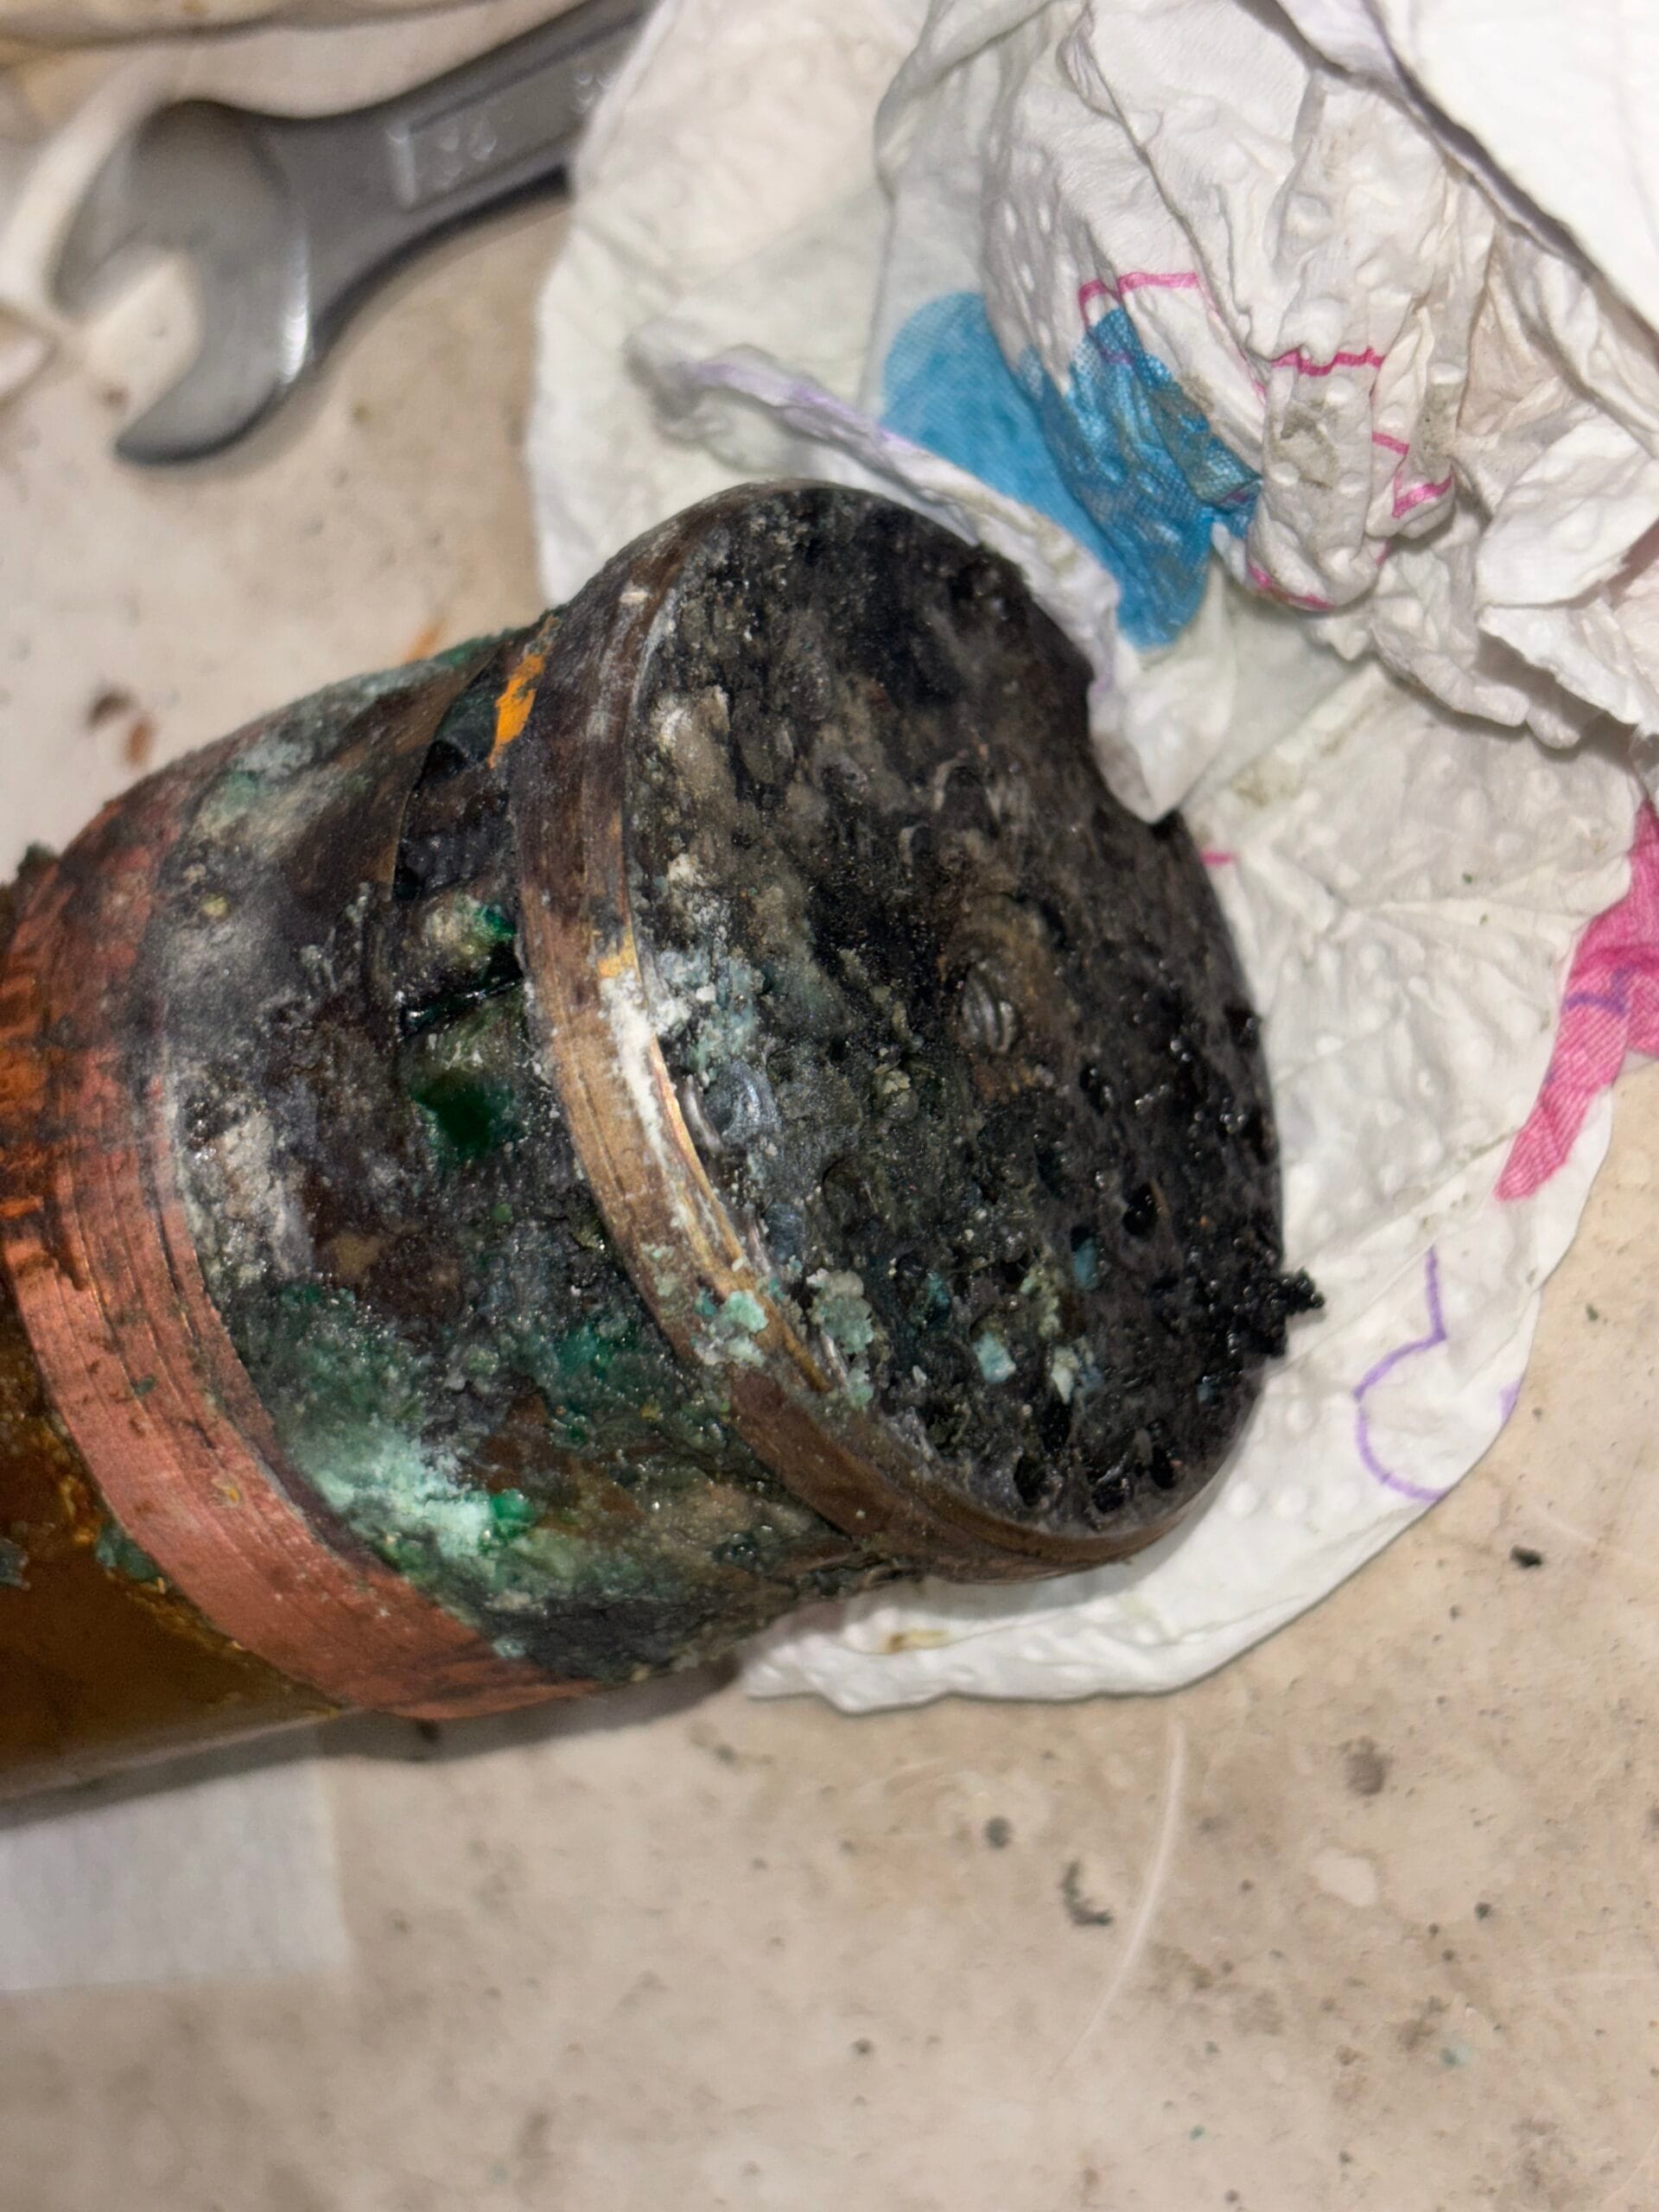
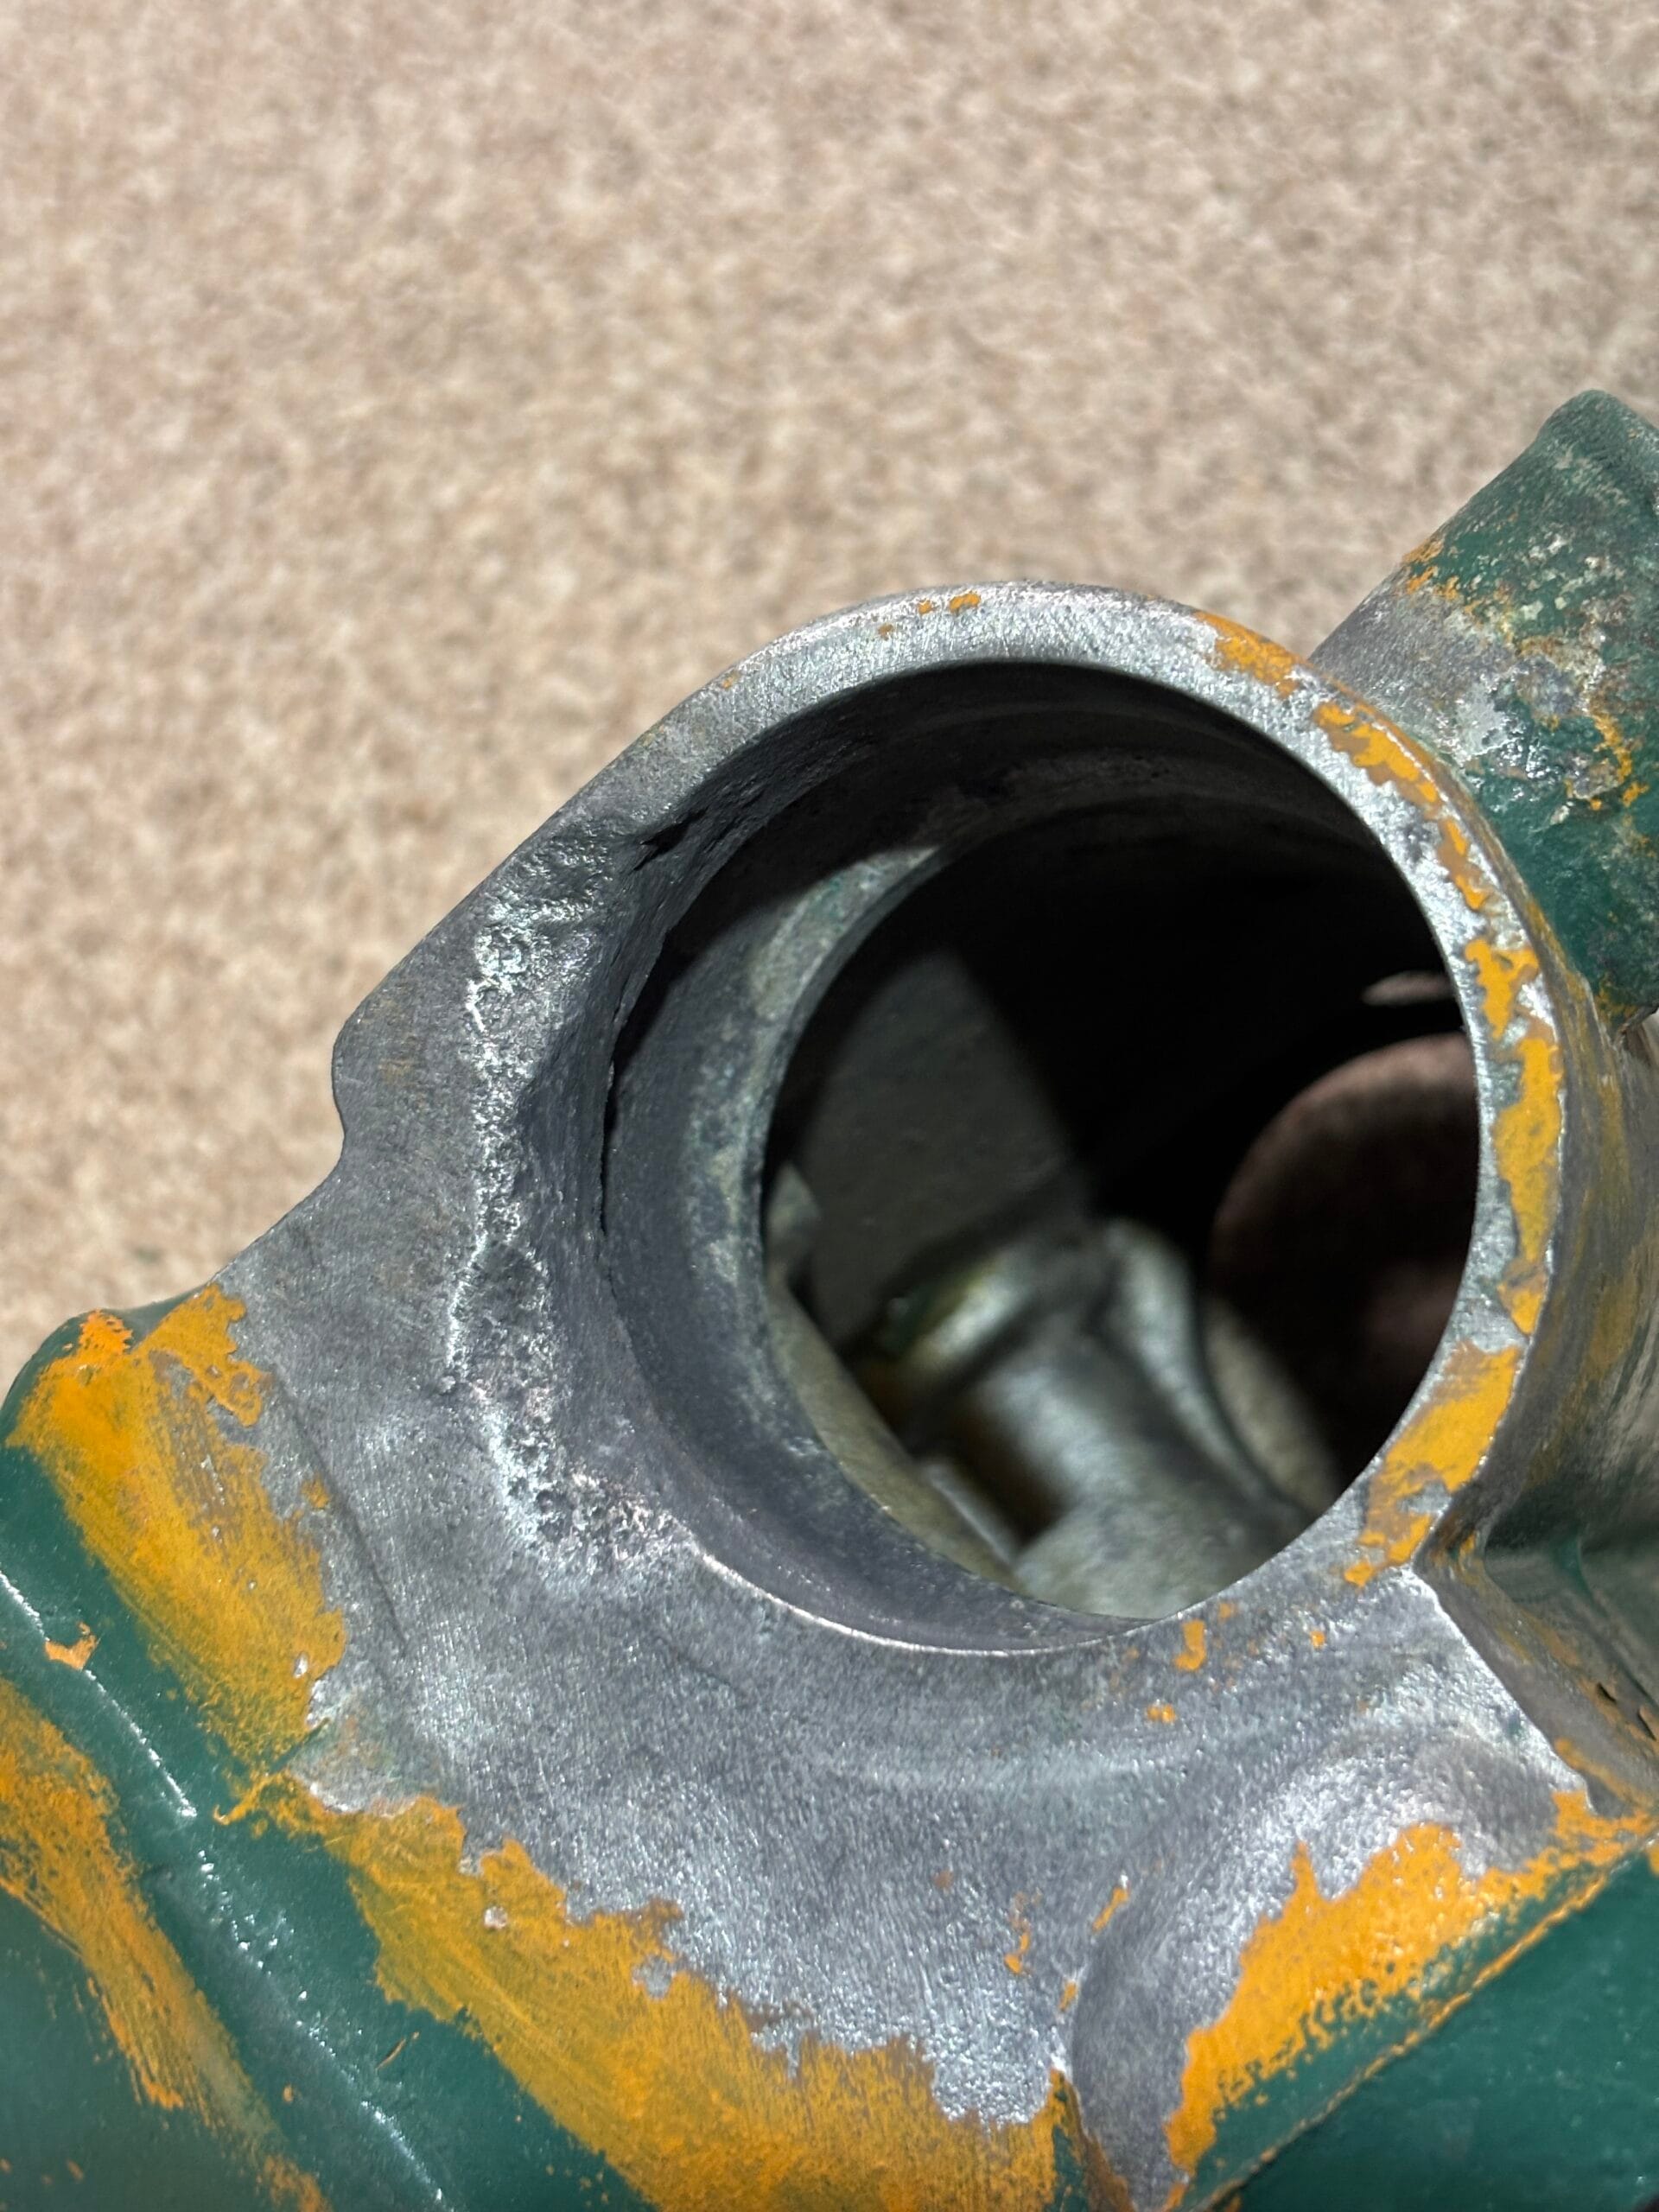
After buying our Fellowship 28 for 2500€, I quickly noticed some corrosion problems on the engine mounts. The engine itself was running without problems, but the mounts were pretty worn and needed to be replaced. Upon further inspection, I saw that one of the mounts was completely corroded to the point that I broke both bolts and the mount itself when trying to remove it from the engine bed. The reason for this specific damage was that the heat exchanger was leaking due to a worn O-ring.
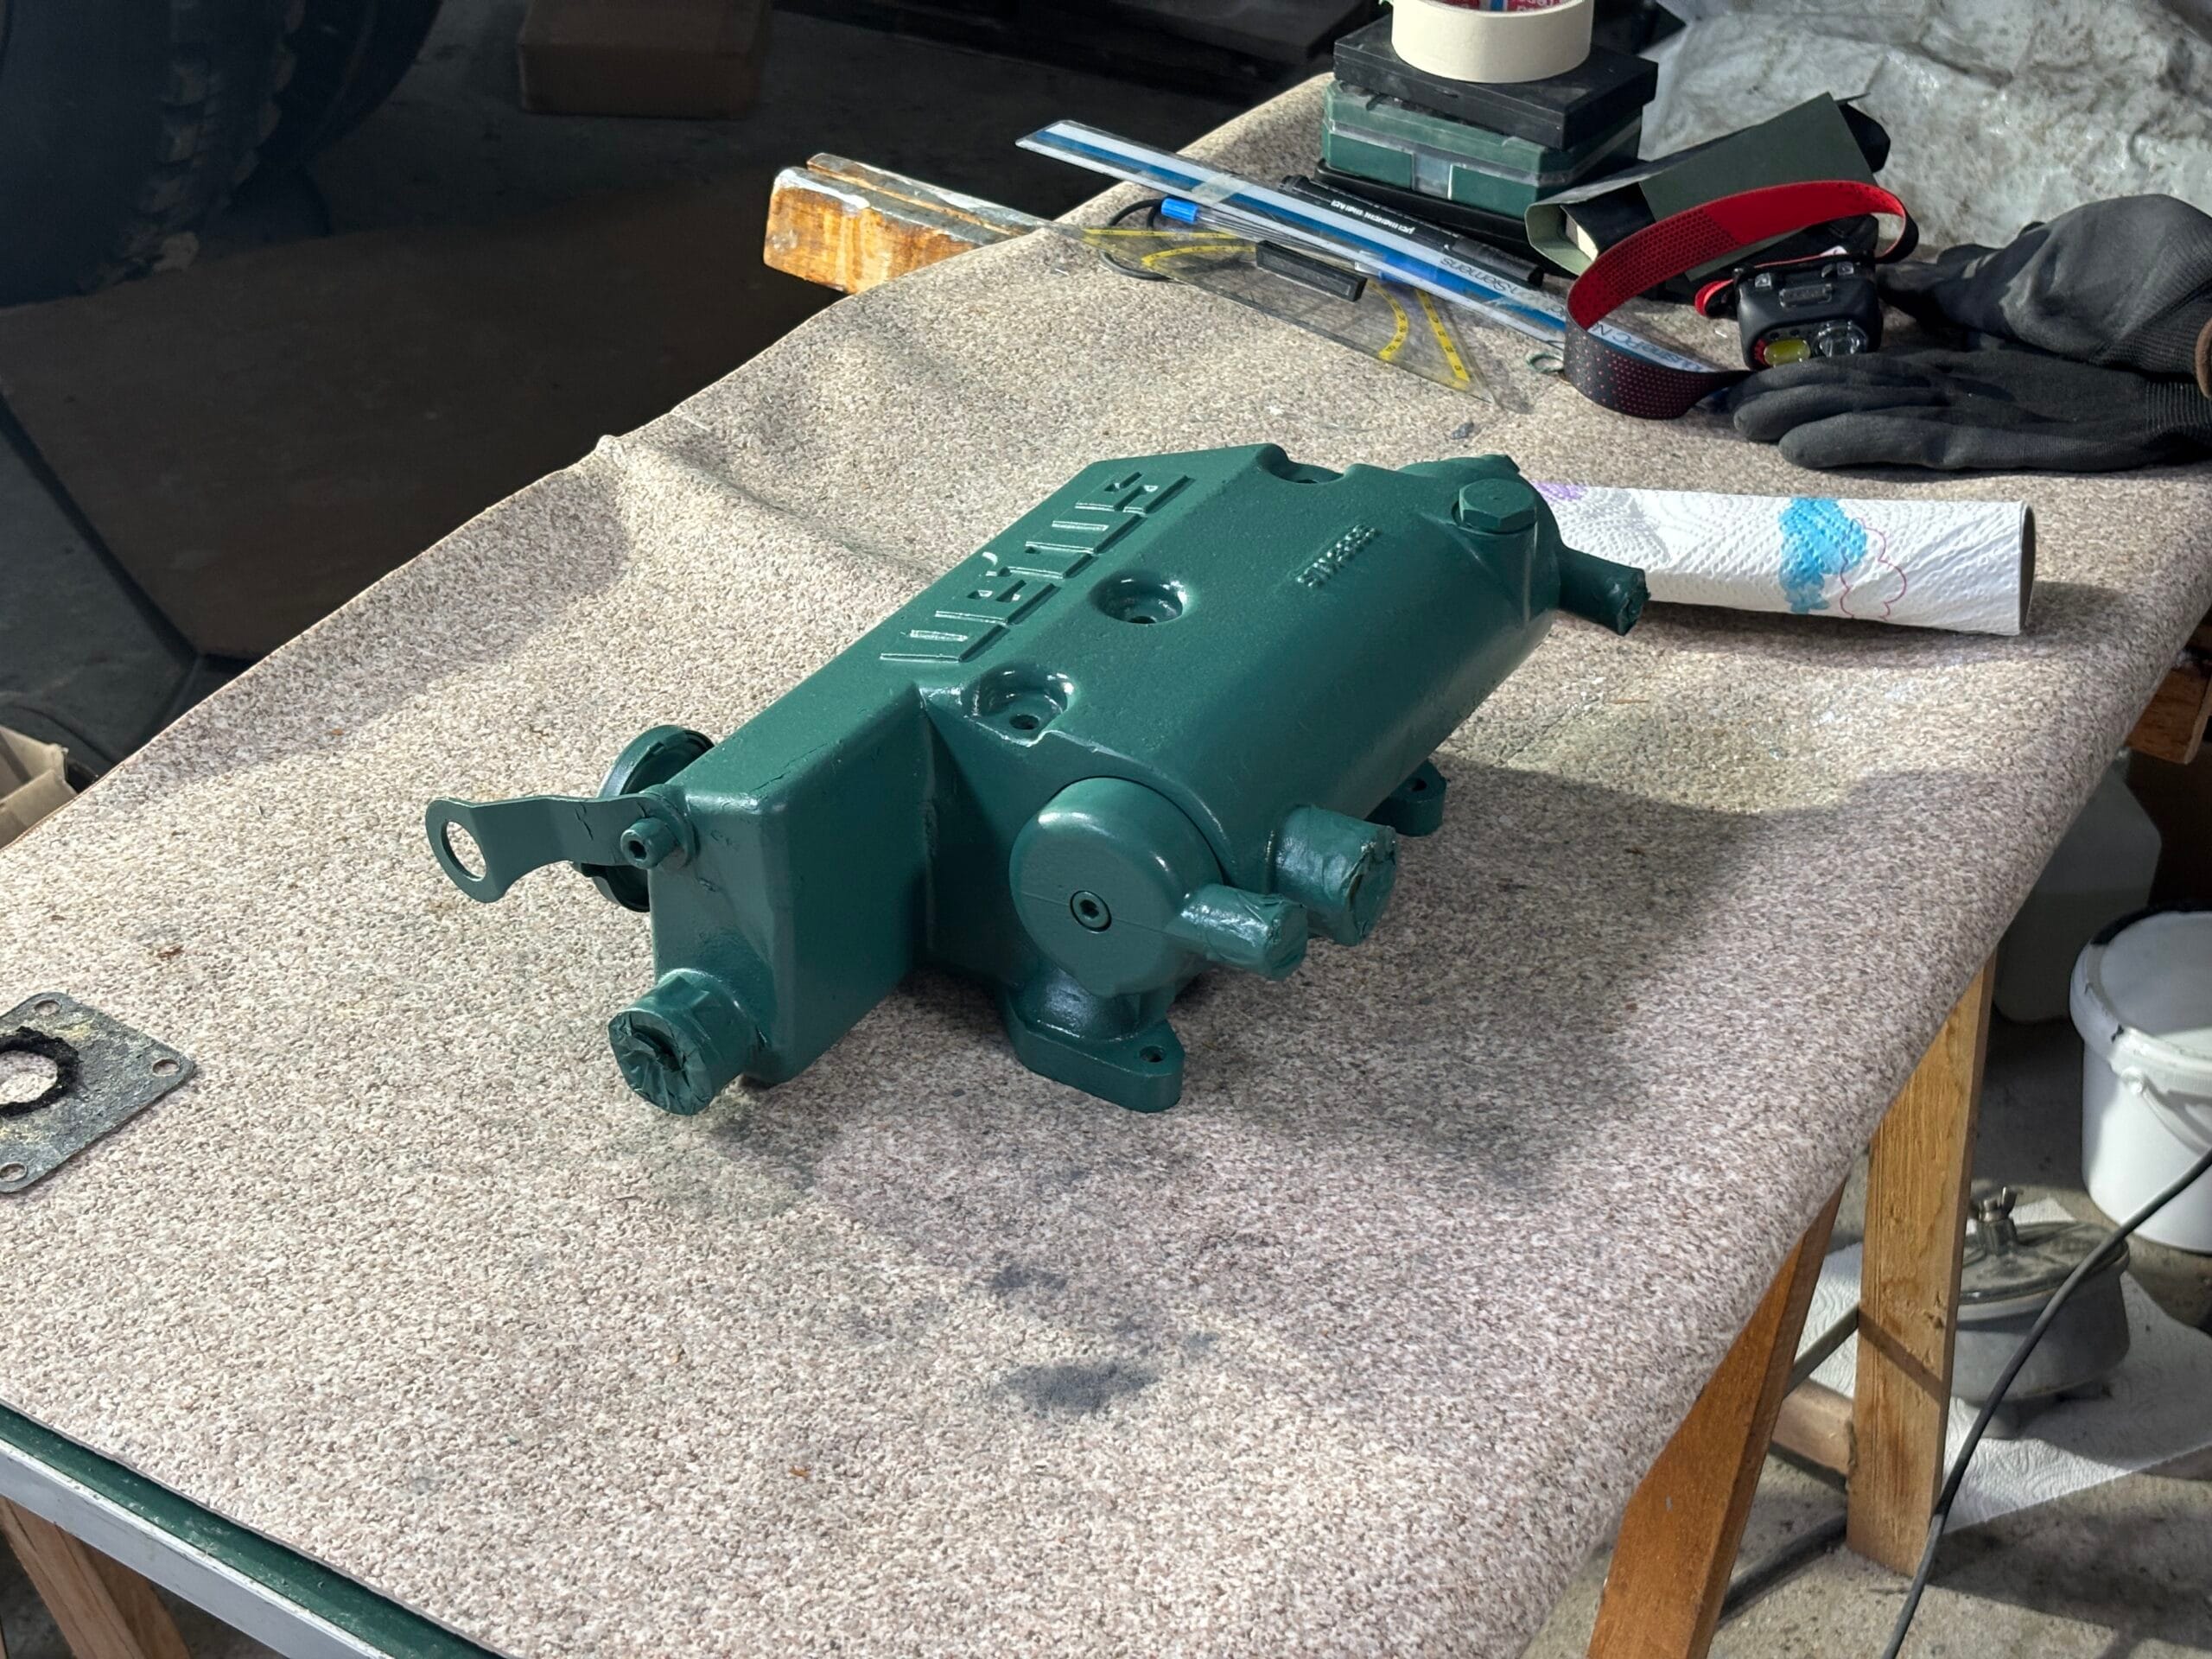
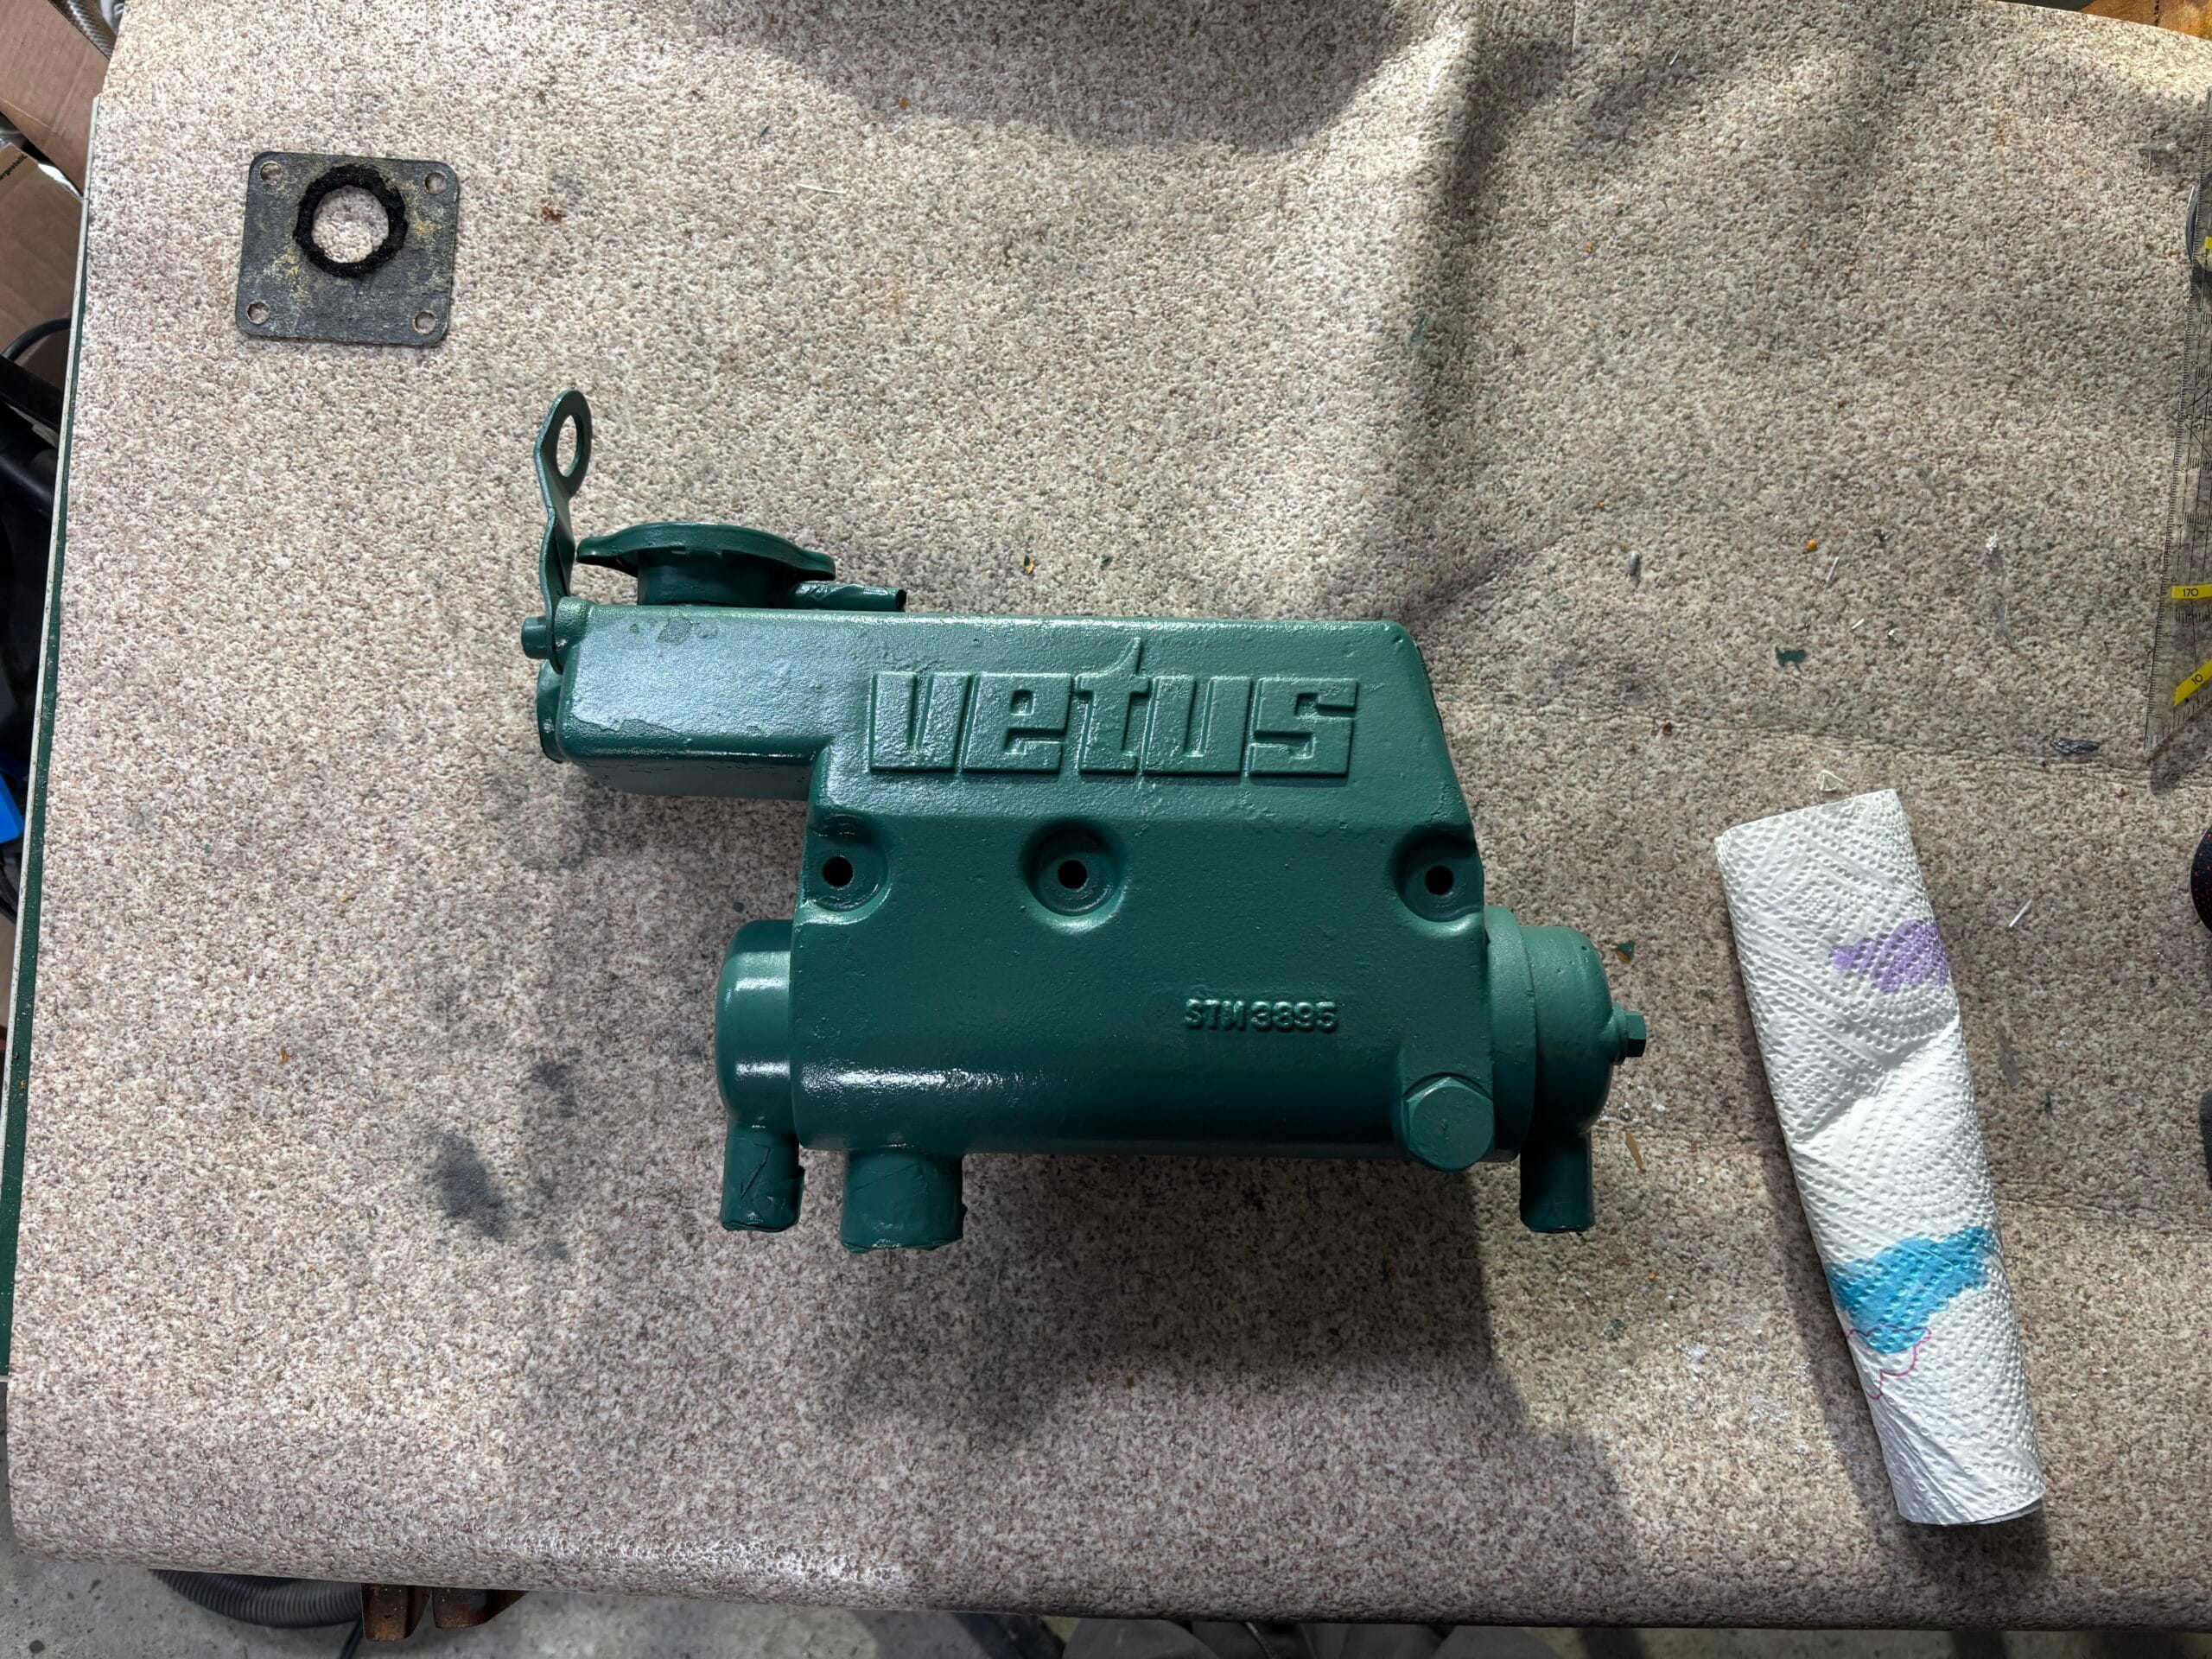
Note: Our engine has been painted green by the previous owner, as she disliked the yellow. I don’t know why, but it is still an original Vetus, and the characteristic yellow still shines through here and there. To match the overall theme, we also painted the heat exchanger green again.
Leaking heat exchangers seem to be a common problem on these engines. The problem is that the replacement parts are also very expensive, costing around 800€ to 1300€ just for the housing, and the tube stack can be another 300-400€. For any problems or troubleshooting, I recommend the Vetus Marine Engine Owners Group if you are interested in exchanging experiences with people who face similar problems. There, you will also see that there are lots of people reporting the exact same issue.
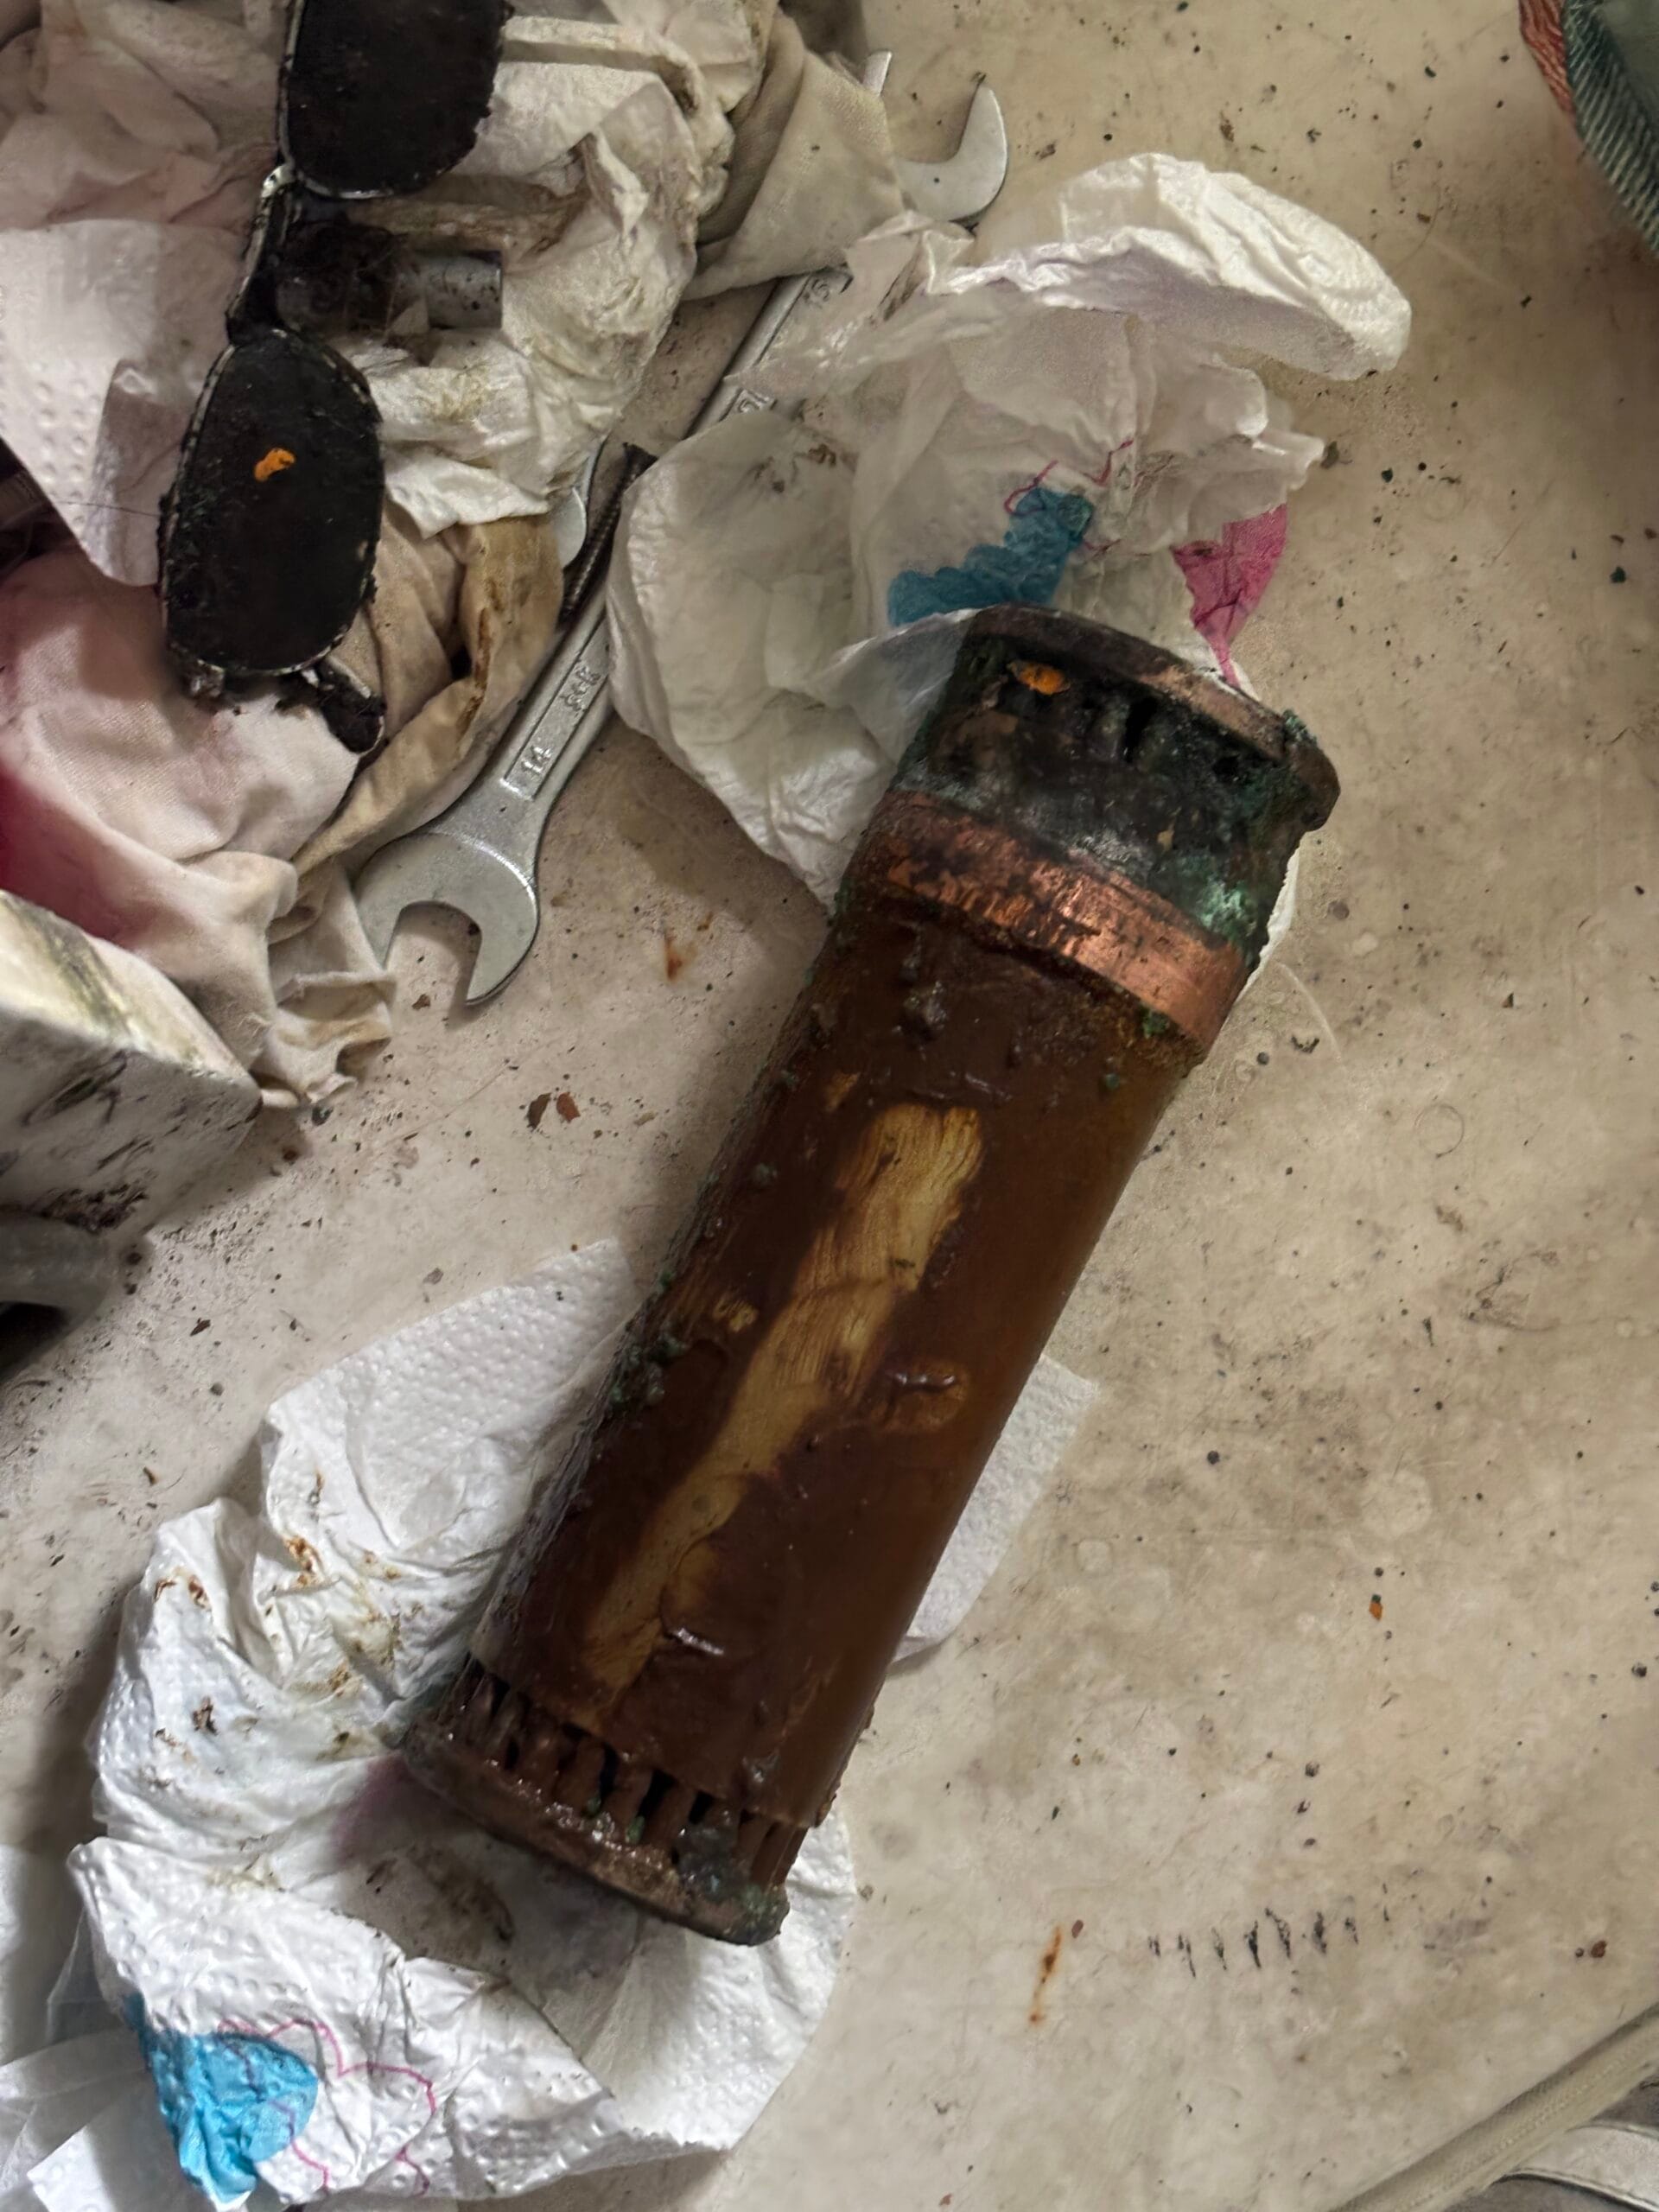
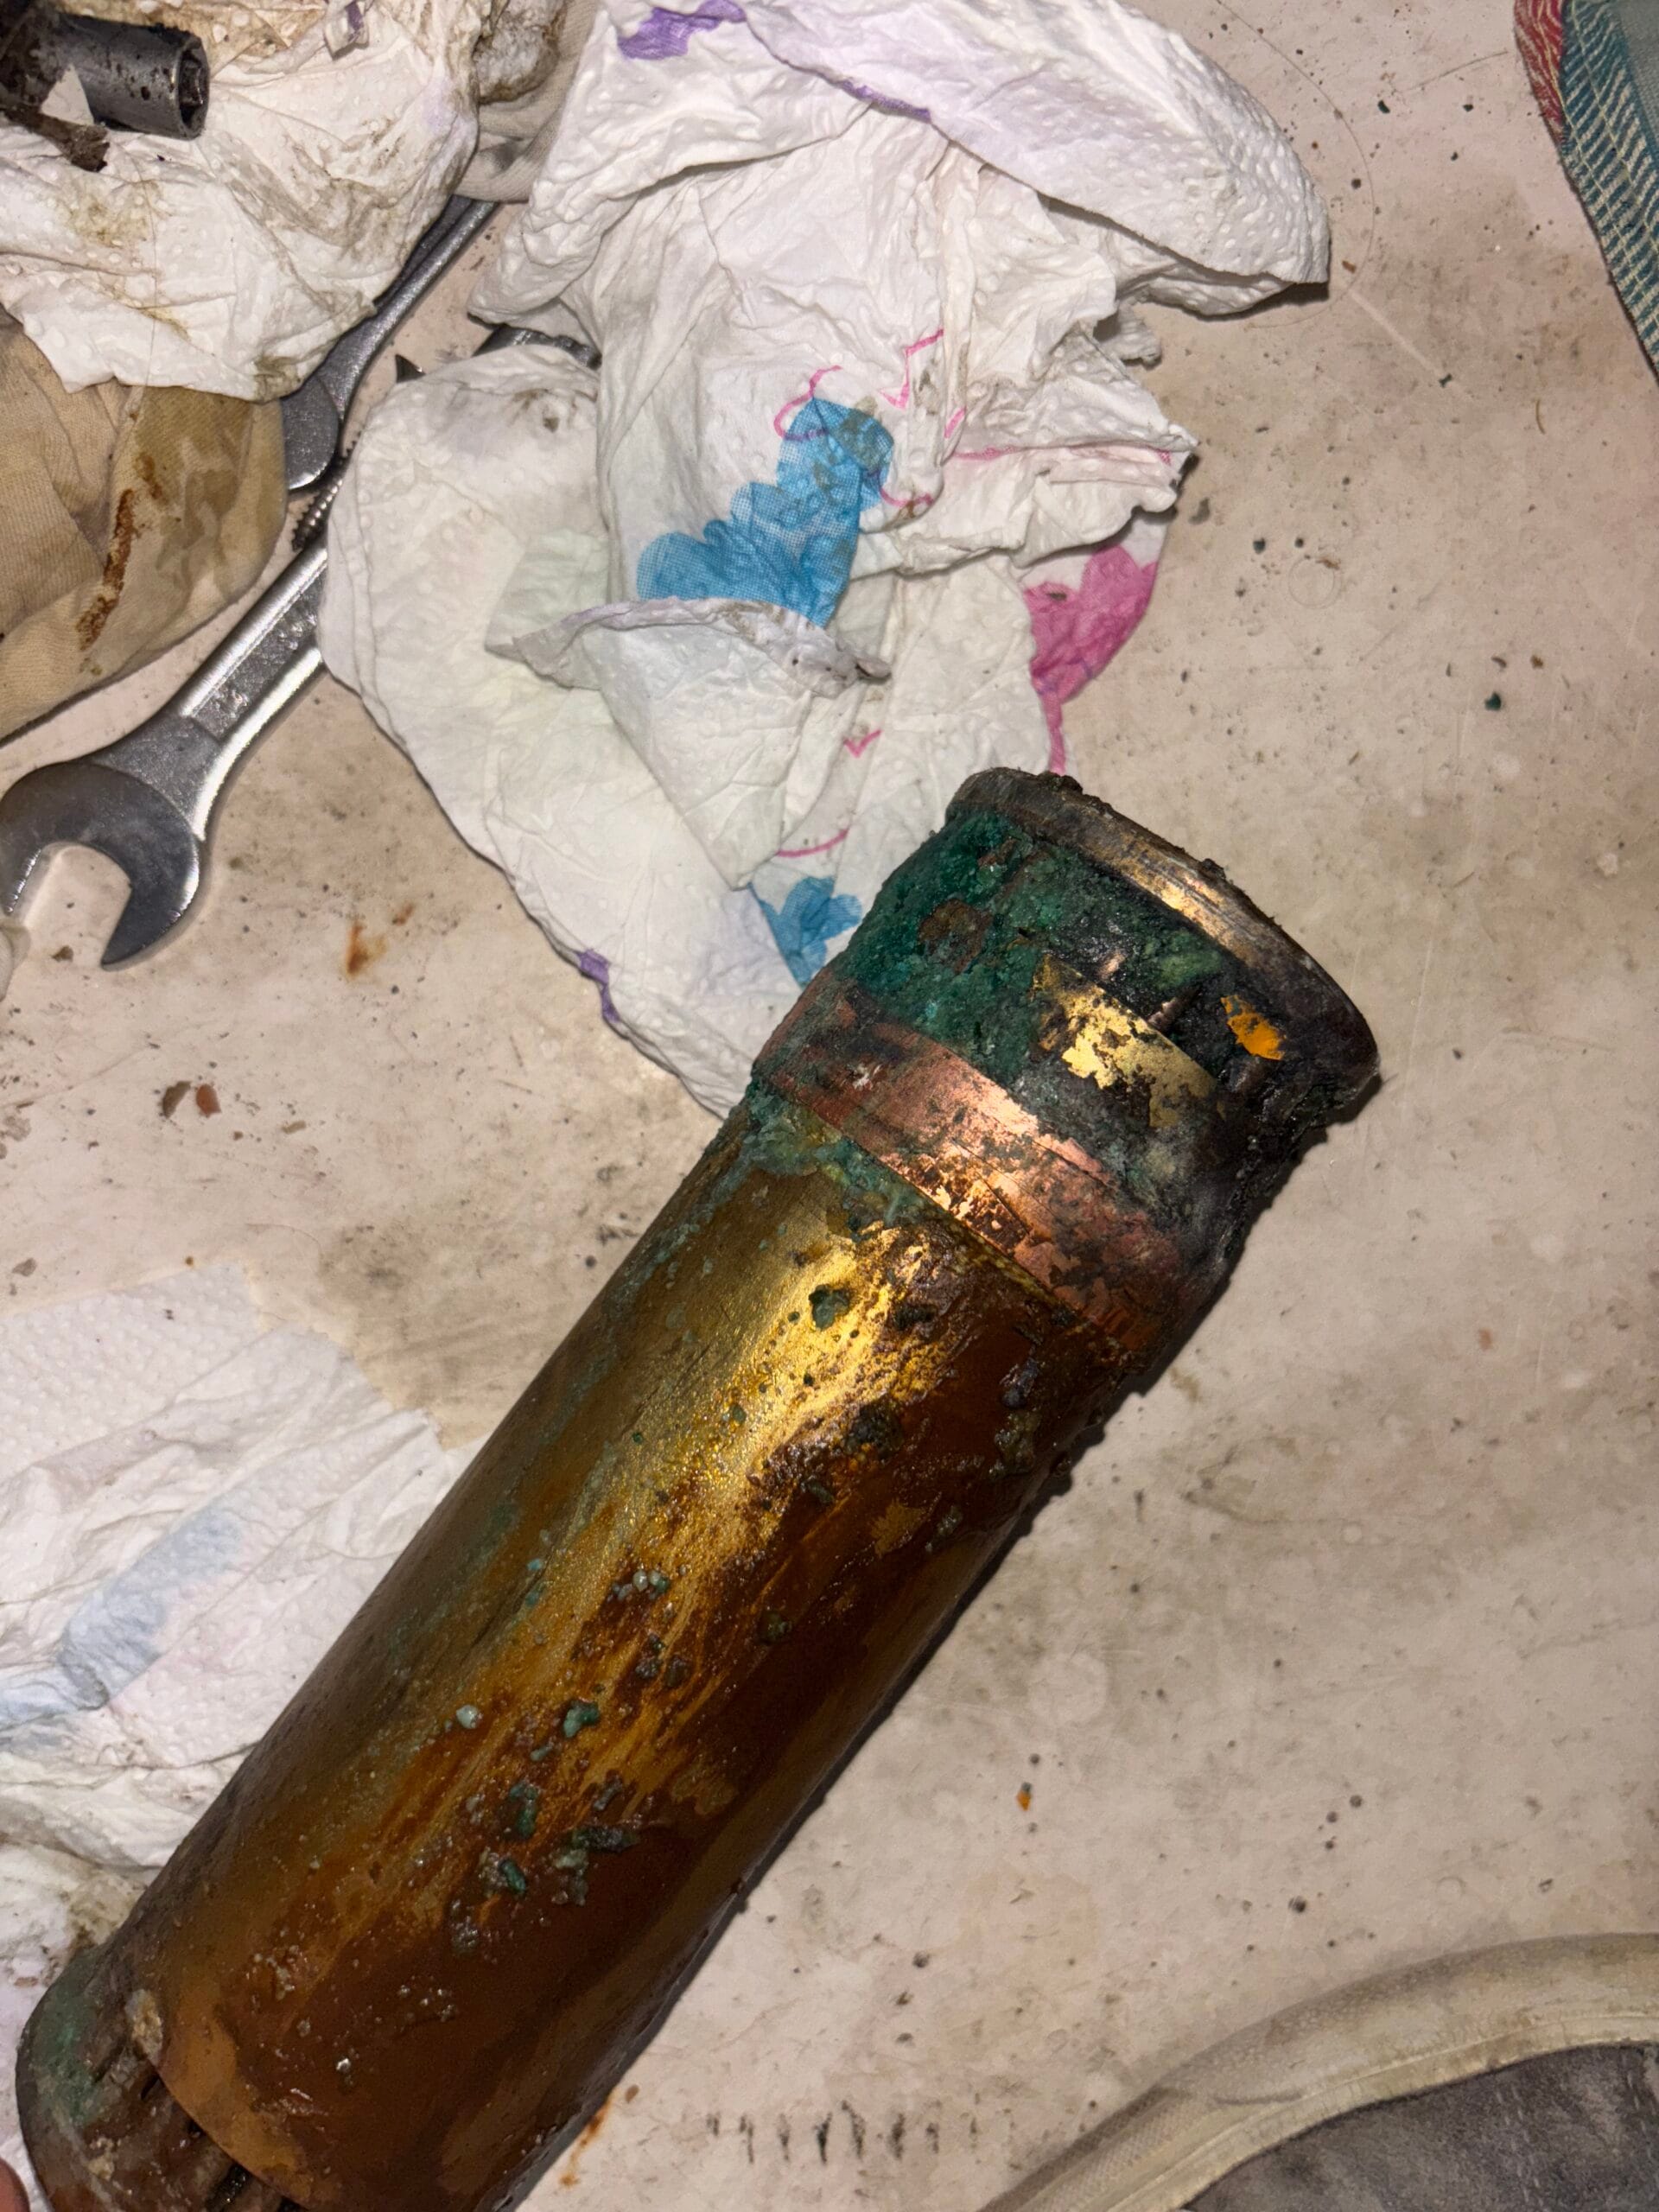
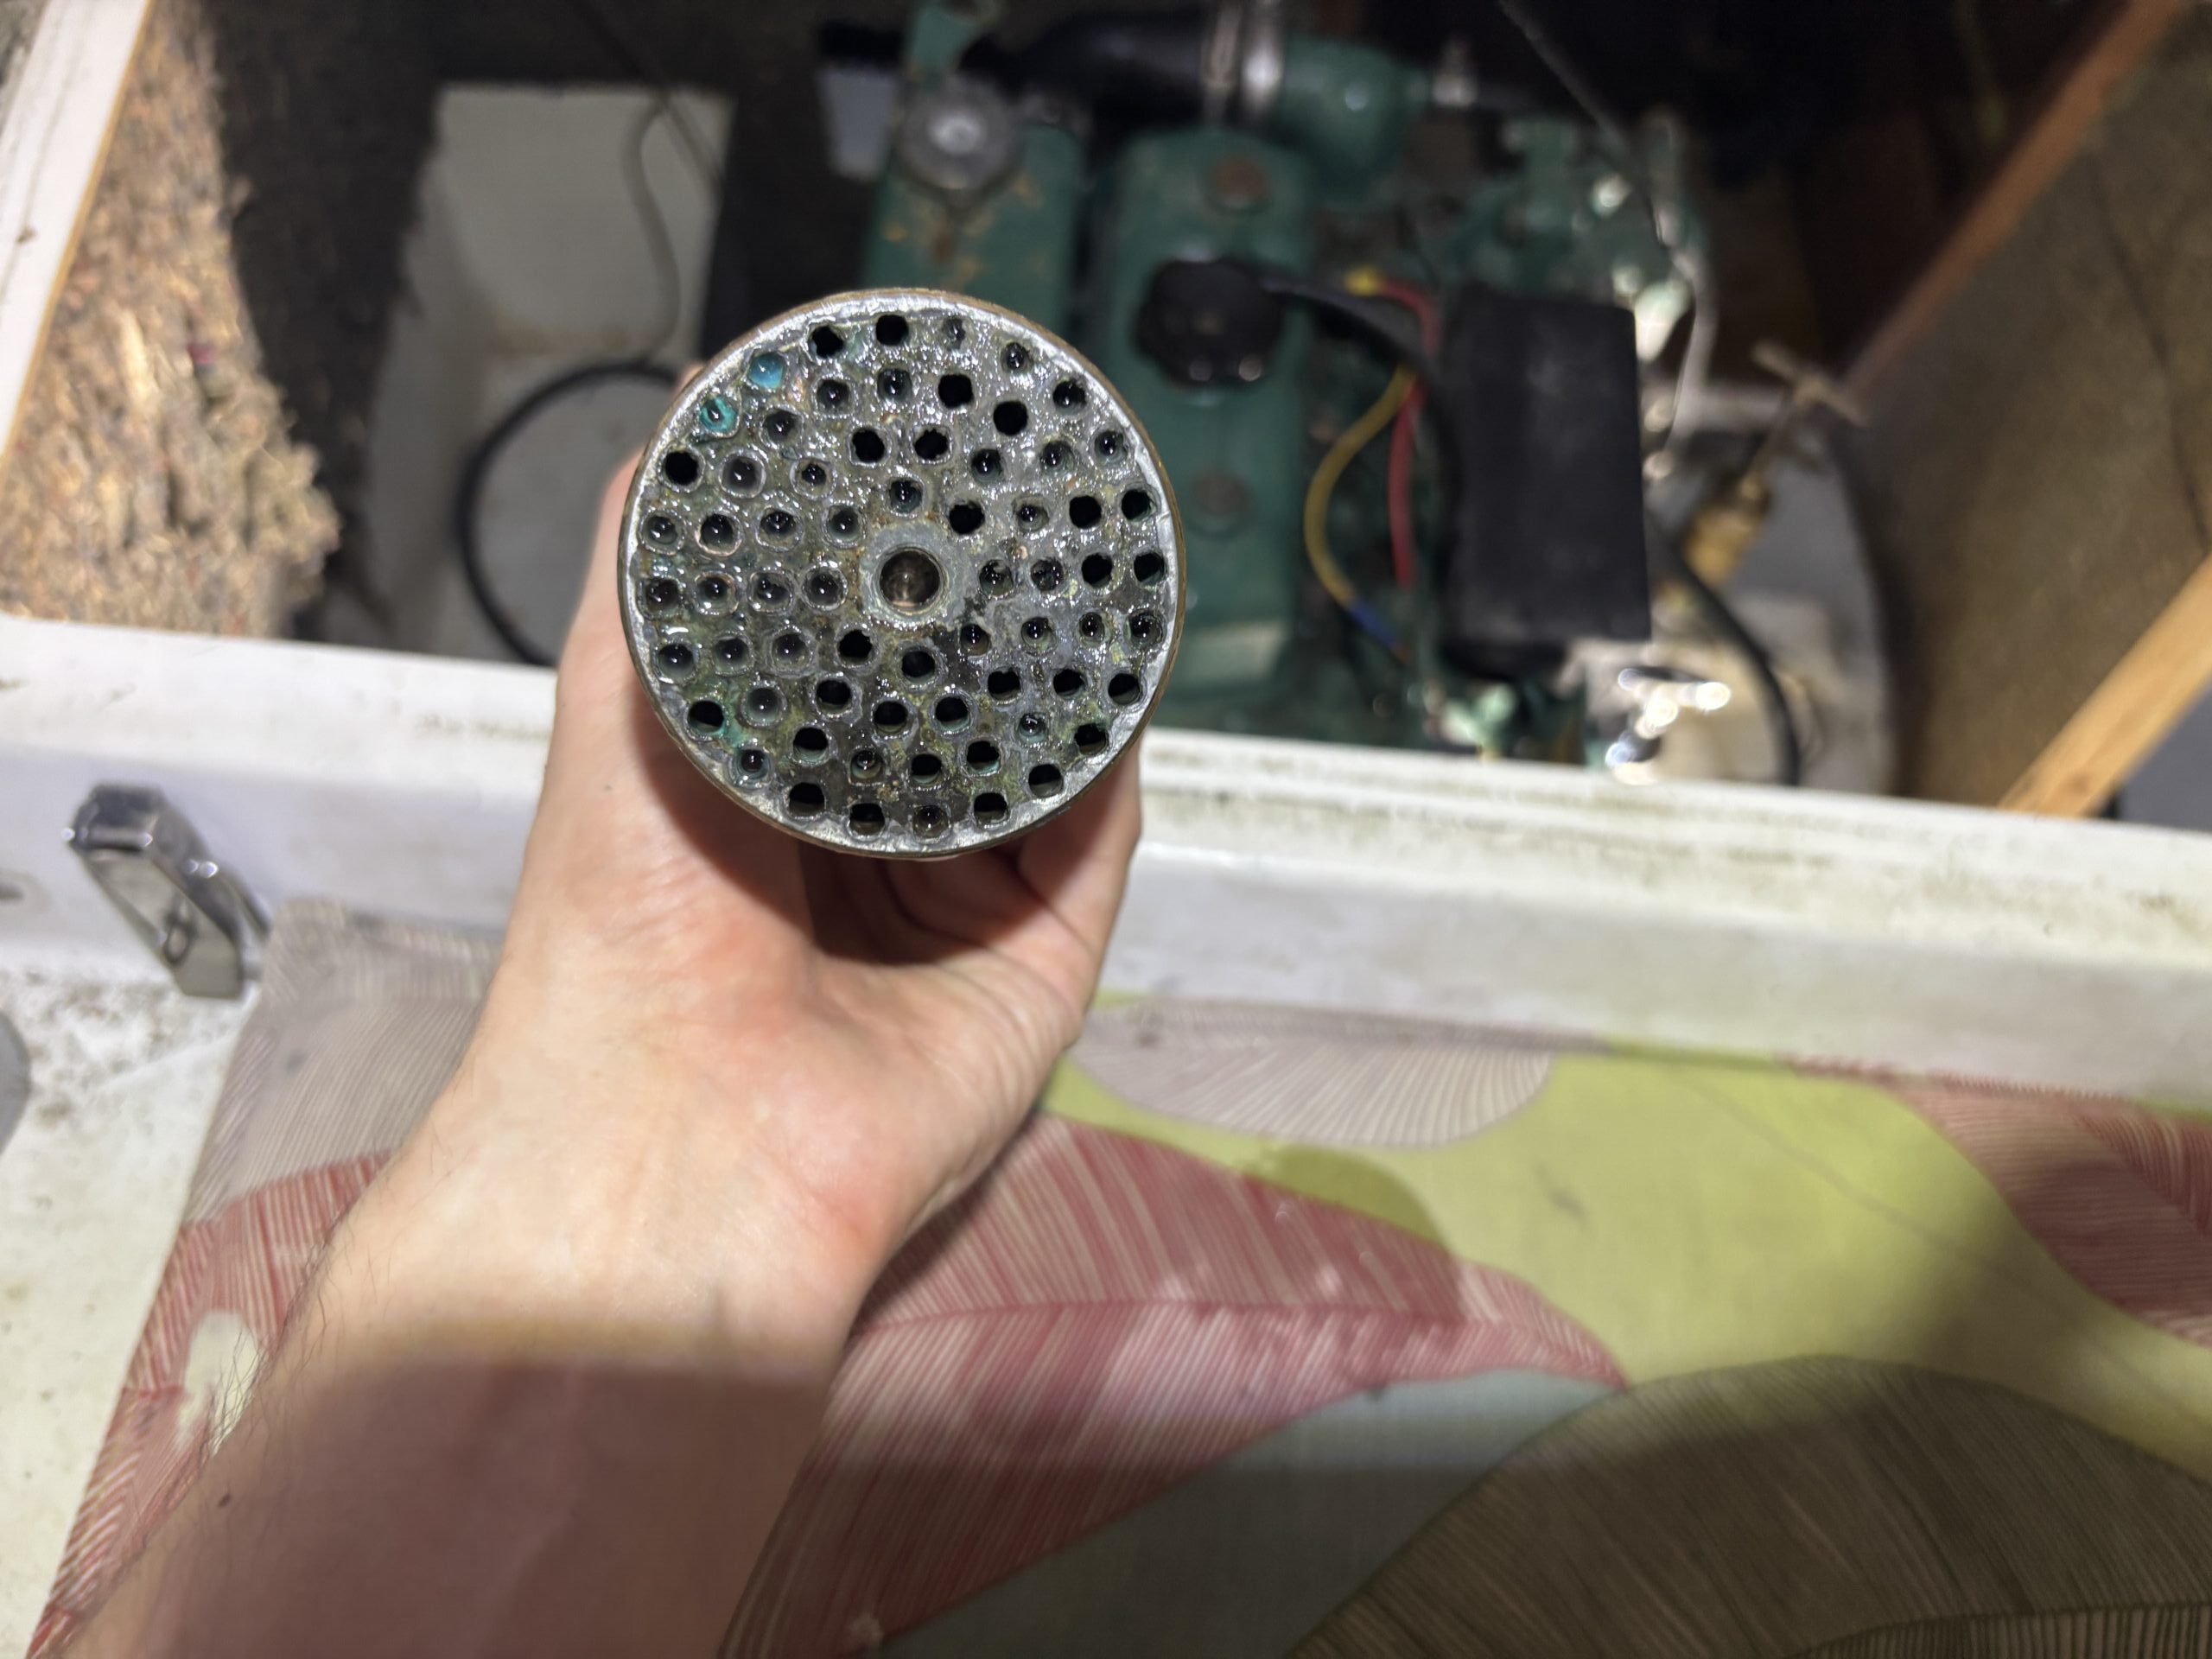
How our problem looked like
Options we considered
Replacing the Heat exchangers
Probably the easiest and best option if you are willing to spend the money. However, I was hesitant to do so, as it is a big investment for such an old engine. At some point, it might make more sense to just replace the whole unit with a new, state-of-the-art engine from a different manufacturer. Also, the parts are not easily available, prices vary, and there can be long waiting times.
If you consider this option, it’s worth noting that Vetus has an improved version that features a new filler neck design and seems to be more resistant to corrosion due to some changes they made. Double-check that your existing tube stack still fits correctly or if it also has to be changed; both parts are not cheap.
Getting it repaired and welded by a repair shop
Several people in the Vetus group have examples of a repair that worked perfectly. However, this is also not cheap, and you will have to find a competent shop that can do it. It’s best if you already know someone or can machine it yourself, so this was not an option for us.
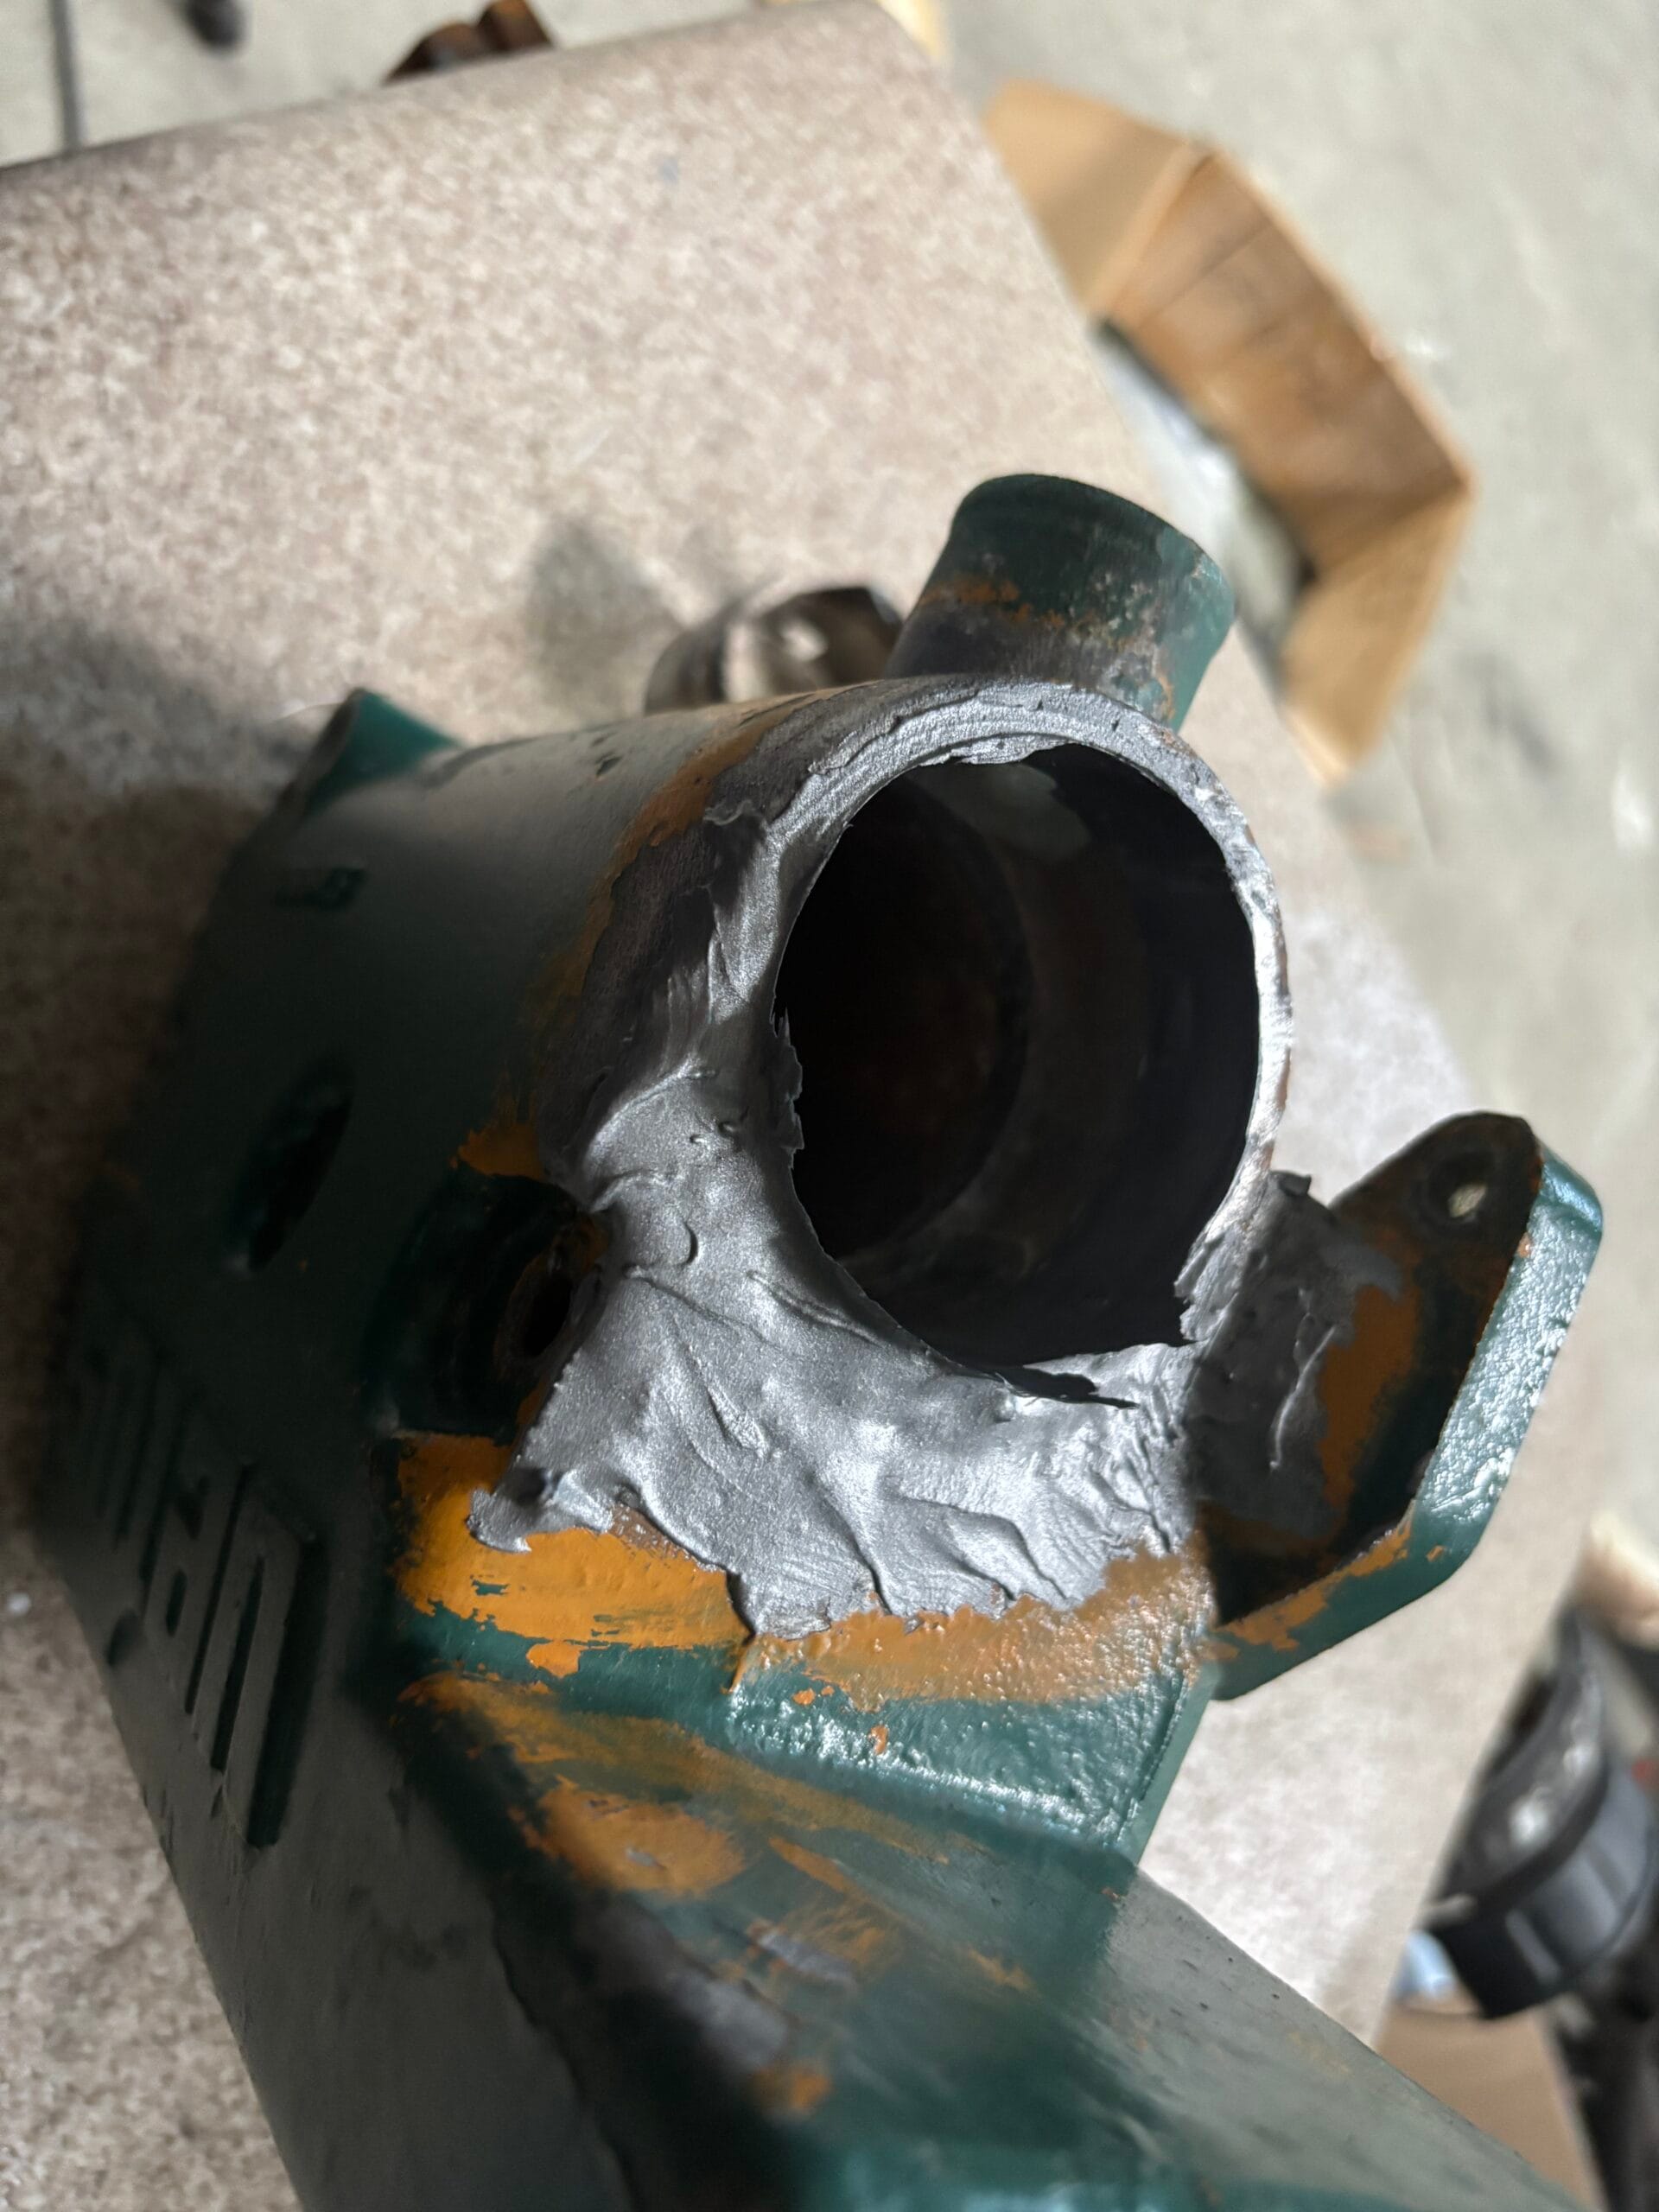
DIY repair with aluminium epoxy putty
I found this repair on the Dangar Marine channel. He has a great and detailed video that I recommend watching if you go down this route. This was also the option for us and what we ultimately decided to do. After further inspection, our heat exchanger was much less corroded than the one in the video. We only needed to get the flange built up a little bit and ensure that the area where the O-ring sits is flat and smooth so it can properly seal. The actual repair is explained in the next part.
Repairing Our Heat Exchanger With Aluminium Putty
Gear that we used
- Weicon F (alternatively JB Weld or Devcon F)
- 2x New O-Rings STM1005 (62.62 x 2.62mm)
- Manifold Gasket STM1051
- Exhaust Elbow Gasket STM3046
- Spray Paint
- Stainless Steel Wire Brush for the drill
- Nylon Wire Brush Wheel
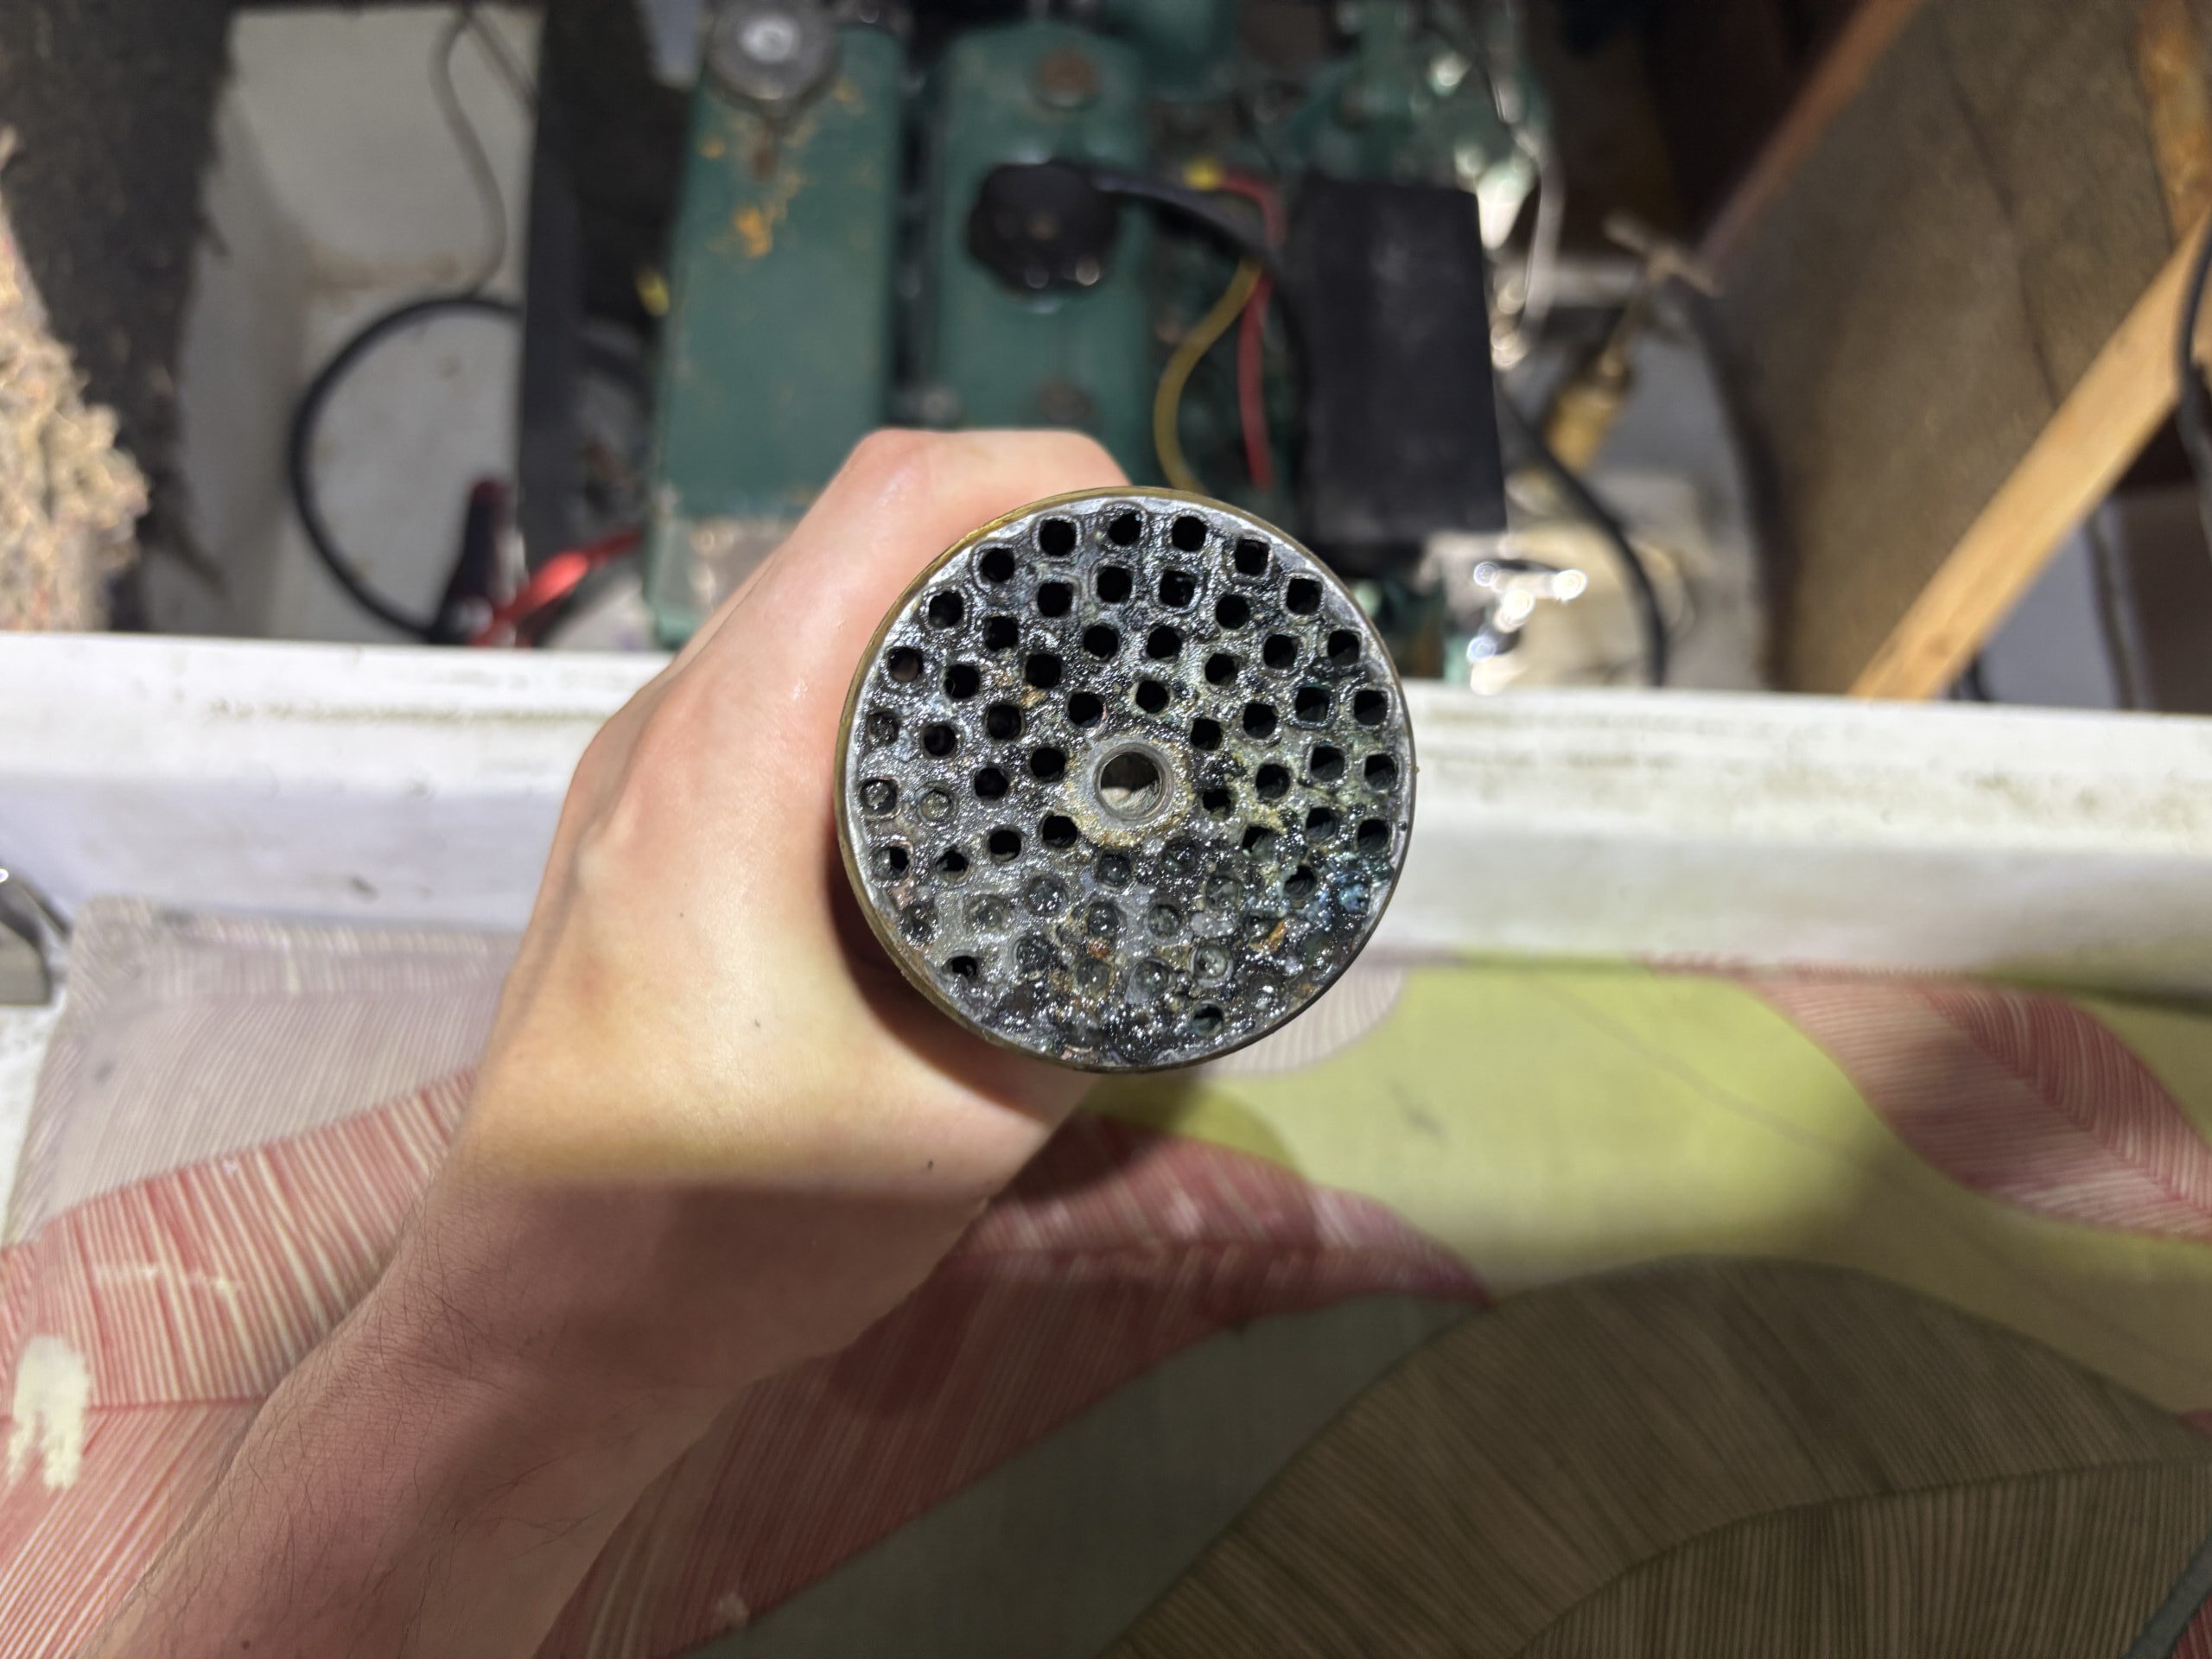
- Pipe Cleaners for the Tubestack
Dangar Marine used Devcon F aluminium putty. Since this was not available to us at an affordable price here in Germany, we decided to go with Weicon F aluminium putty. It is a very similar product and, for our specific application, makes no difference at all.
You could also use something like J-B Weld, but the difference here is that the filler is steel/iron. Therefore, it does not have the same material characteristics in terms of expansion and contraction under heat. The idea here is to match the original material as closely as possible to avoid the separation of the materials.
The plus side of J-B Weld is that it is much more heat resistant. That is, however, something that is not really relevant at the part of the heat exchanger that I am repairing. The aluminium housing will never get hotter than the water inside the cooling circuit, provided the engine is not overheating (you should always be very careful with opening your cooling seacock!).
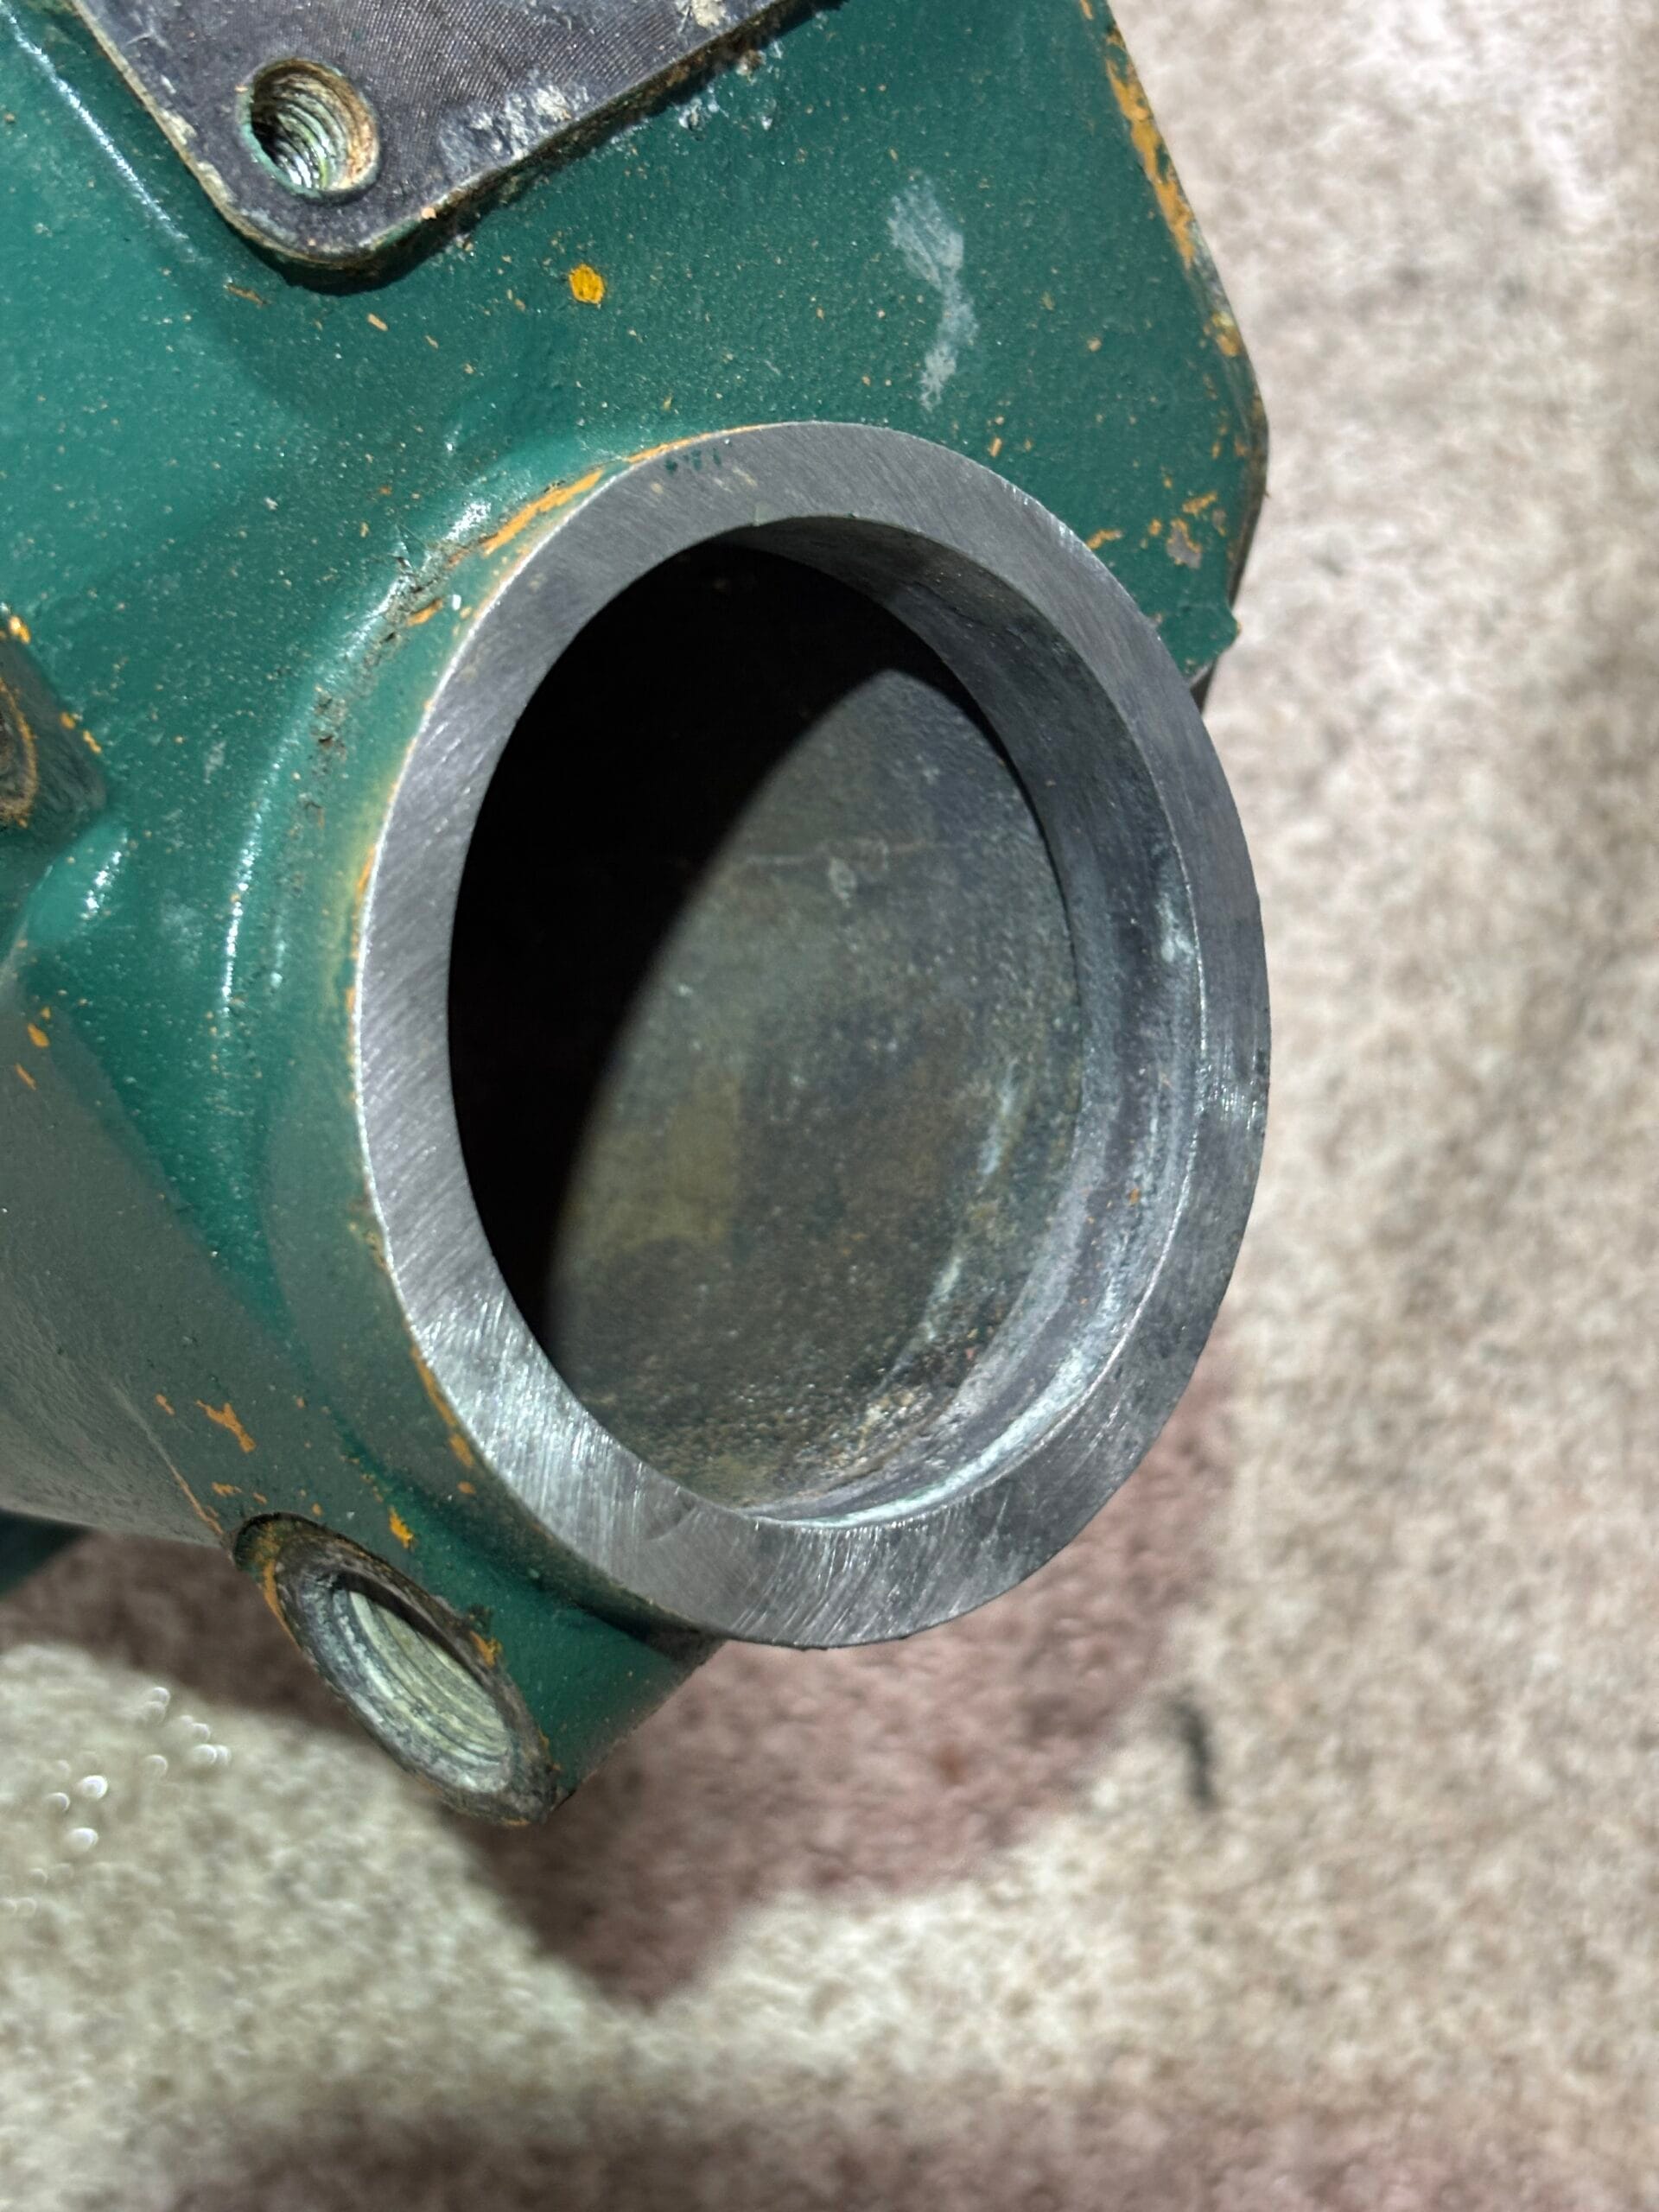
Removing the heat exchanger
The first step was to empty the cooling system and remove the heat exchanger from the engine block. Some screws are a bit tricky to reach. Downloading and having the engine manual, as well as the spare parts list with exploded views, is a big help for any work on the engine and makes finding all the necessary screws much easier.
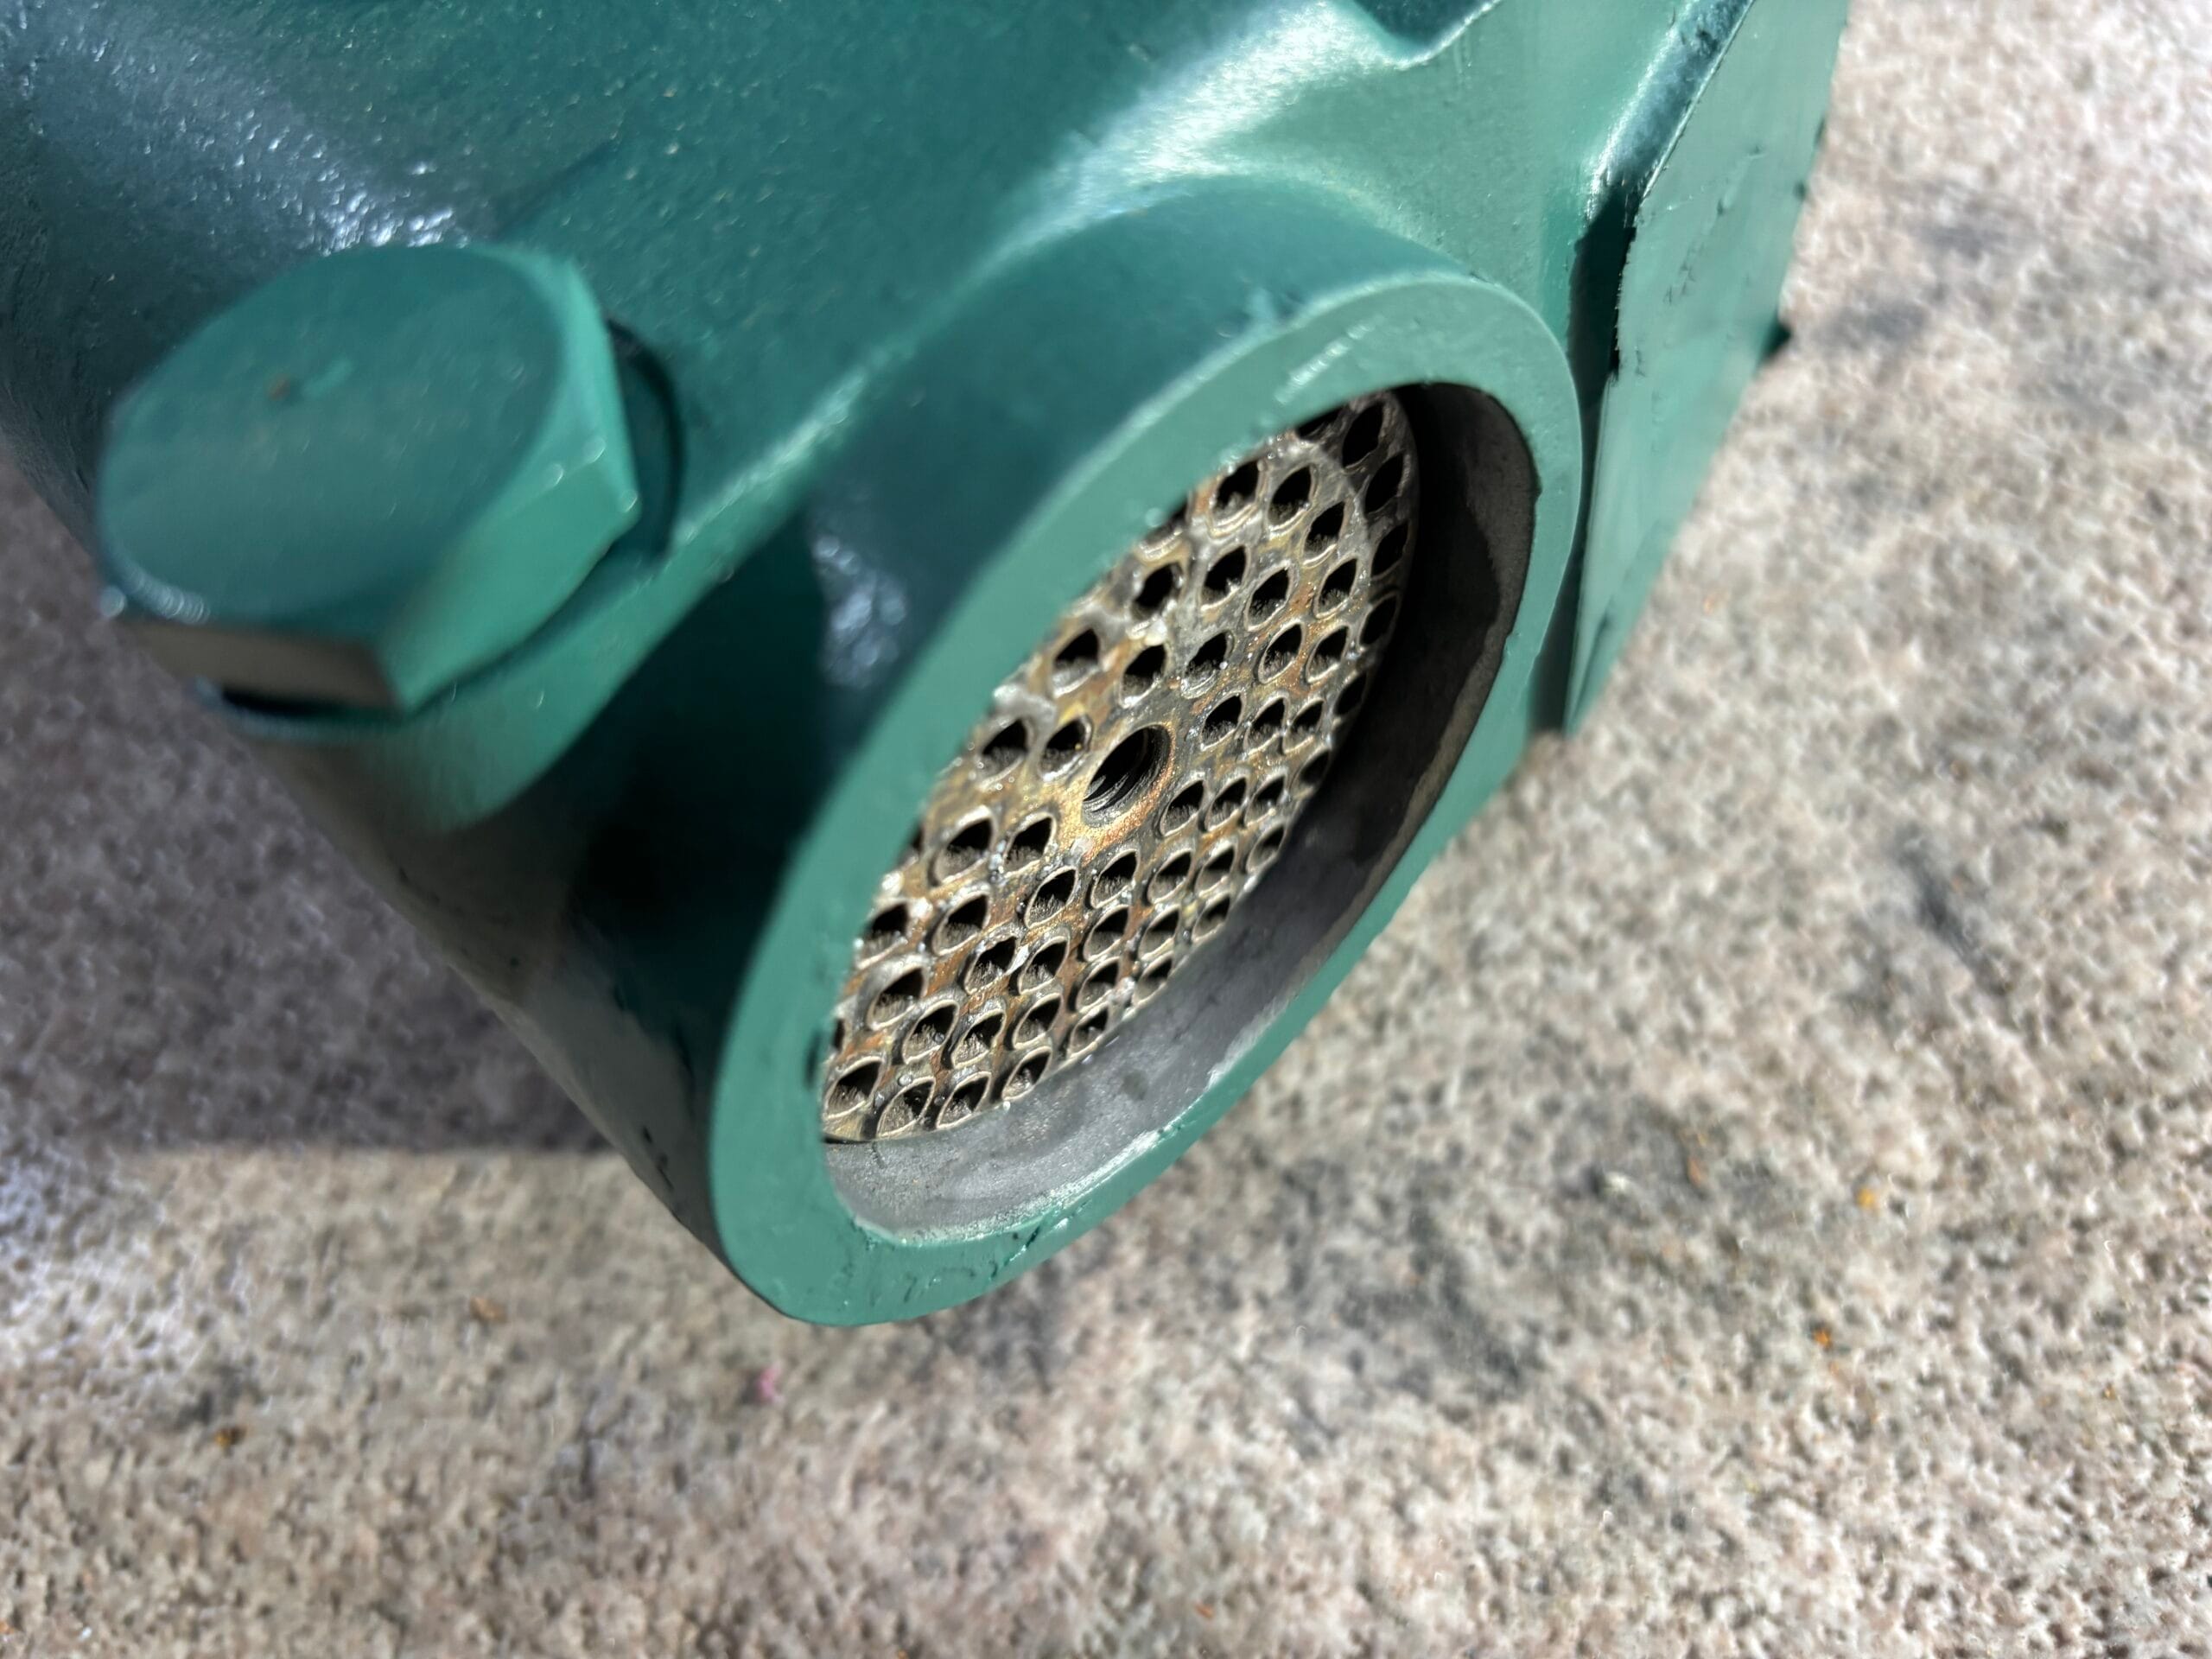
I also managed to retrieve the tube stack using a hammer and a small piece of wood. However, judging by many other posts, it can easily happen that the tube stack is simply corroded in place. In that scenario, it might be easier to just leave it be.
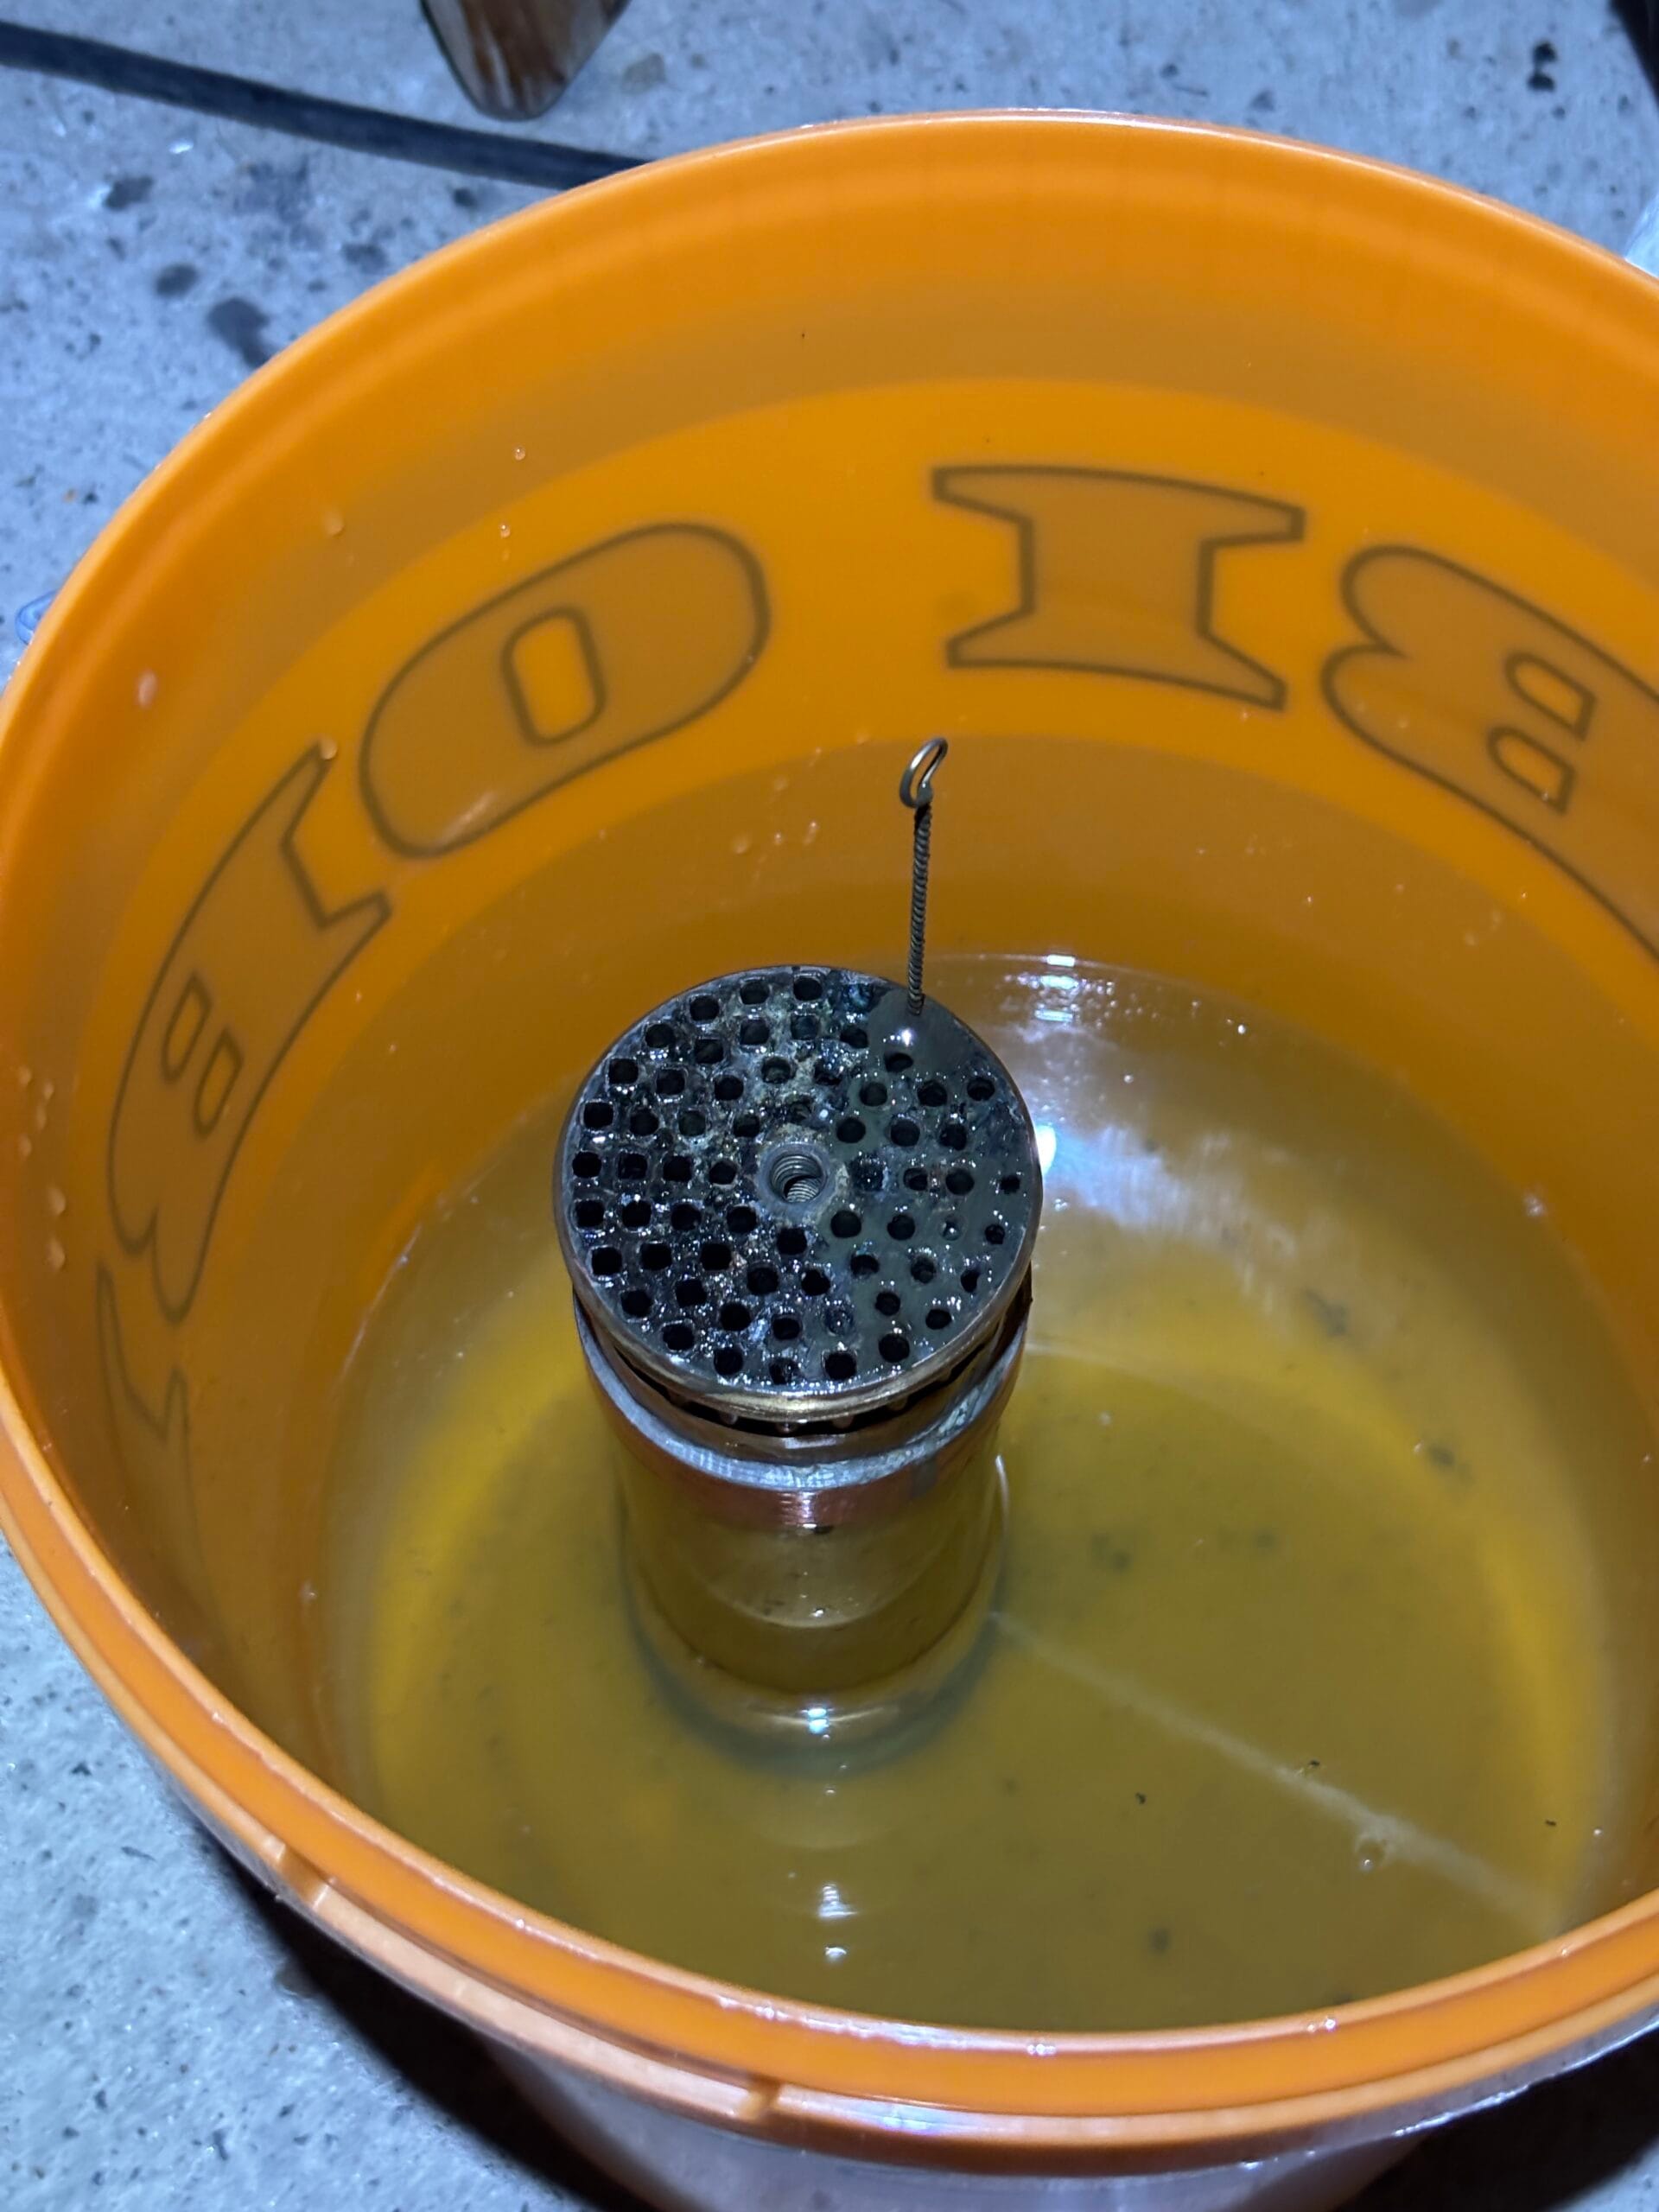
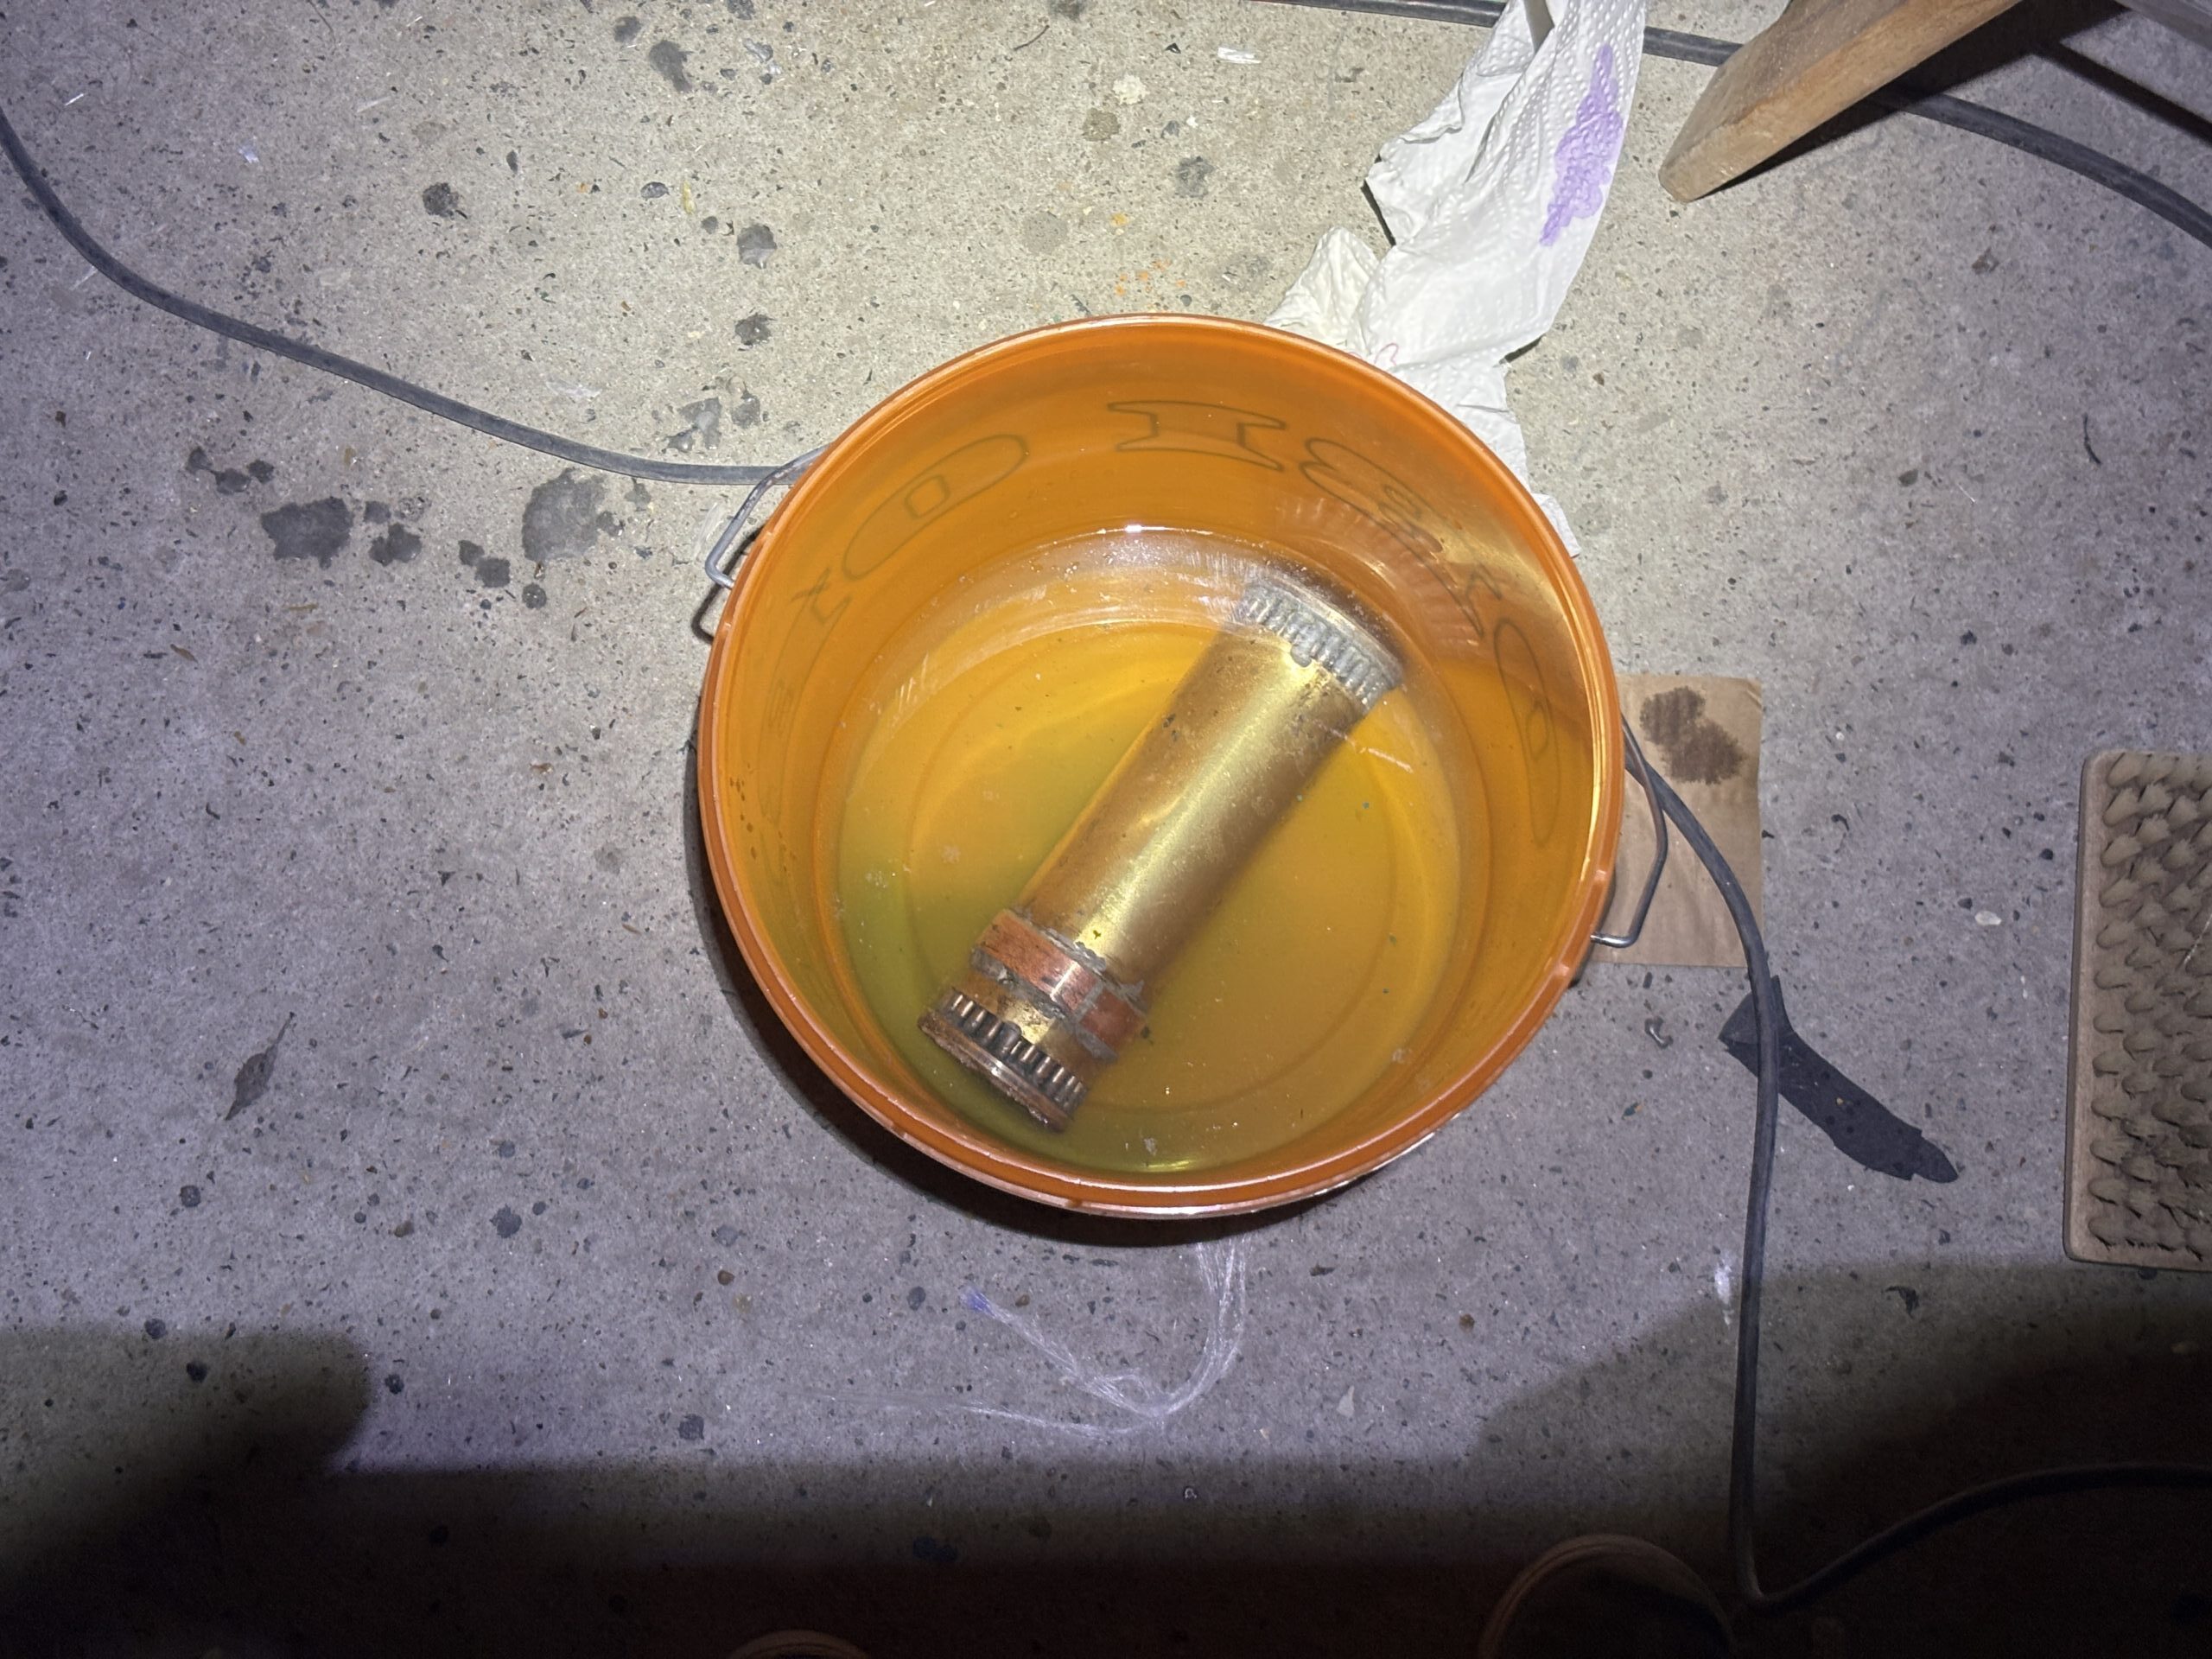
Cleaning the Tubestack
I found that half of our tube stack was completely clogged with coolant sludge. Due to the broken seal, some saltwater had probably mixed with the coolant and formed a brownish sludge that had almost completely hardened, causing a solid blockage. There are multiple options to clean it, like Barnacle Buster or other chemicals, but we decided to go for the least aggressive method. We just soaked it in a short vinegar bath and carefully cleaned the inside with pipe cleaners, which worked perfectly to clear the blocked pipes.
Preparation
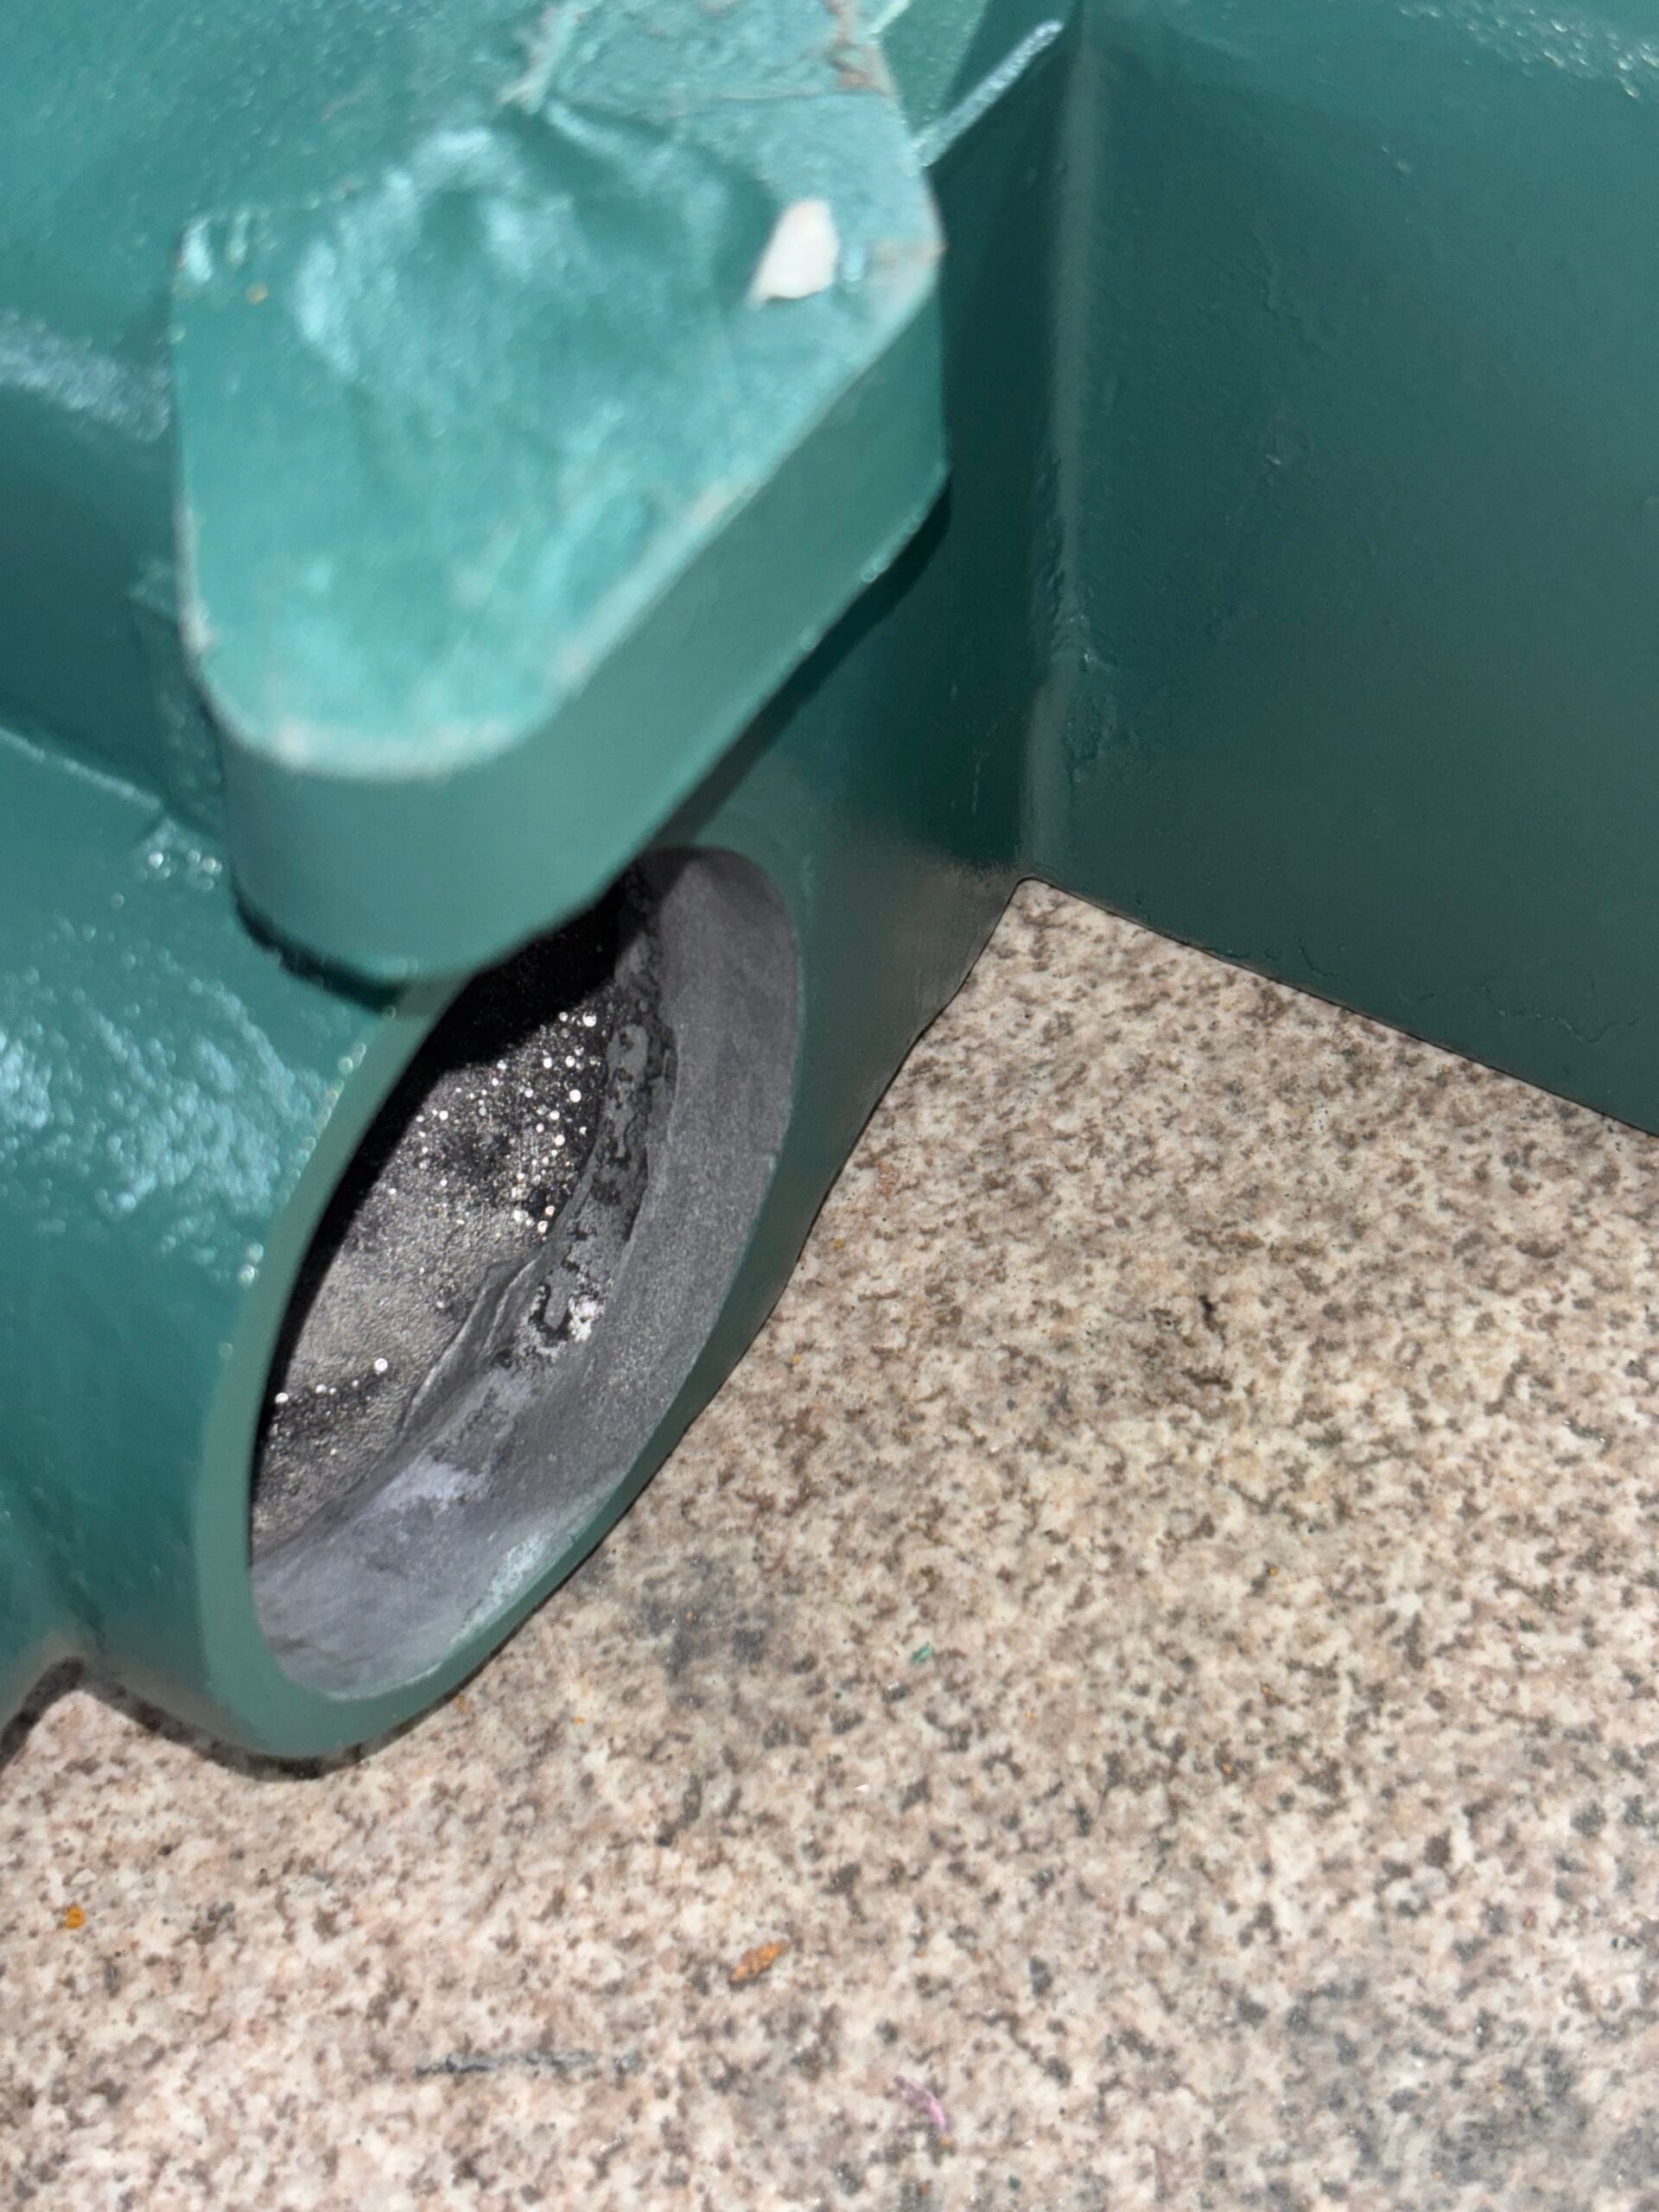
Before building up the new flange and filling the pitting holes, the housing has to be cleaned as thoroughly as possible. It makes sense to do this initial cleaning before removing any corroded parts or starting to sand, as you want to avoid pushing oil or dirt deeper into the material. I cleaned it and wiped it down extensively with acetone.
In the next step, it is important to get all the brittle or corroded material removed. I used a synthetic wire brush, a stainless steel wire brush, and 40-80 grit sandpaper. Do not use normal steel brushes they will leave behind particles that can rust and eventually ruin the bond. The epoxy putty needs a good tooth to properly adhere to the aluminum.
Applying the putty
In the next step, we applied the aluminium epoxy putty. It is important to be extremely quick after sanding and wiping with acetone, as aluminium oxidizes rapidly in the air and builds a layer that the epoxy will not stick to. Acetone evaporates very quickly, so after a minute or so, we applied the putty and built up the flange. To create some sort of mold, I inserted a hole saw and covered it with tape to act as a release agent. The epoxy will not stick to the tape, so you can easily remove it afterwards.
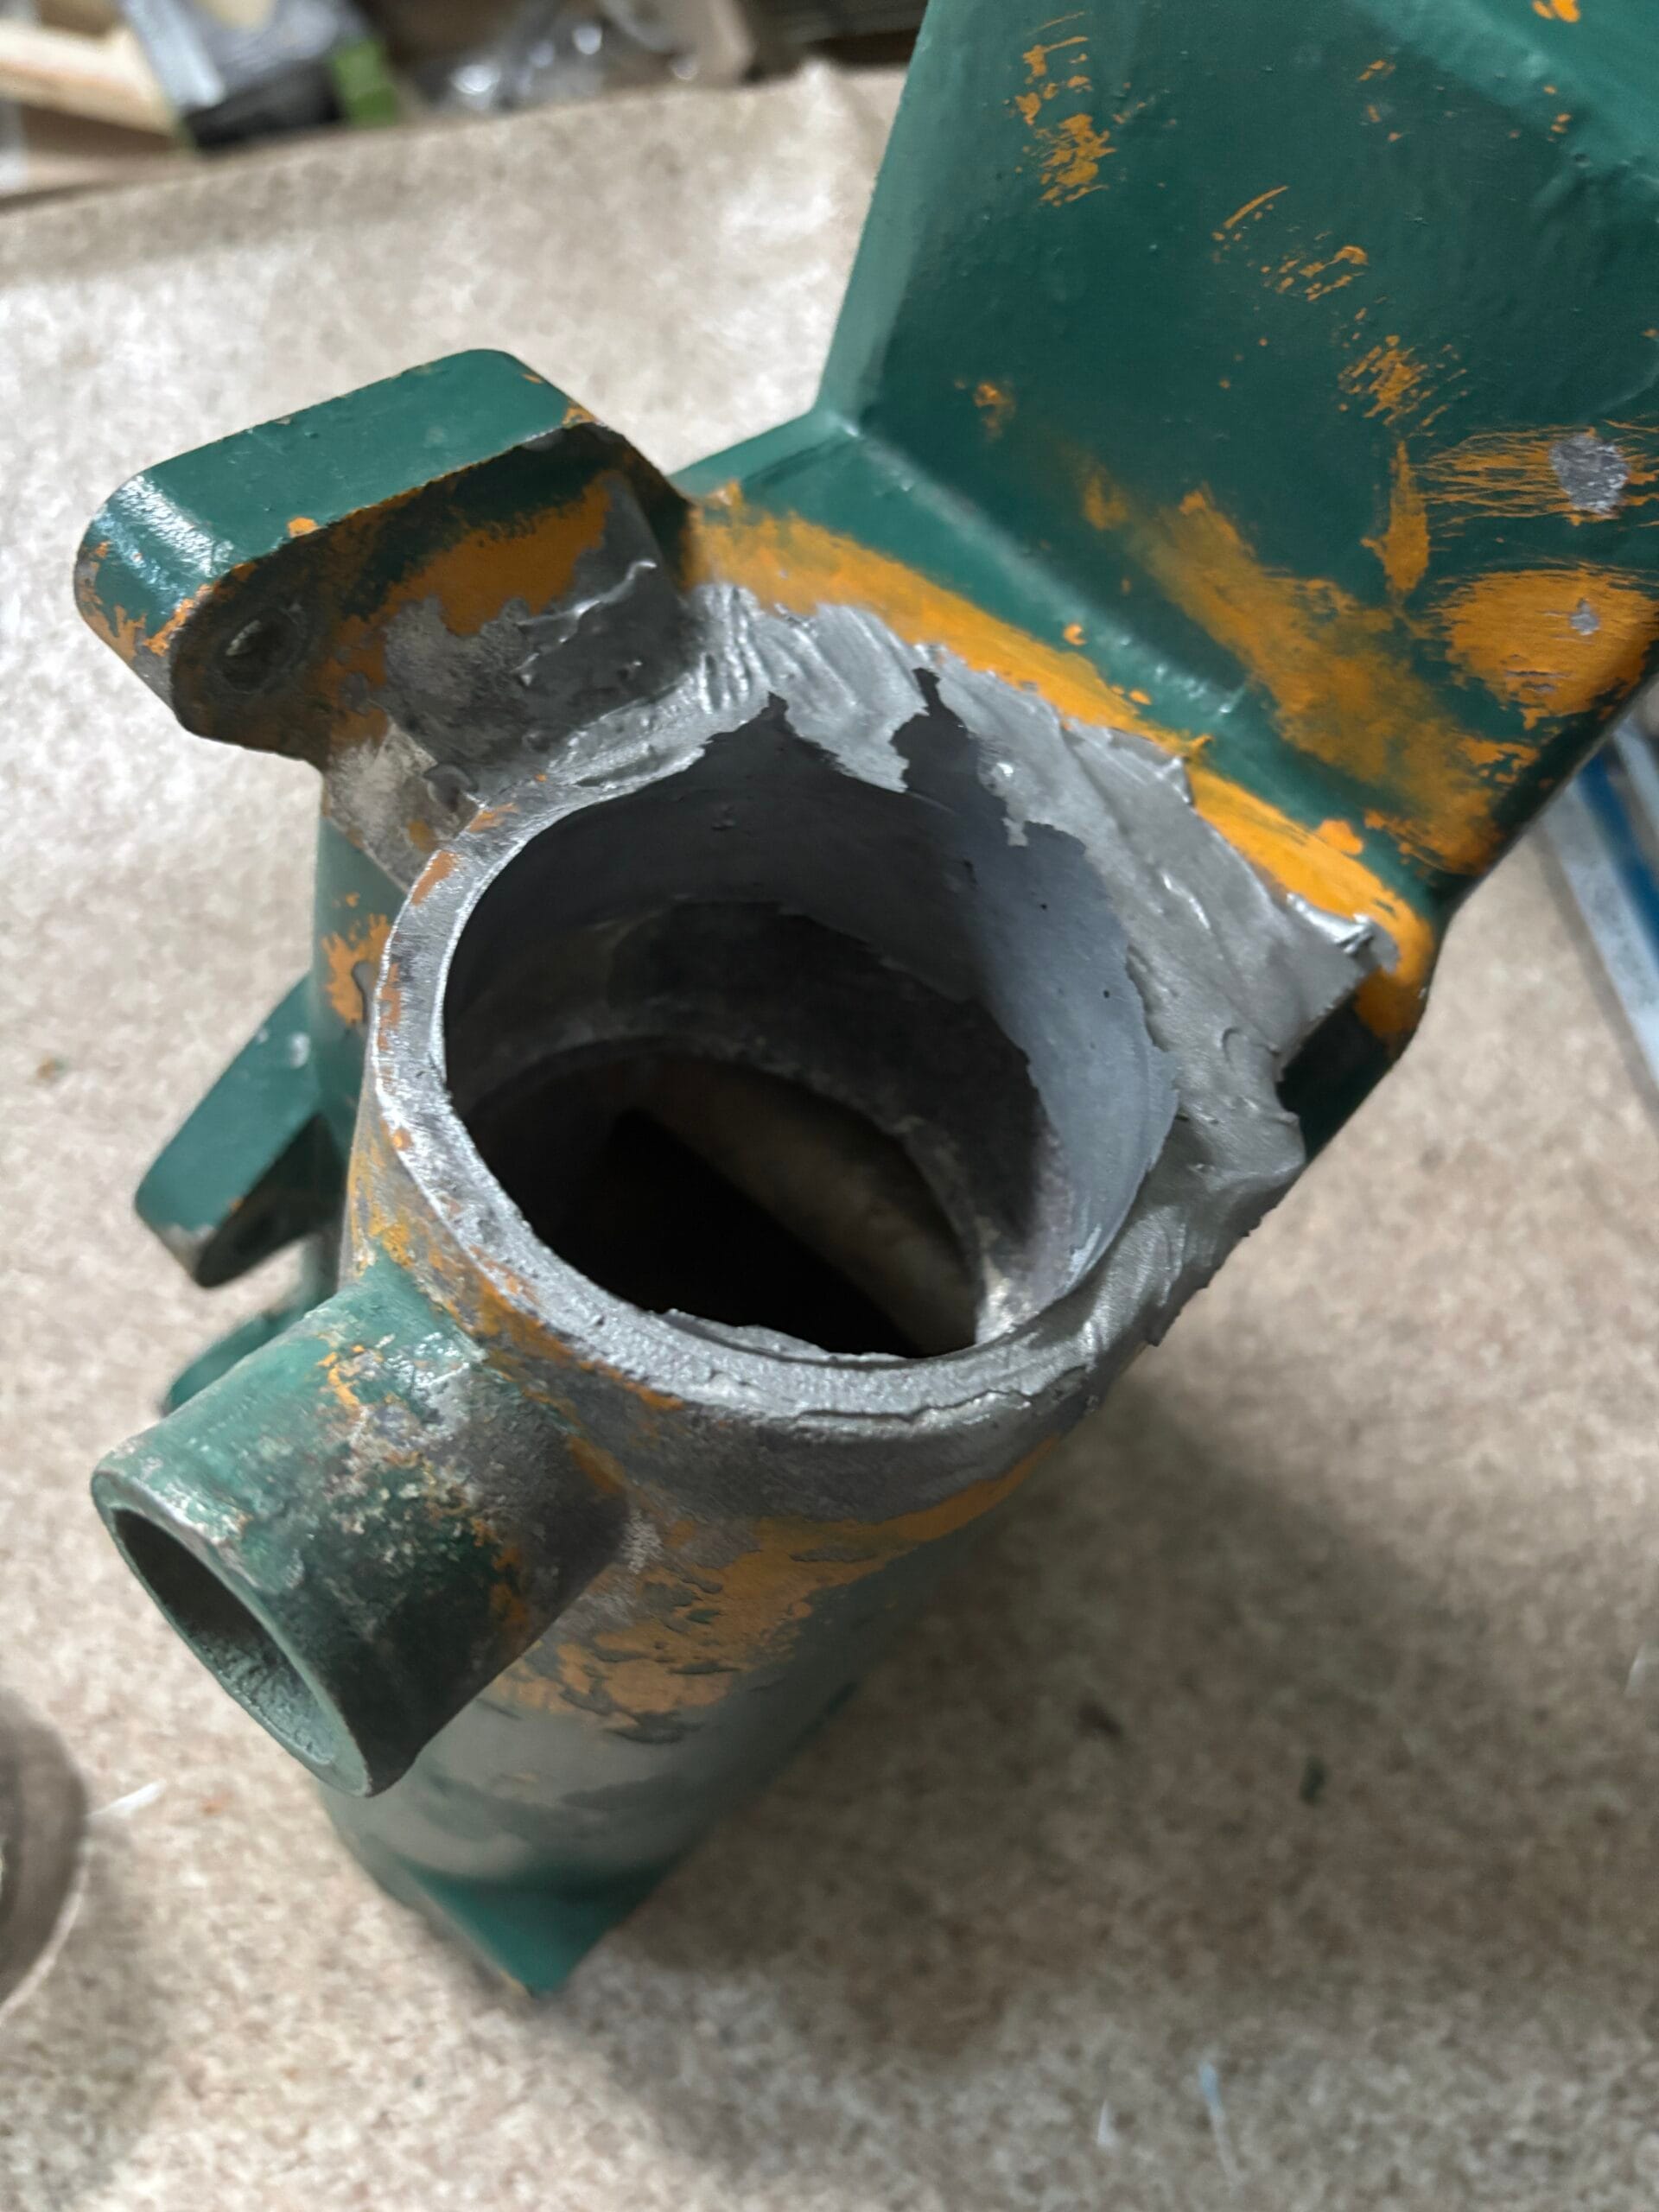
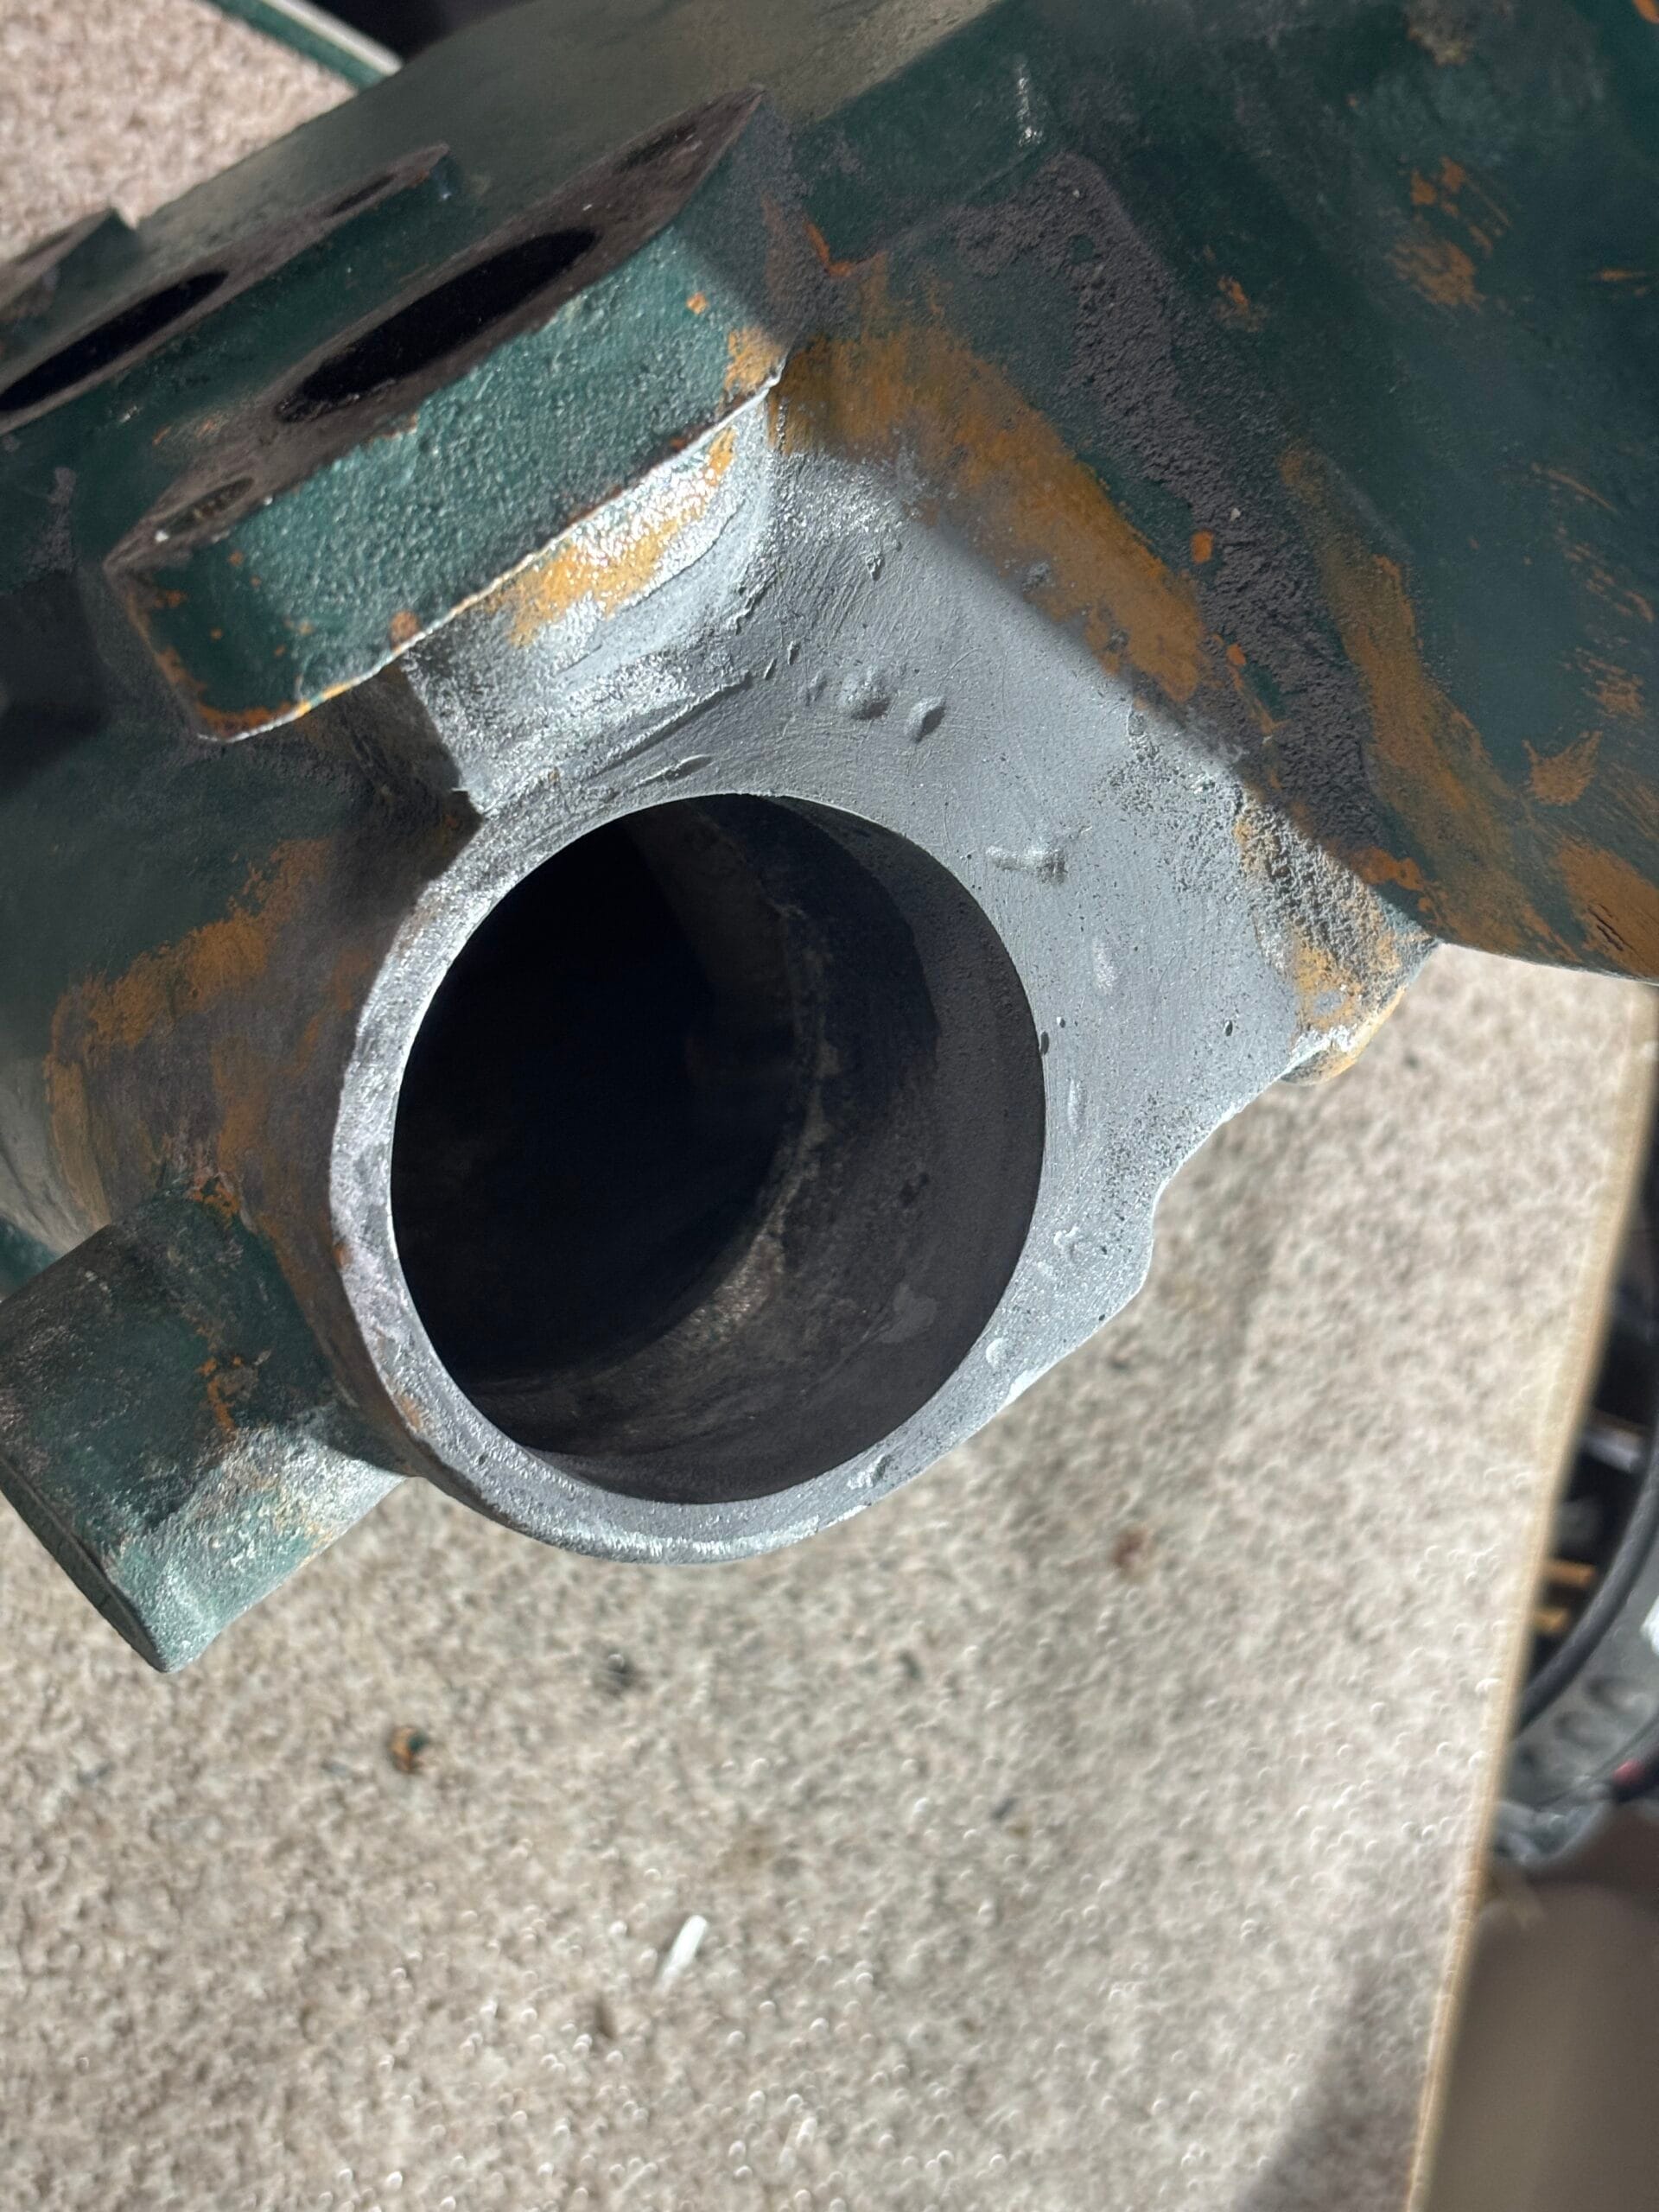
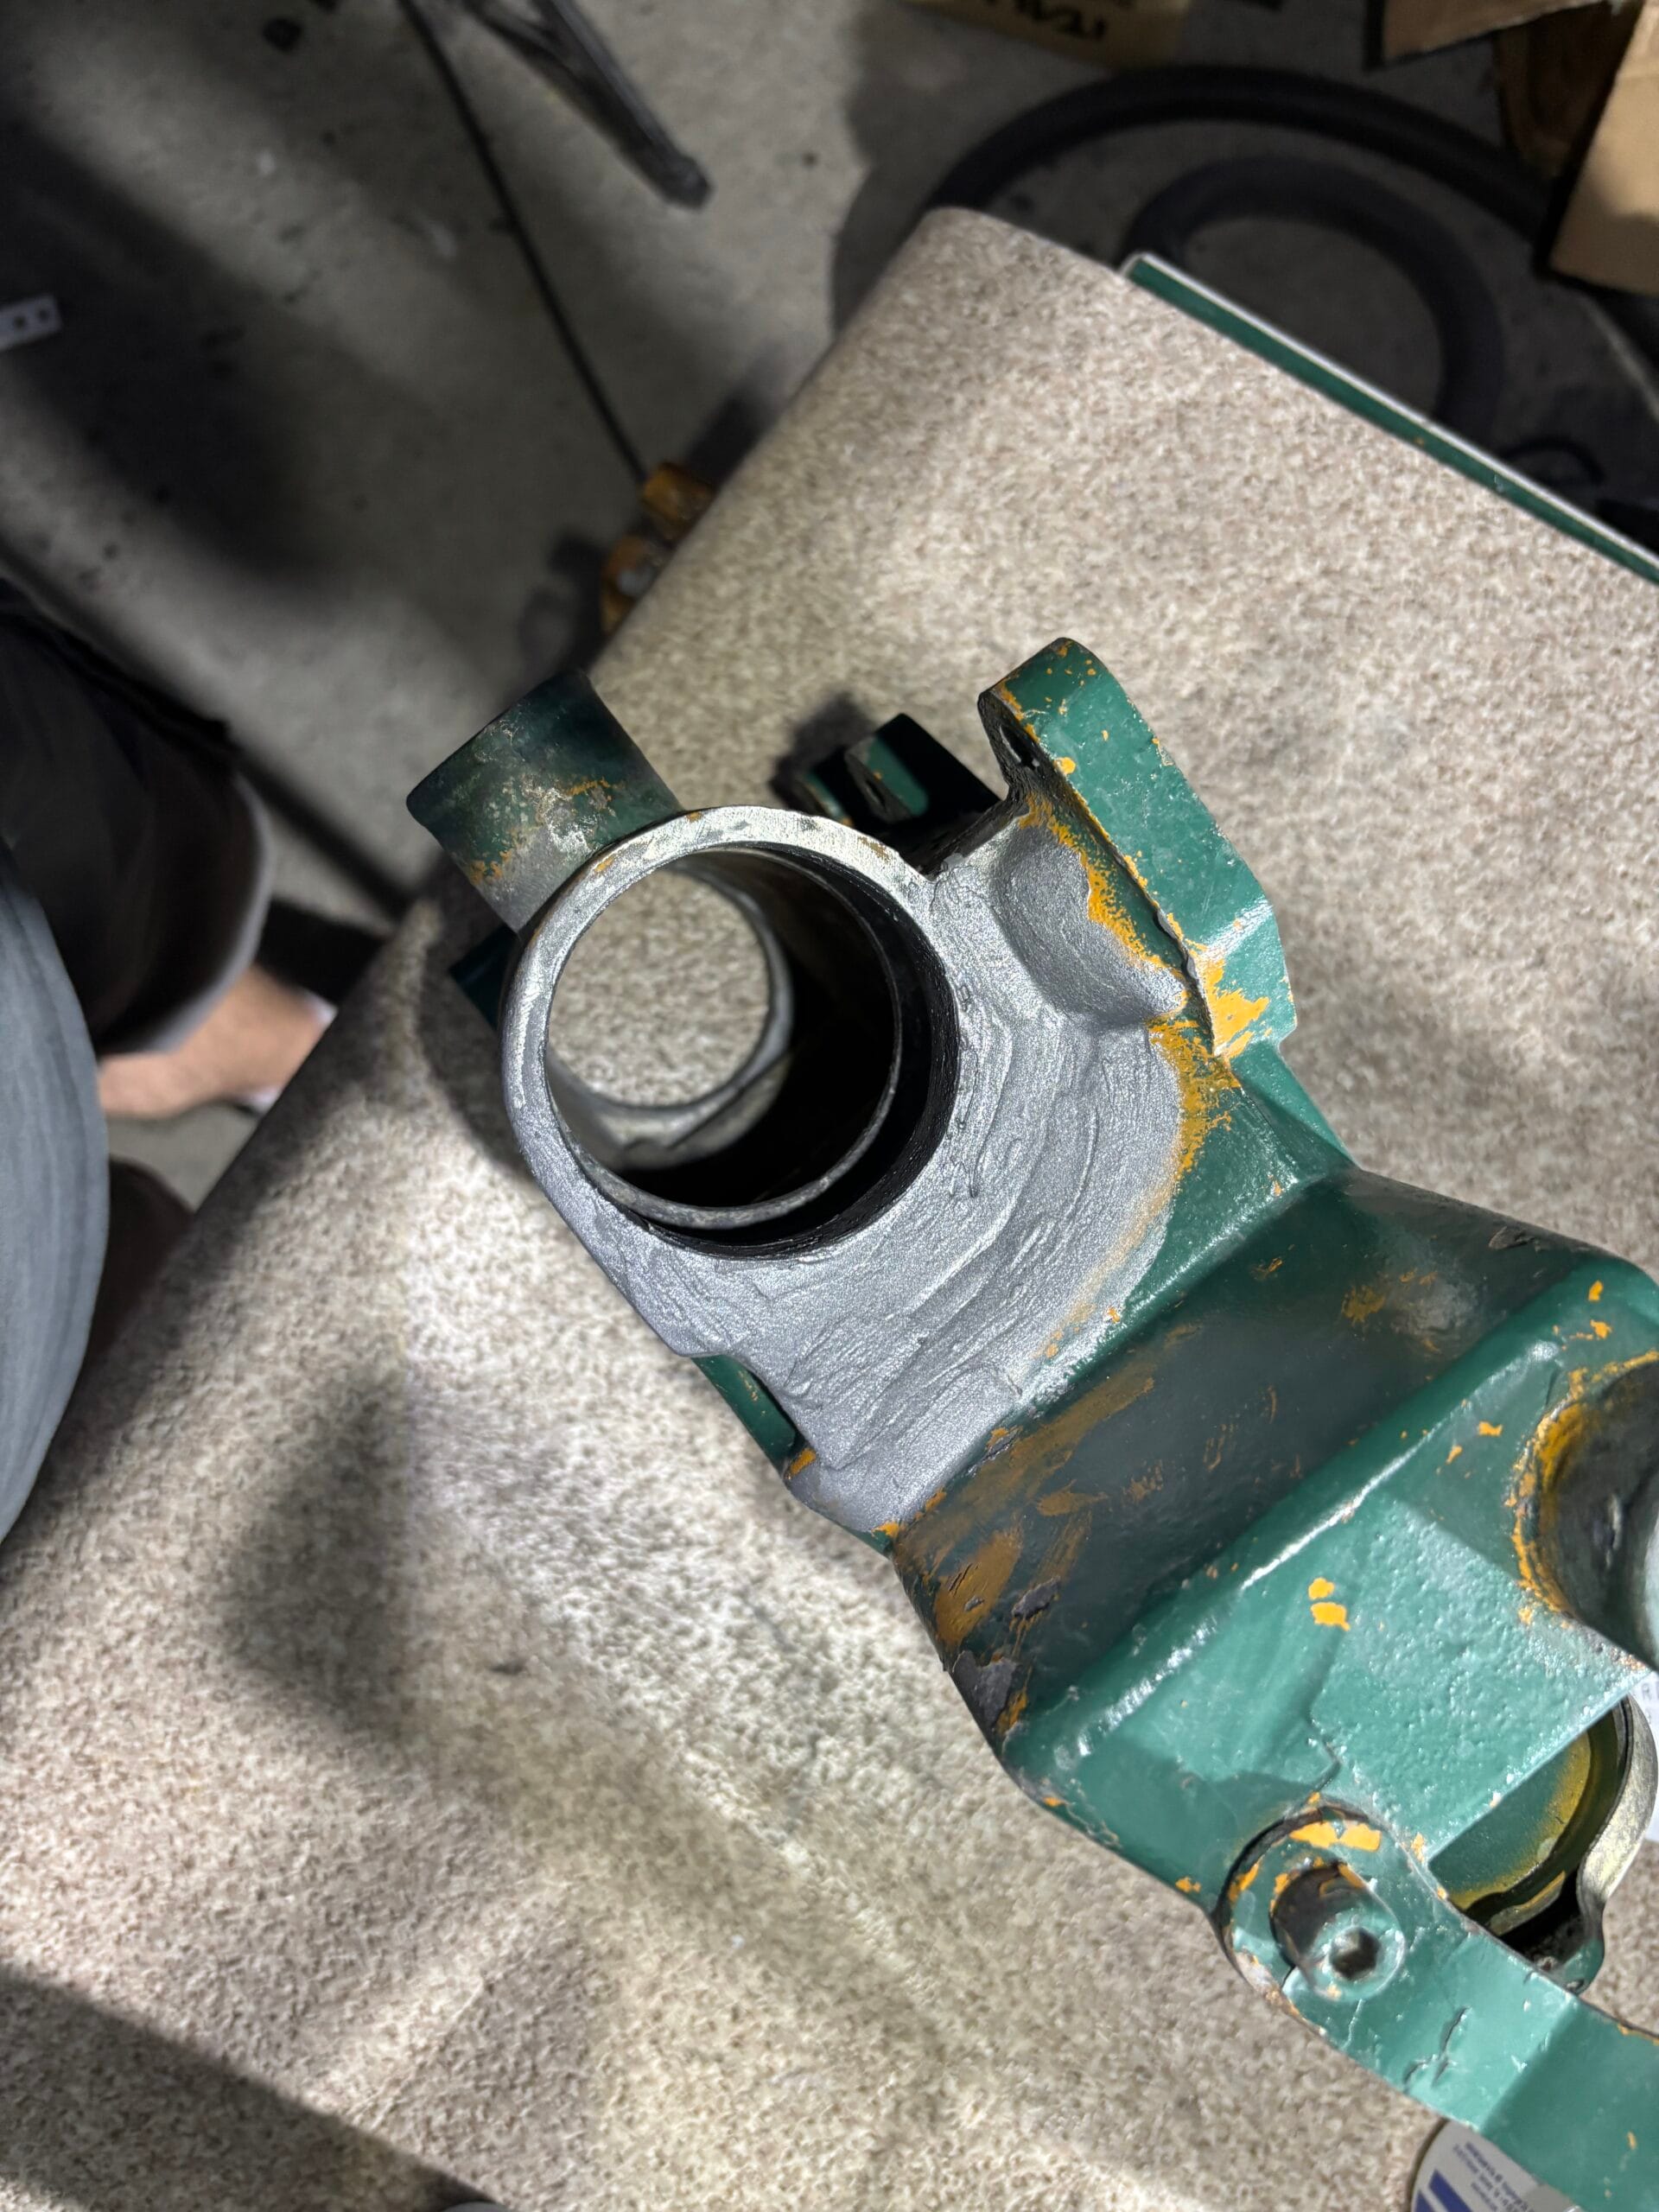
Sand and repeat according to your requirements
I had to sand and fair the area twice to reach the desired result, but I was pretty happy with it in the end. The only thing left to do was to apply paint in the best matching color you can get, install the new O-rings, and reassemble the whole heat exchanger. We’ve had the engine running for a couple of hours now, and everything is sealed and working perfectly so far.